Set up Single Sign On (SSO)
Using SSO, you can authenticate users with their existing accounts on platforms like Okta, OneLogin, Azure AD, etc.
The feature is currently in alpha, which means you may encounter bugs. Please report them in our Discord group if you run into any.
To use this feature on courseLit.app, you need to be on the Enterprise plan. For self-hosted instances, this feature is available by default.
Steps to set up SSO
-
Subscribe to the Enterprise plan, if you haven’t, to unlock the feature. Ignore this step for self-hosted instances.
-
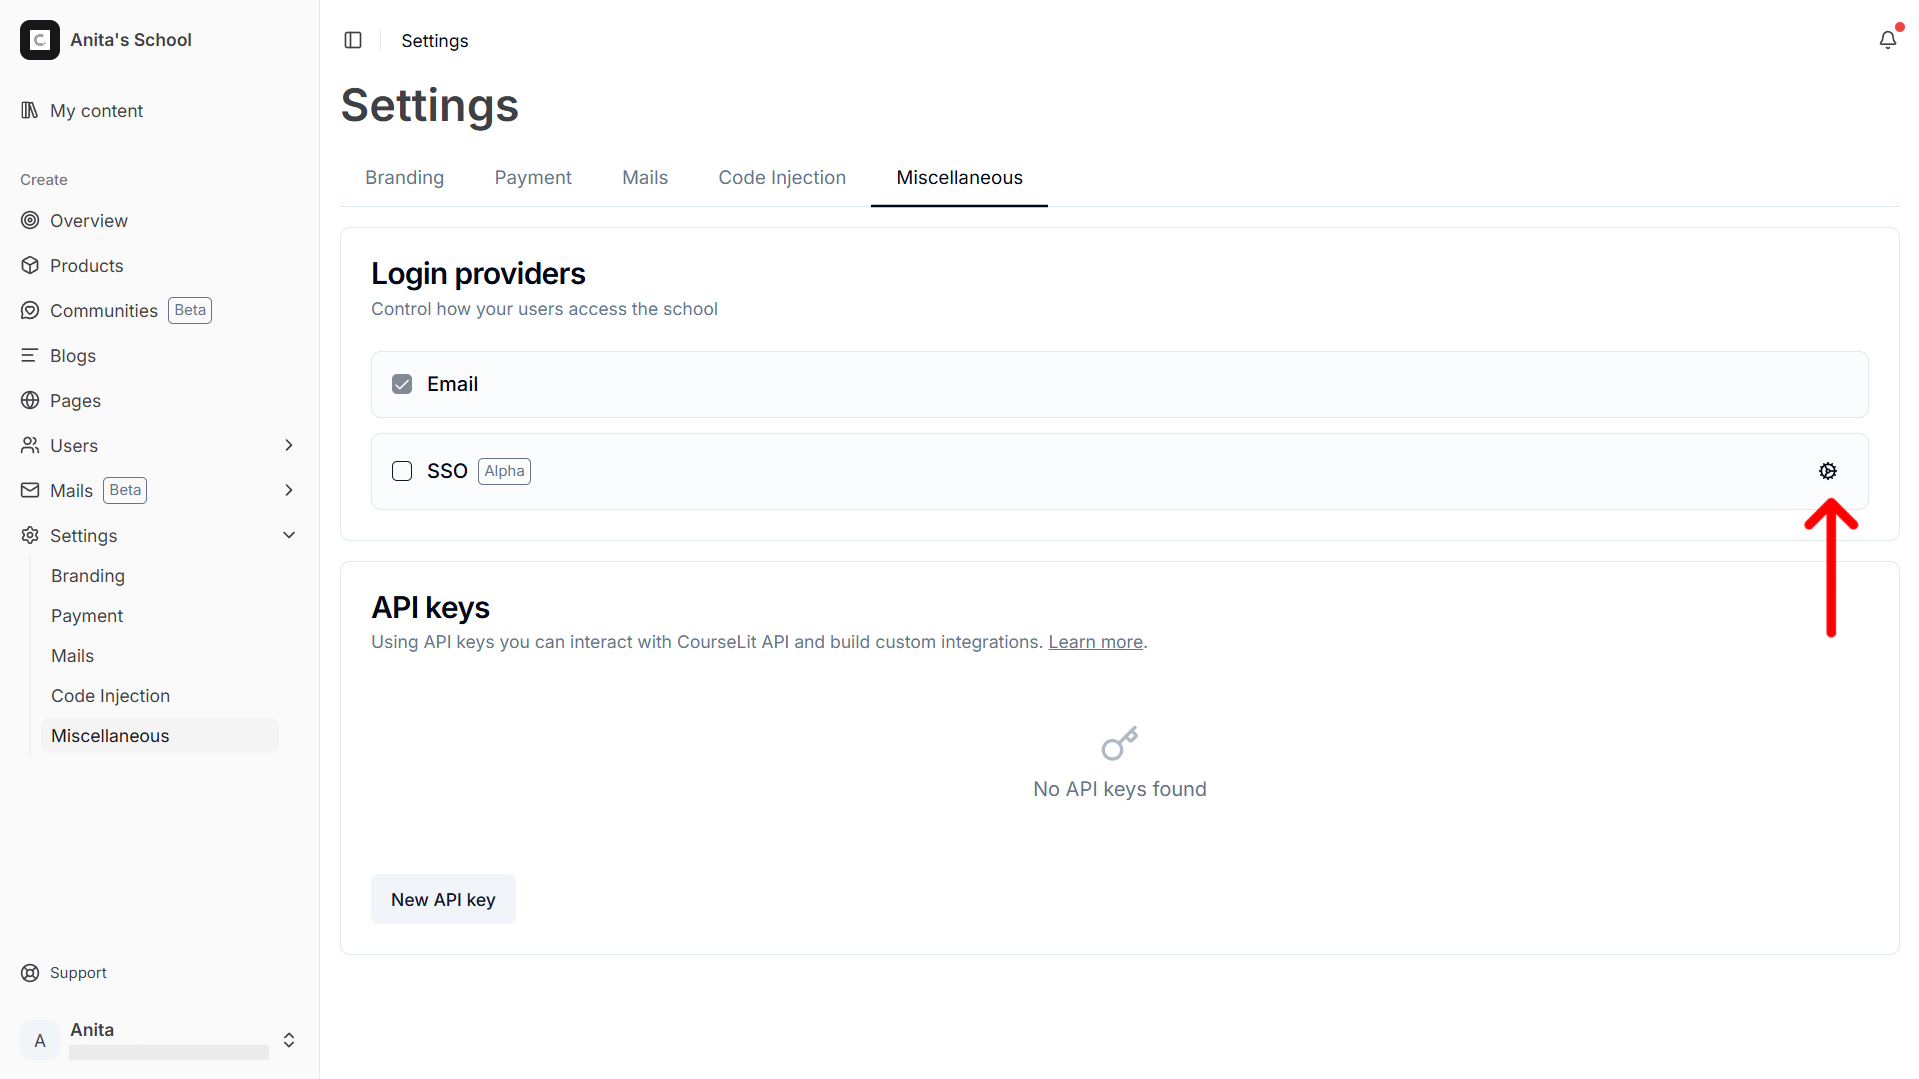
In the CourseLit dashboard, go to
Settings->Miscellaneous->Login providers.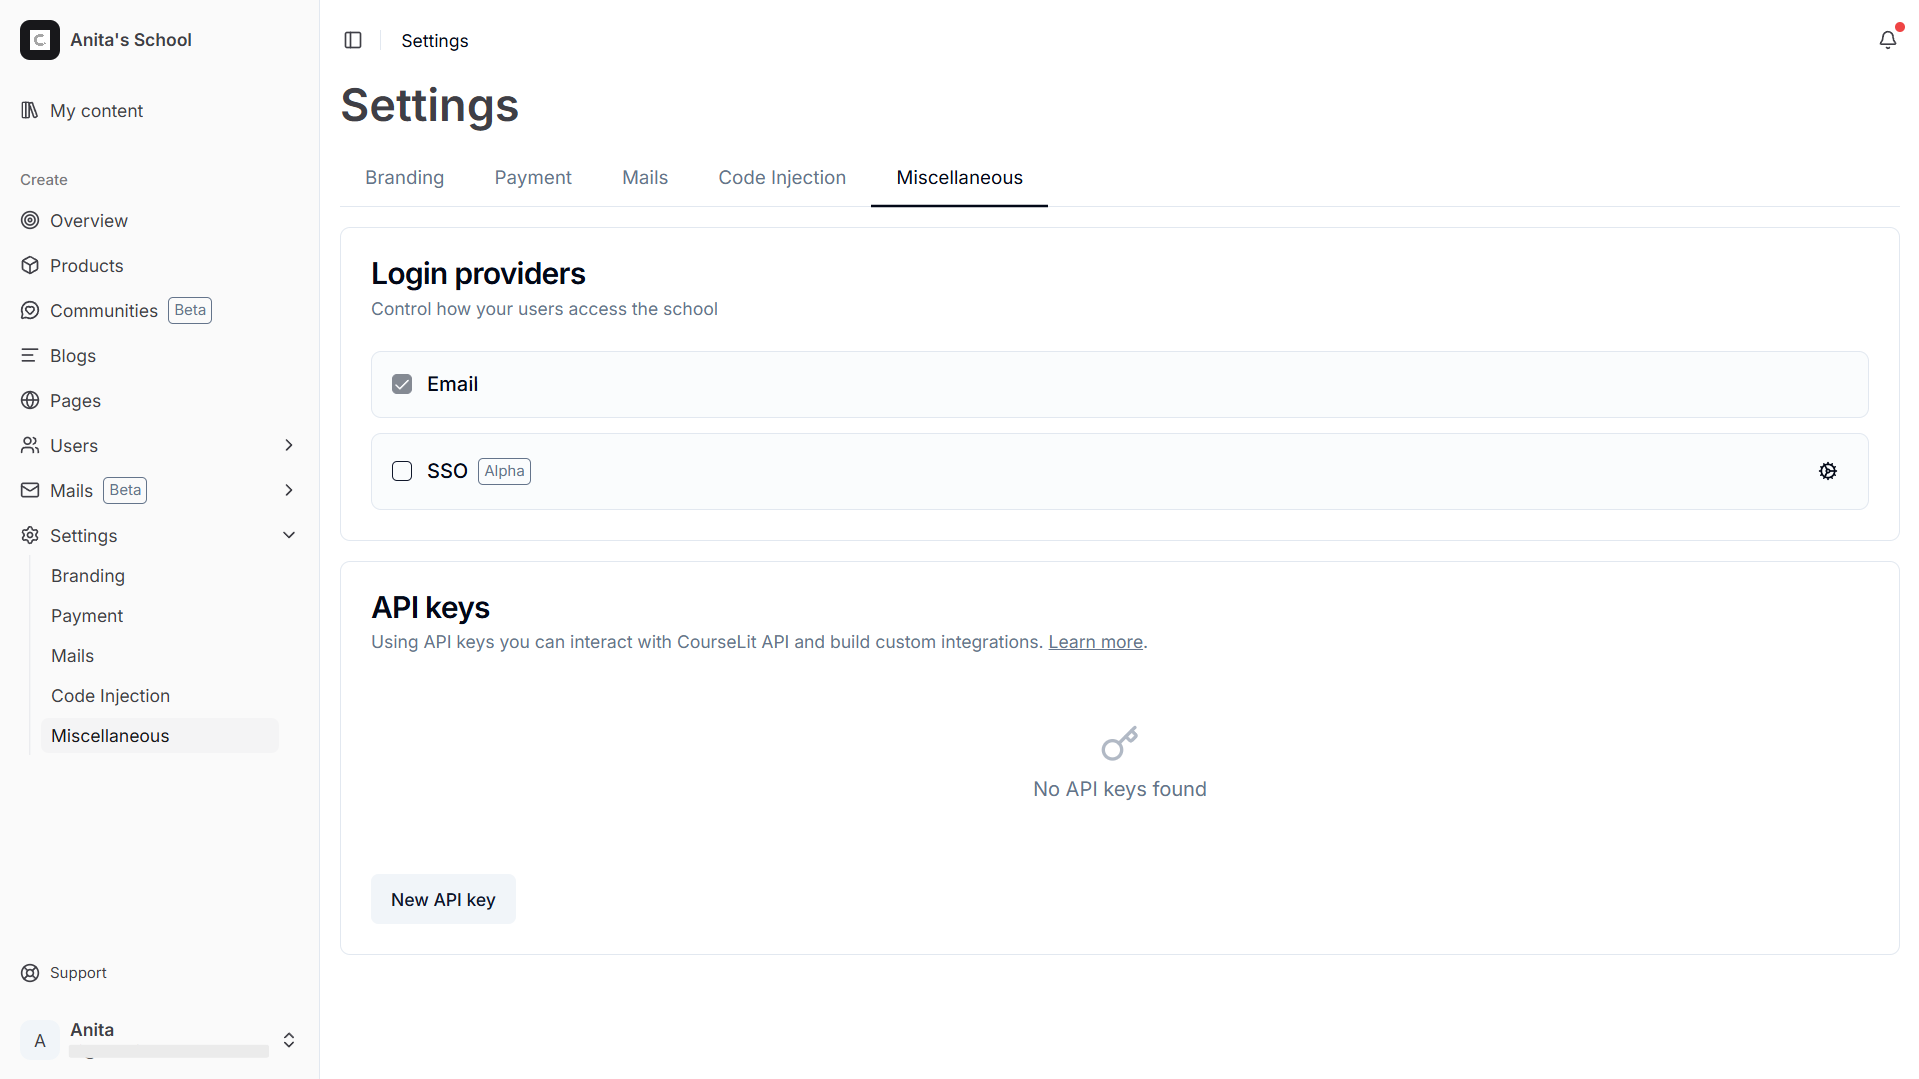
-
Click on the Cog icon next to the SSO provider to open SSO configuration.
-
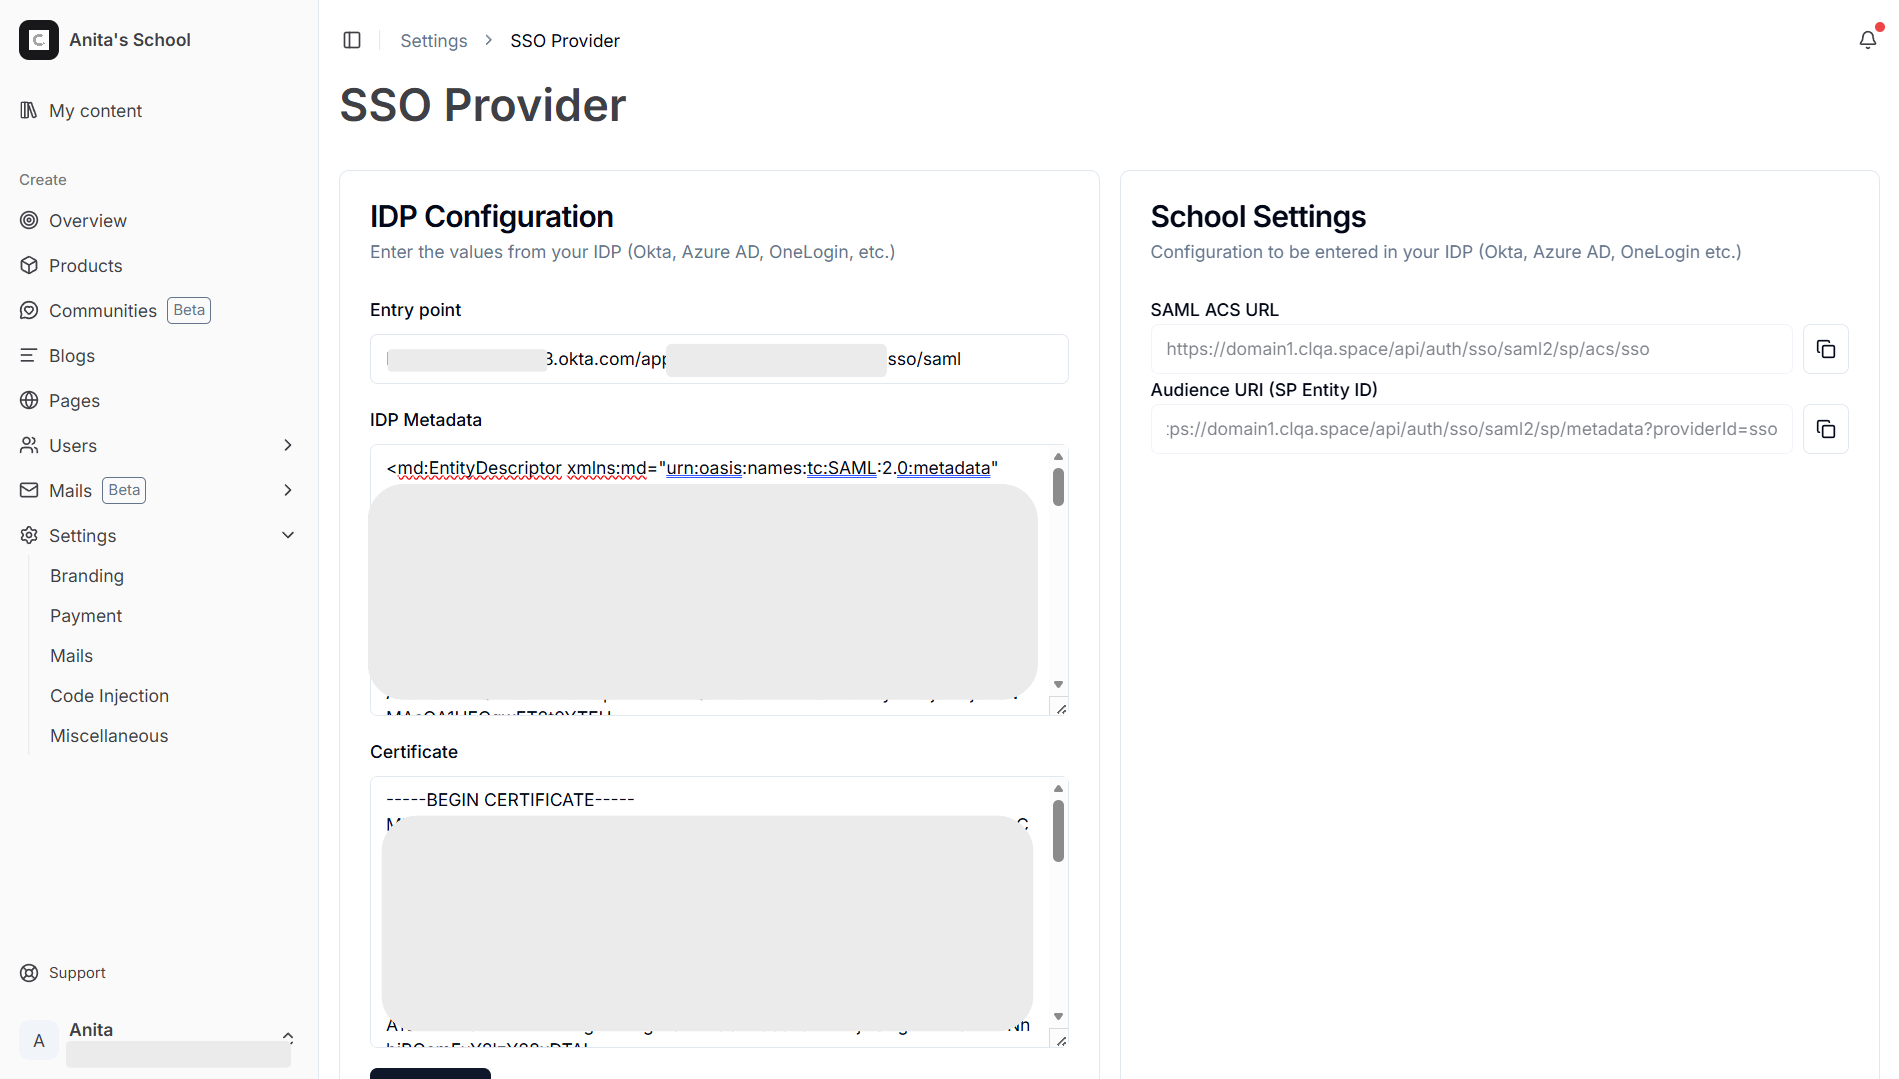
In the
SSO Providerscreen, use theSchool Settingsto configure your IdP provider. Refer to the sections below to see how to configure your IdP provider.The following is a description of the fields under this panel:
- SAML ACS URL: This is the URL that your IdP will send the SAML response to. This is usually
https://<school>.courselit.app/api/auth/sso/saml2/sp/acs/sso - Audience URI (SP Entity ID): This is the URL that your IdP will use to validate the SAML response. This is usually
https://<school>.courselit.app/api/auth/sso/saml2/sp/metadata?providerId=sso
- SAML ACS URL: This is the URL that your IdP will send the SAML response to. This is usually
-
After configuring the IdP provider, obtain the required settings from it and populate the values in the
IDP Configurationpanel.The following is a description of the fields under this panel:
- Entry point: This is the URL CourseLit will use to send the SAML request to your IdP.
- Certificate: This is the certificate that your IdP will use to validate the SAML response.
- IDP Metadata: This is the metadata that your IdP will use to validate the SAML response.
Here is an example configuration for Okta:
-
Click on the
Savebutton to save the configuration.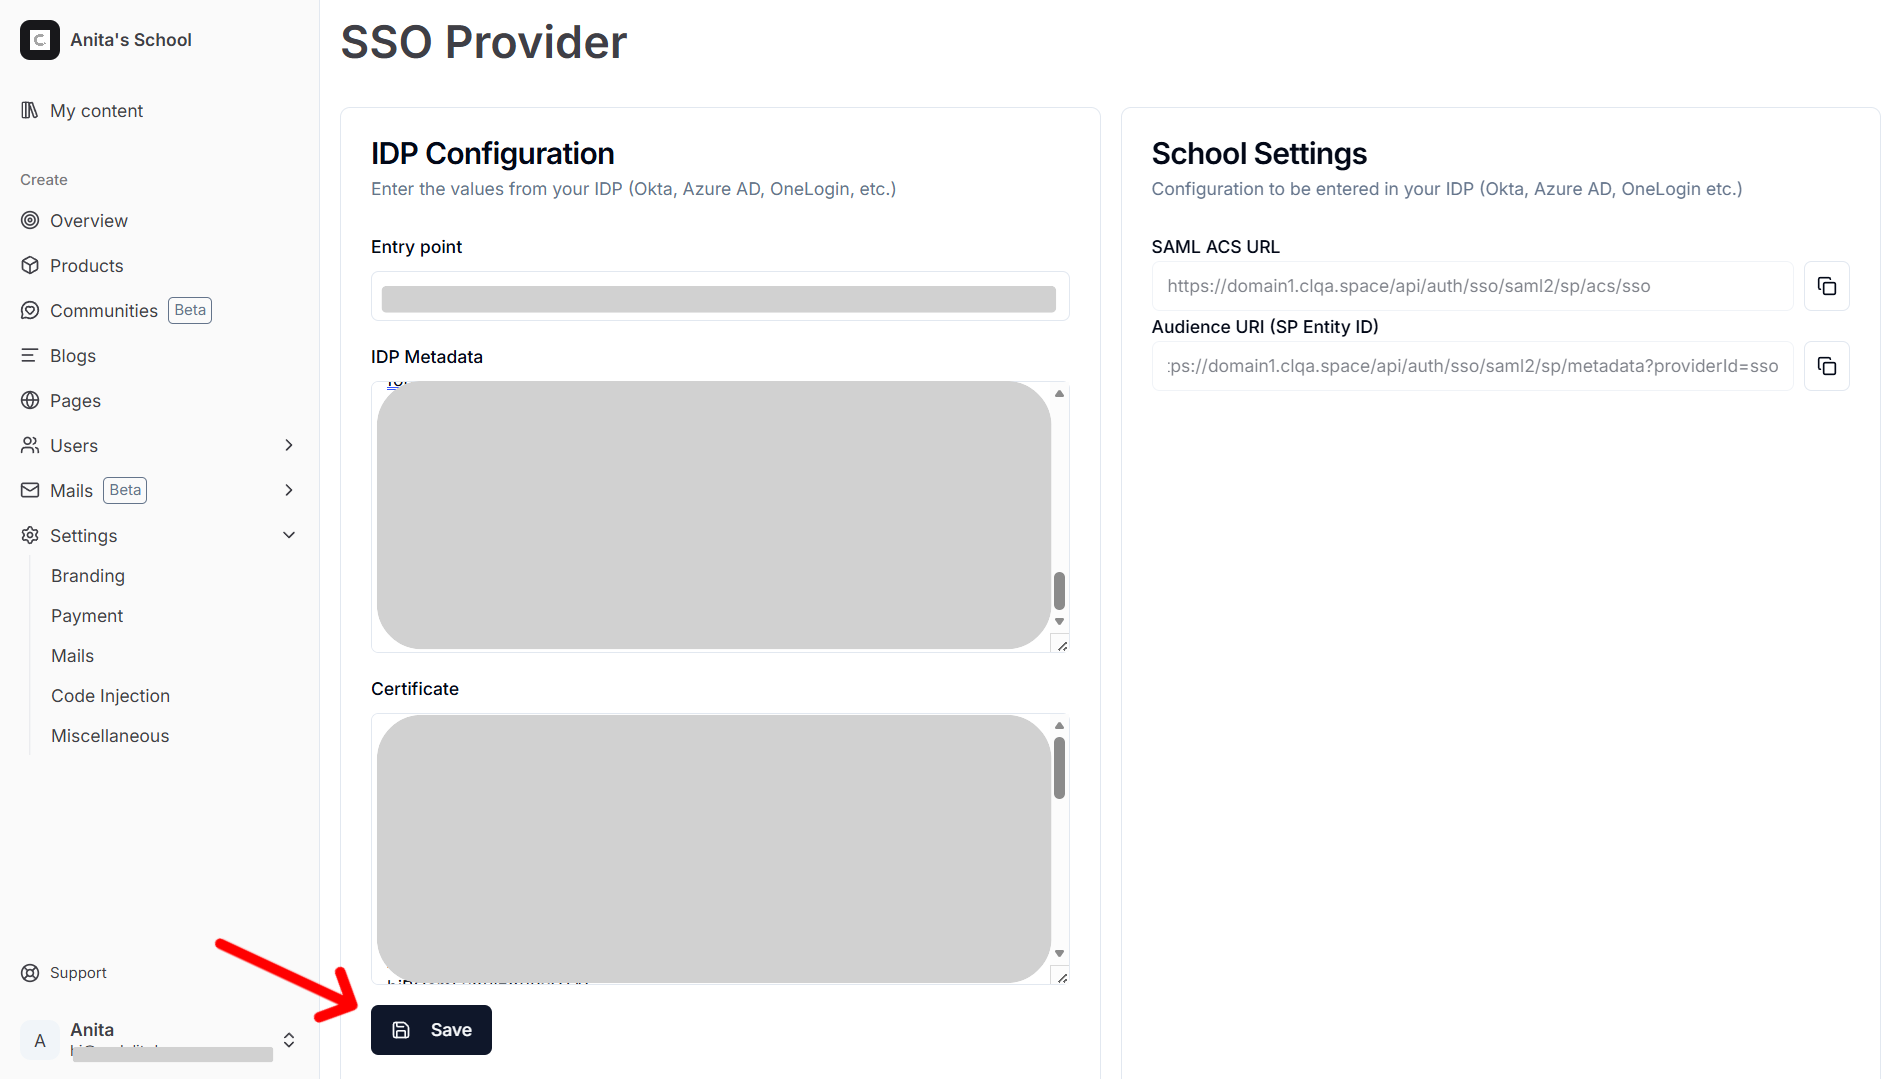
-
Go back to the
Login providersscreen and enable the SSO provider.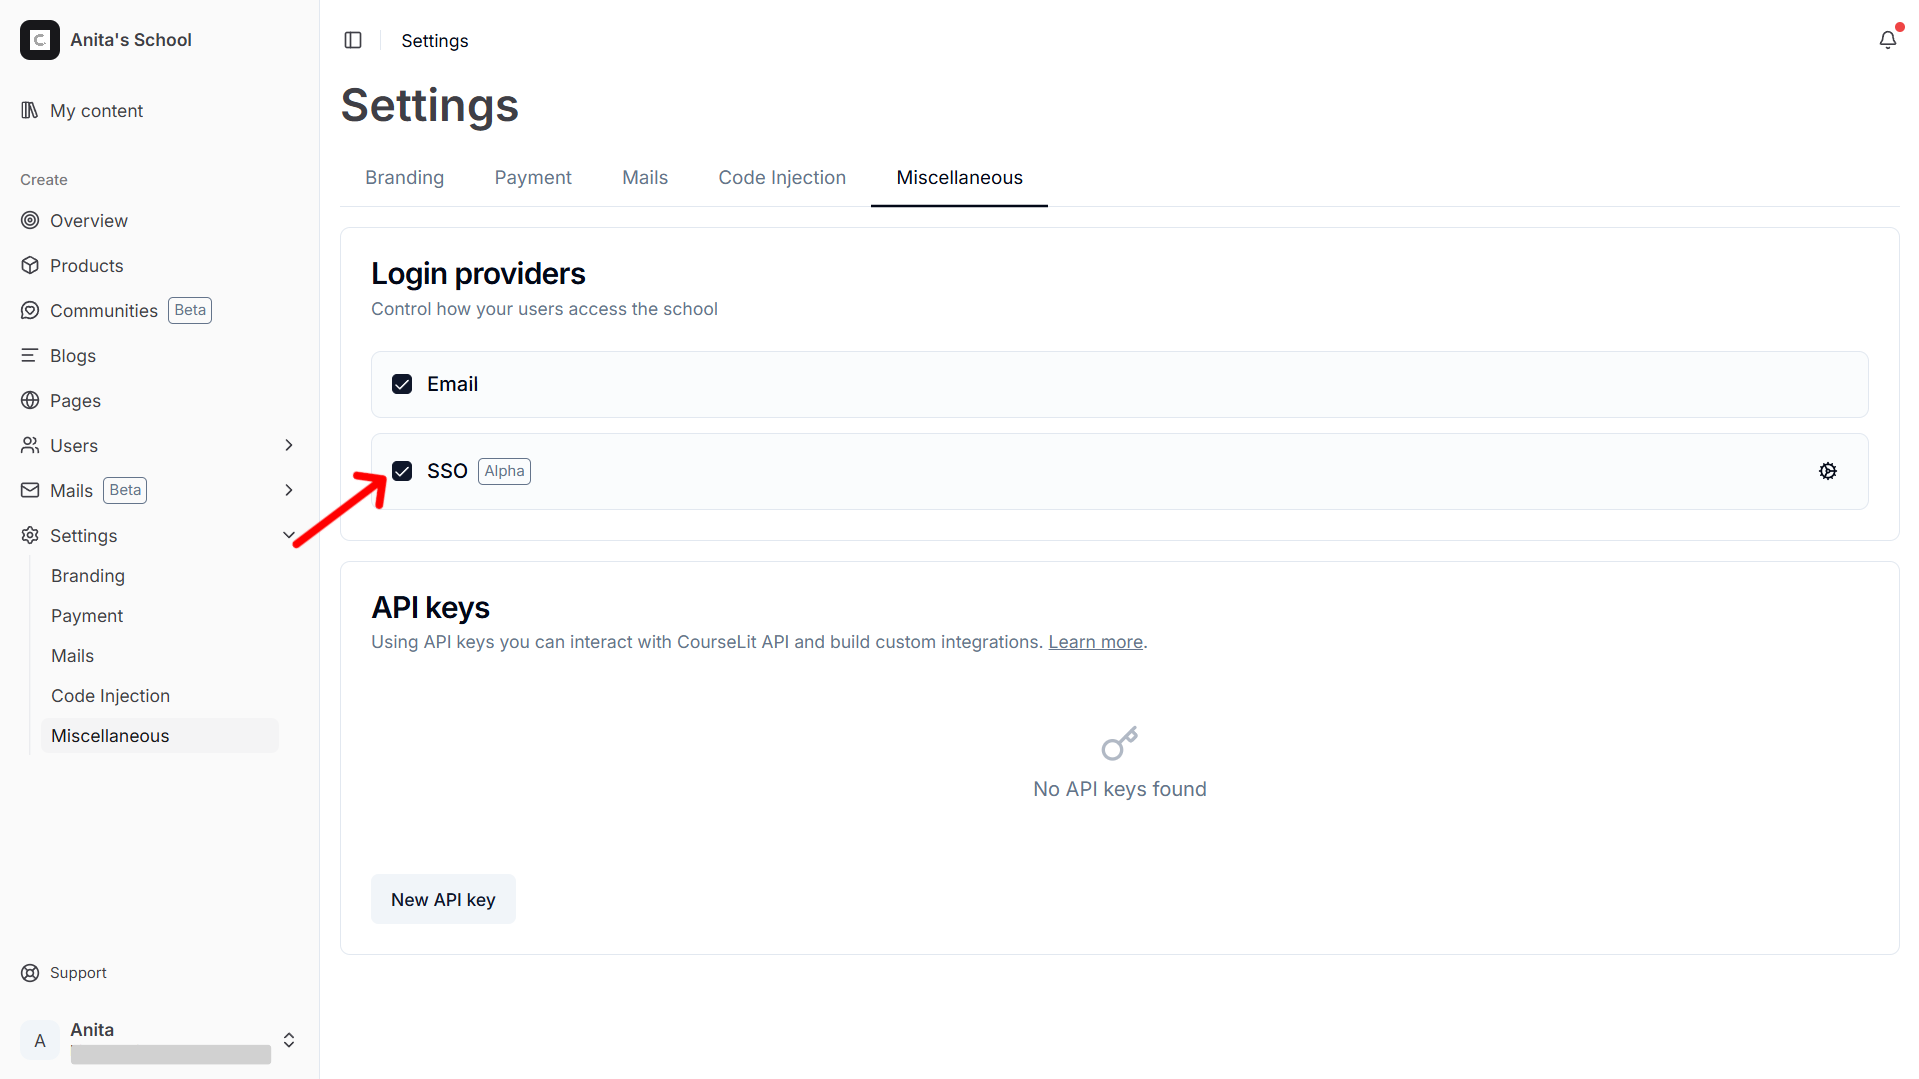
Setup IdP
Okta
-
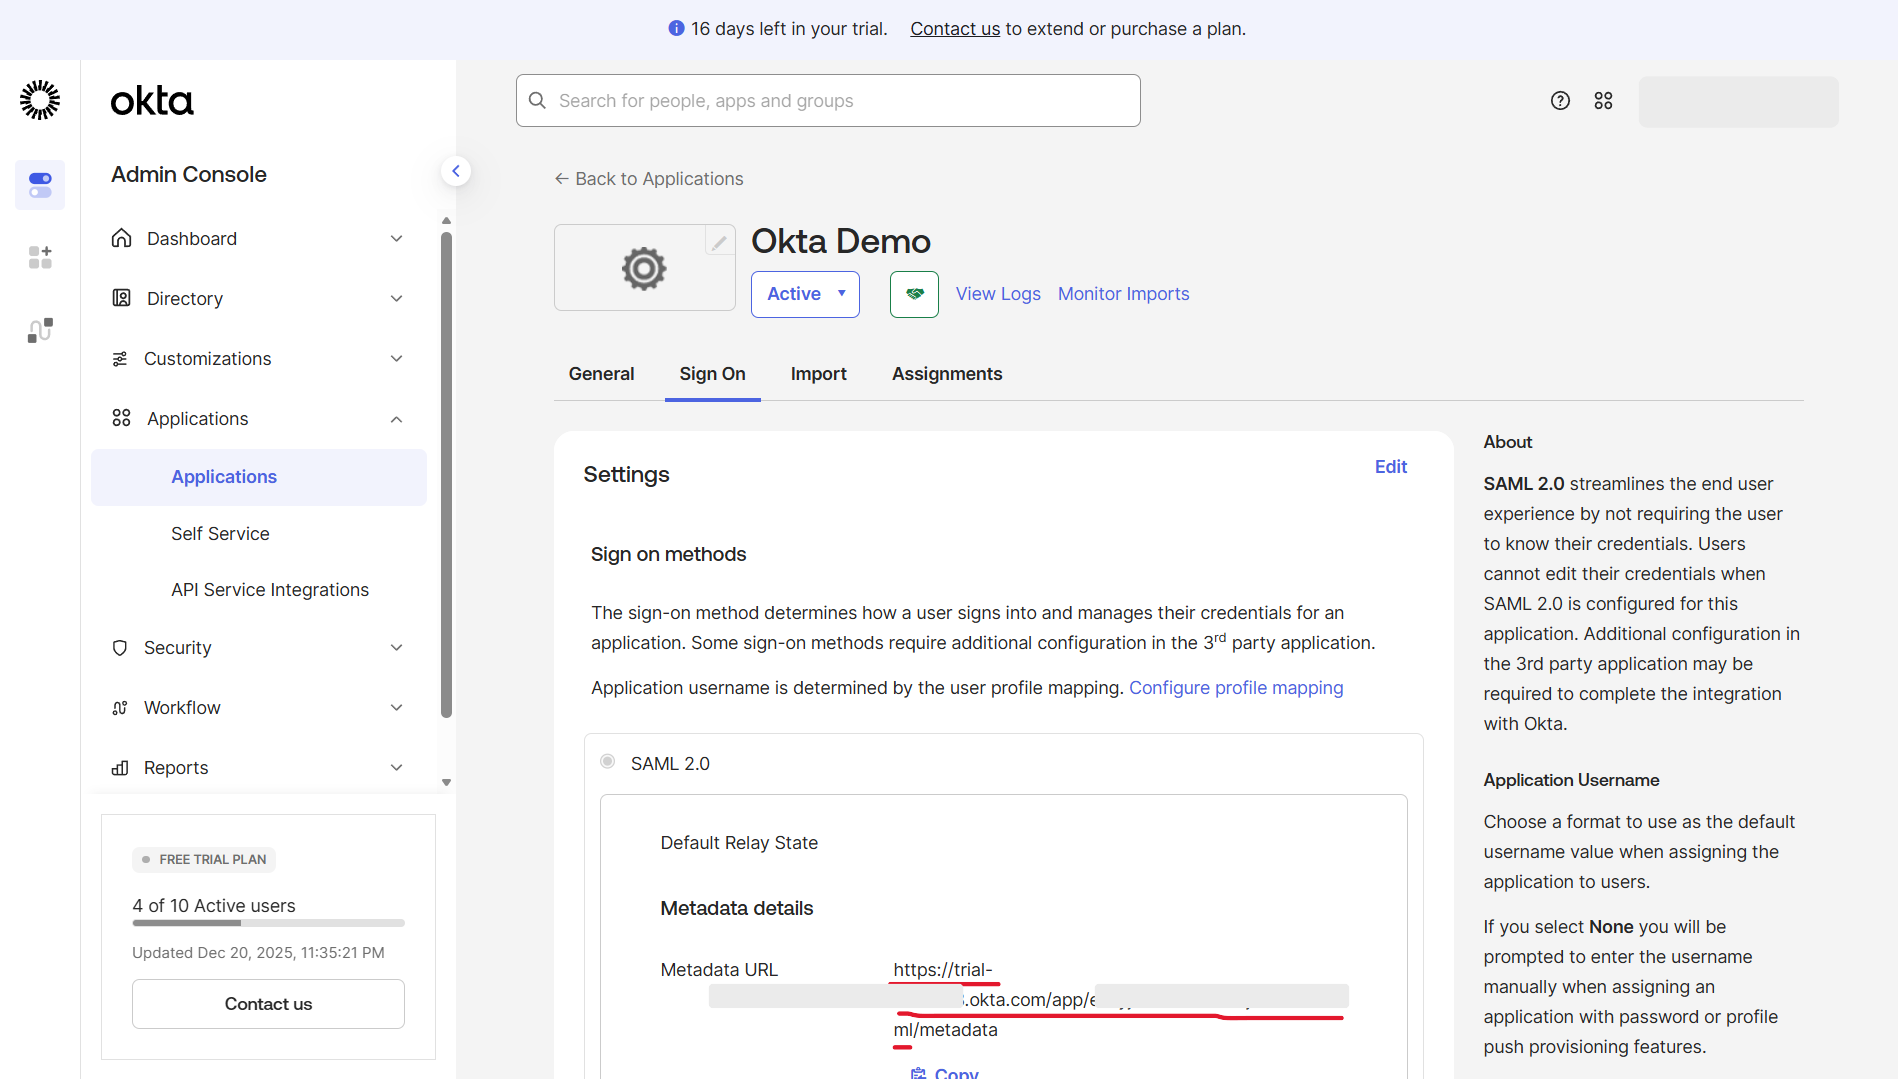
Go to Okta dashboard and click on
Applications->Applications. -
Click on
Create App Integration. -
Select
SAML 2.0on theSign-in methodpopup and click onNext. -
On the
Create SAML Integrationscreen, in theGeneral Settingstab, enterApp nameand click onNext. -
In the
Configure SAMLtab, enter theSAML ACS URL(obtained from CourseLit) in theSingle sign-on URLfield andAudience URI (SP Entity ID)(obtained from CourseLit) in theAudience URI (SP Entity ID)field and click onNext. -
In the
Feedbacktab, select theinternal appoption and click onFinish. -
You will be taken to the newly created app’s settings. Your Okta IdP is now configured.
-
Next, let’s obtain the
Entry point,IdP metadataandCertificatefrom Okta. From theSign Ontab, obtain the following:
- Entry point: We can infer this from the Metadata URL. It is usually
https://<okta-account>.okta.com/app/<okta-app-id>/sso/saml2
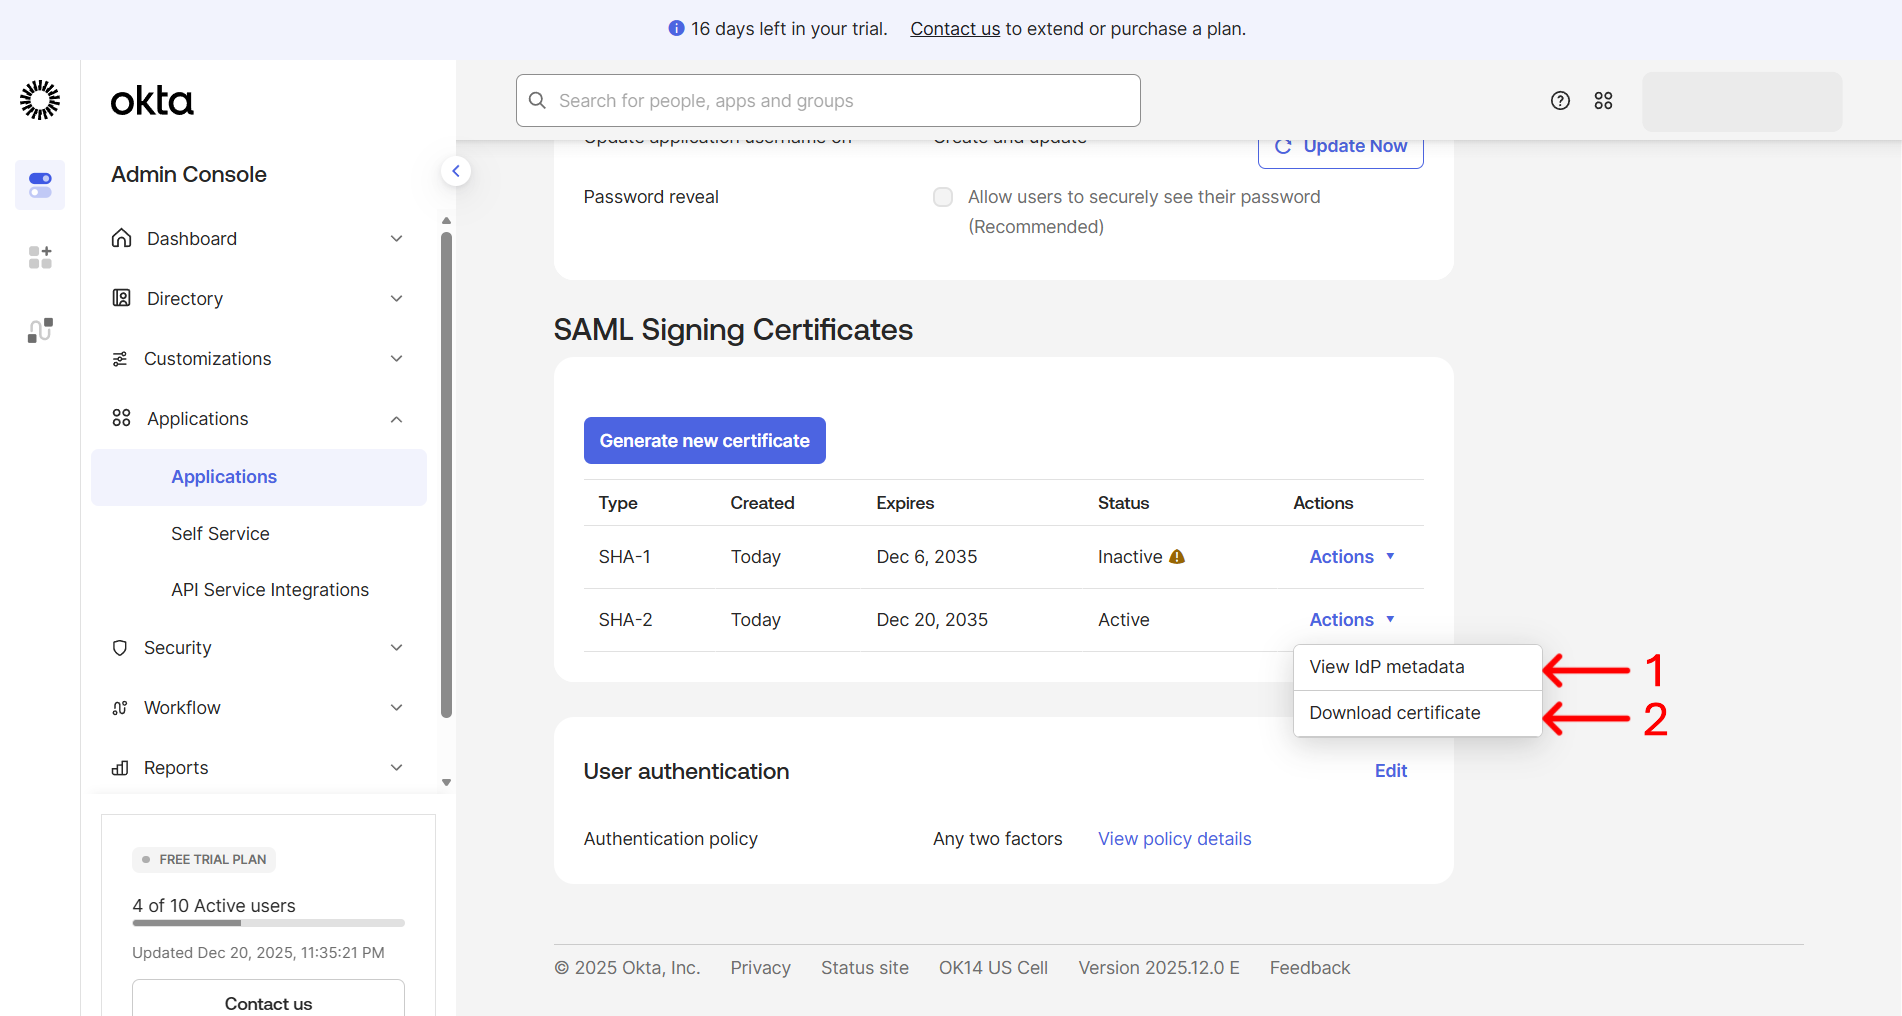
- IdP metadata and Certificate:
To obtain these, scroll down on the same page and locate the
SAML Signing Certificatessection. Click on theActionsbutton next to theSHA-2and copy the IdP metadata and download the certificate.
- Entry point: We can infer this from the Metadata URL. It is usually
-
Enter the values obtained in the
IDP Configurationpanel. -
The Okta IdP is now configured. Test the integration.
Microsoft Entra ID
- Go to
Azureportal, search forEnterprise applicationsand click on it to go to the apps. - Click
New applicationto create a new app. - In the
Browse Microsoft Entra App Galleryscreen, clickCreate your own application. In the settings pane, enter the app’s name and clickCreate. - After the application is created, select
Set up single sign onand chooseSAMLas the single sign-on method. - In the SAML setup screen, click the pencil icon in the
Basic SAML Configurationcard and enter CourseLit’sAudience URI (SP Entity ID)inIdentifier (Entity ID)and theSAML ACS URLinReply URL (Assertion Consumer Service URL). - Next, obtain the IdP details from the
SAML Certificatespane (on the same page). Click the pencil icon to open the settings pane, download the PEM certificate and the Federated certificate XML, and paste them into CourseLit’sCertificateandIDP Metadatafields respectively.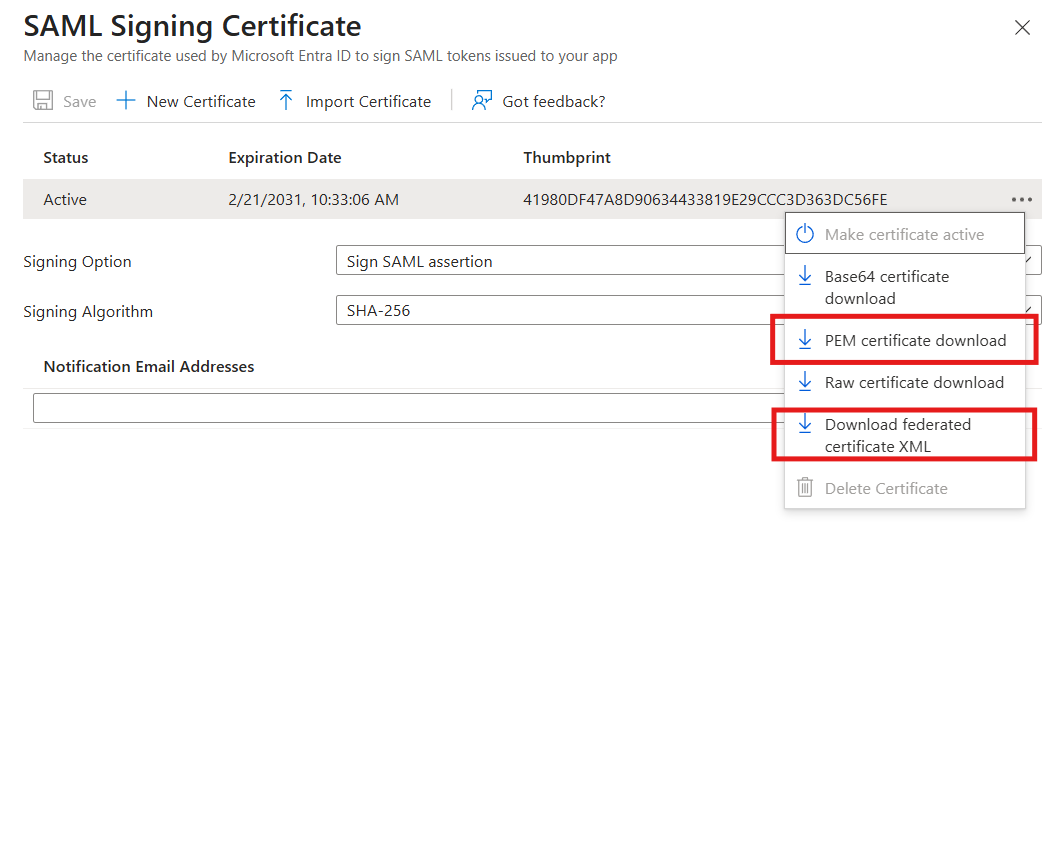
- Obtain the
Login URLfrom the same screen and enter it into CourseLit’sEntry pointfield. - The Entra IdP is now configured — test the integration.
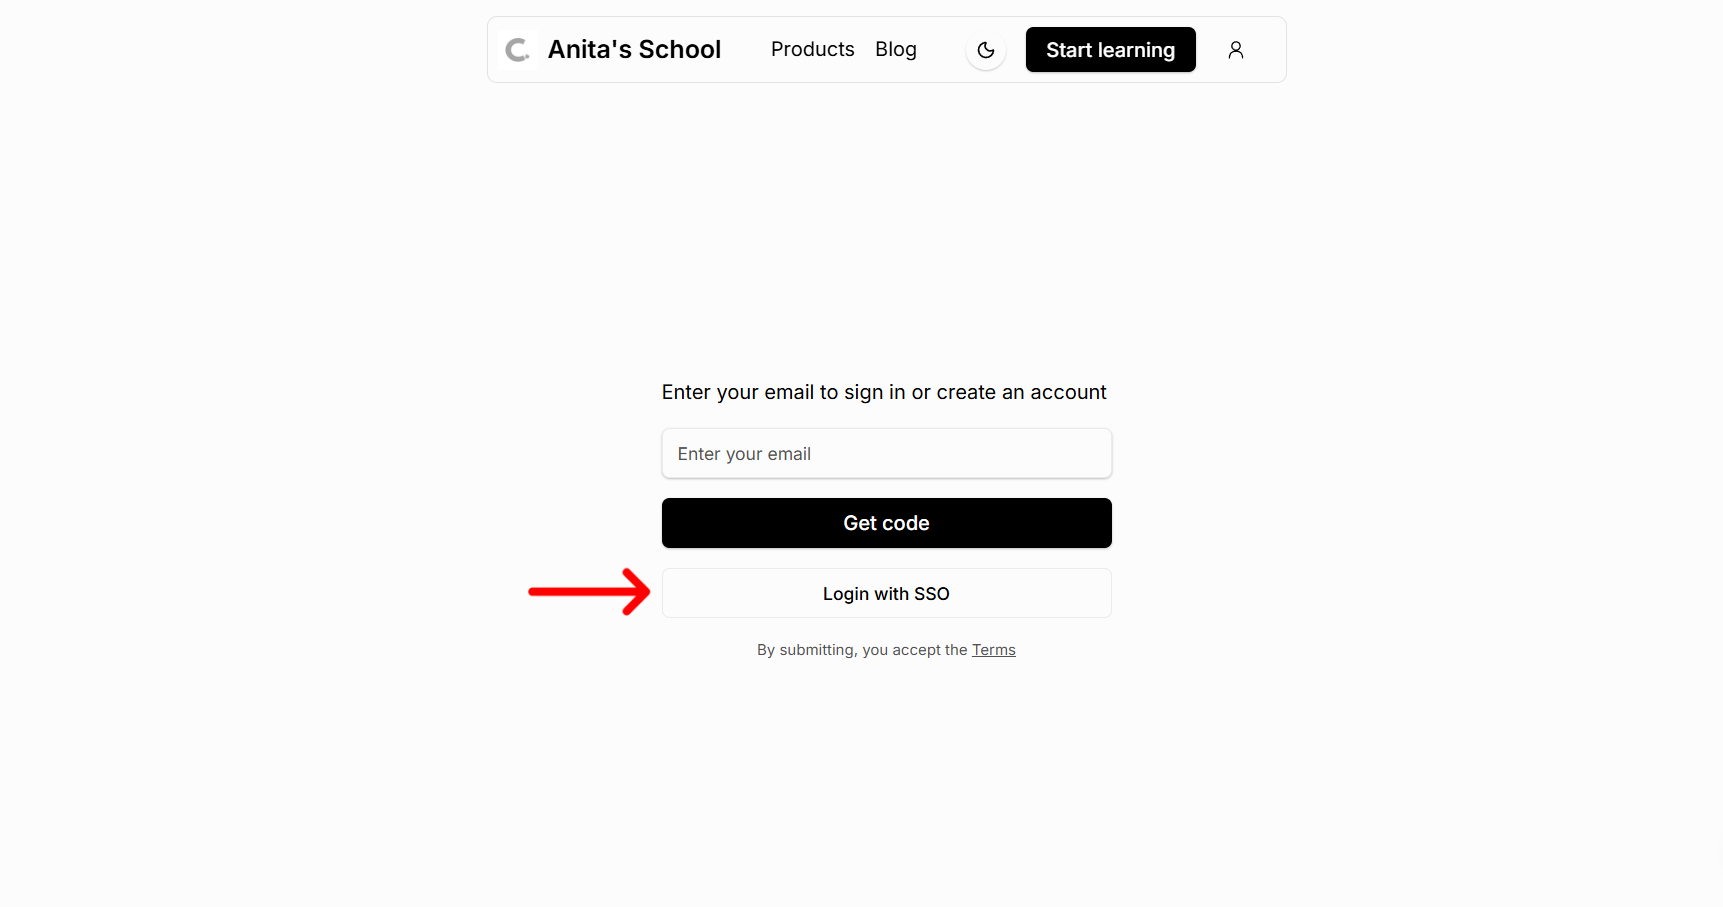
Customer’s experience
When the SSO login provider is configured and enabled, the customer will see a Login with SSO button on the login page and checkout page.
1. Login page
2. Checkout page

Troubleshooting
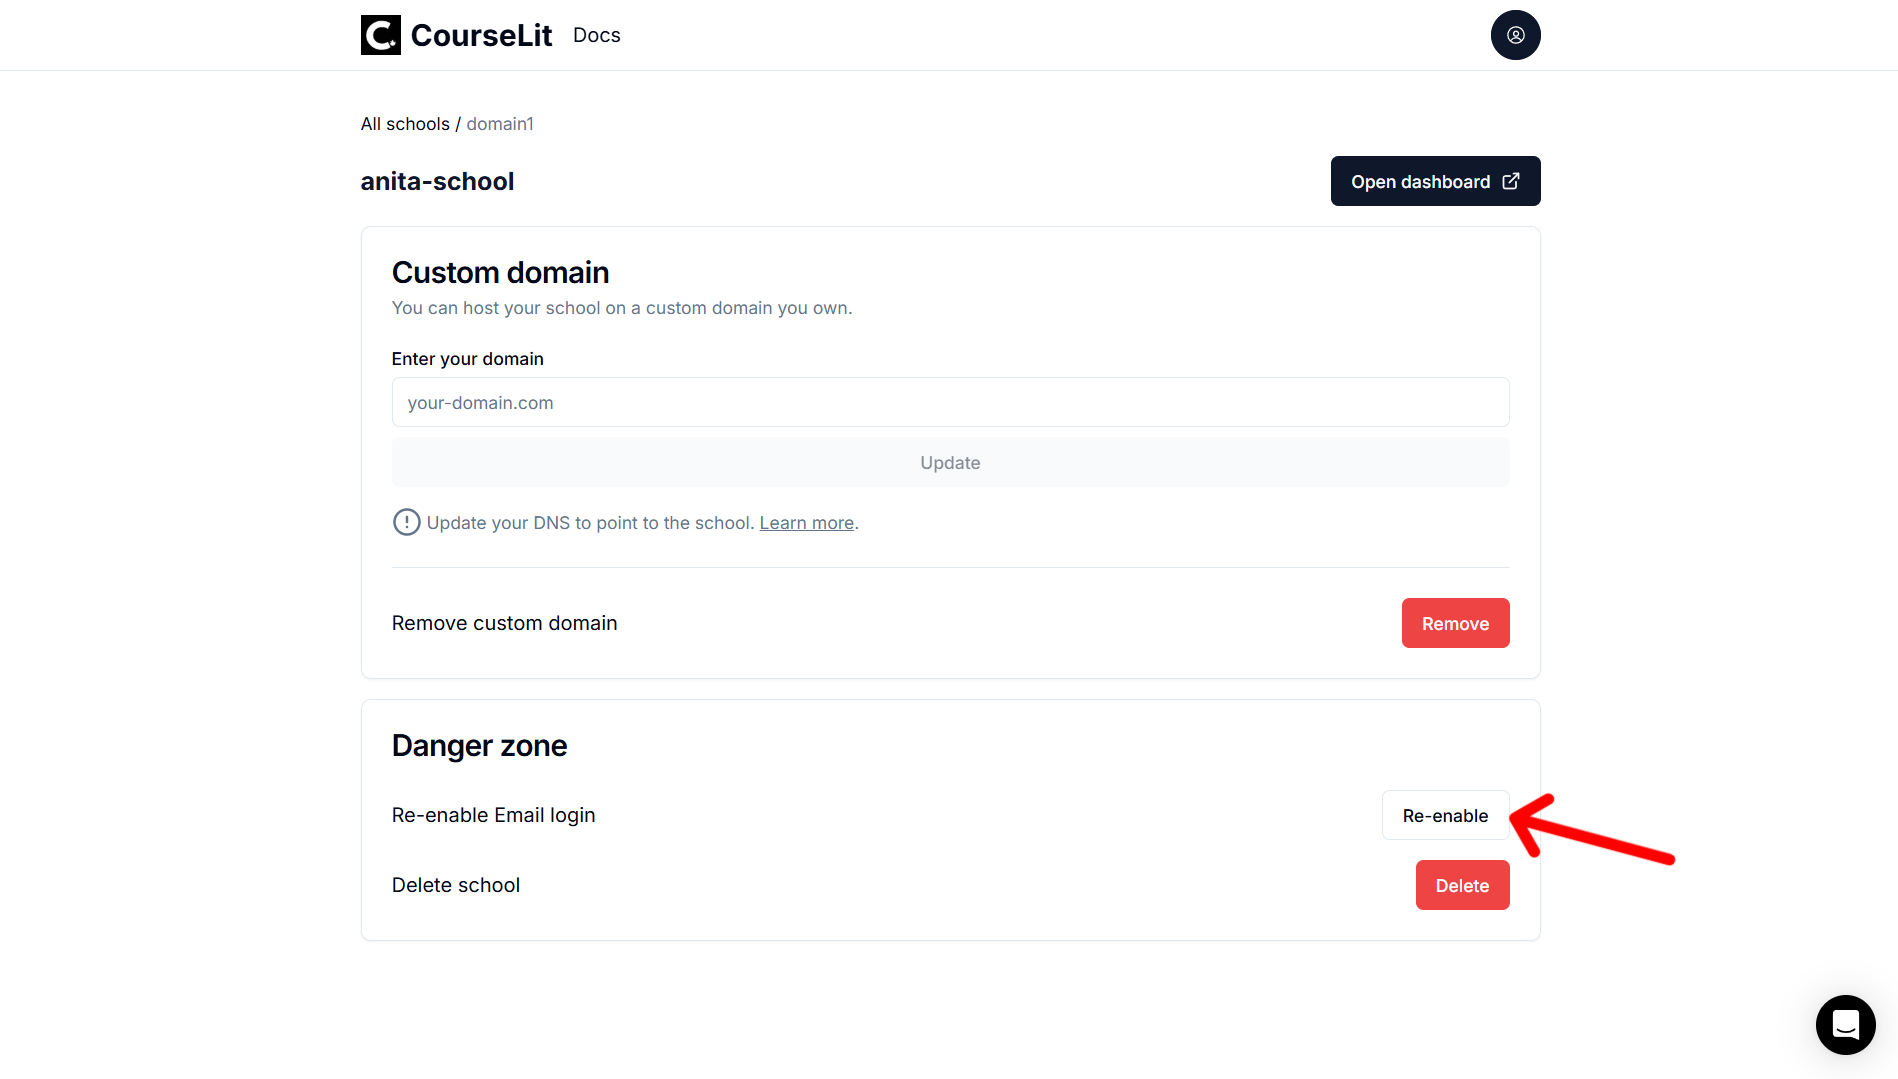
1. Email login is disabled and now I am locked out
a. Cloud-hosted (courselit.app)
You can re-enable the email provider from the CourseLit dashboard.
b. Self-hosted
You need to log in to your school’s MongoDB instance and run the following query to re-enable the email provider:
db.domains.updateMany({}, { $addToSet: { "settings.logins": "email" } });2. Can I add multiple SSO providers?
Since this feature is currently in alpha, you can only add one SSO provider at a time. We want to make sure that the feature is stable before adding more providers.
Stuck somewhere?
We are always here for you. Come chat with us in our Discord channel or send a tweet at @CourseLit.