Set up payments
Receiving payments is effortless in CourseLit, and you get to keep 100% of what you make (except for the charges from your payment platform).
CourseLit offers integrations with the following payment platforms:
- Stripe
- Razorpay
- Lemonsqueezy (Experimental)
A school can only have a single payment platform activated at a time.
Stripe setup
- Sign up for an account on Stripe and get your business approved (or use a test account).
- In the Stripe dashboard, go to the
Developers > API Keyssection as shown below.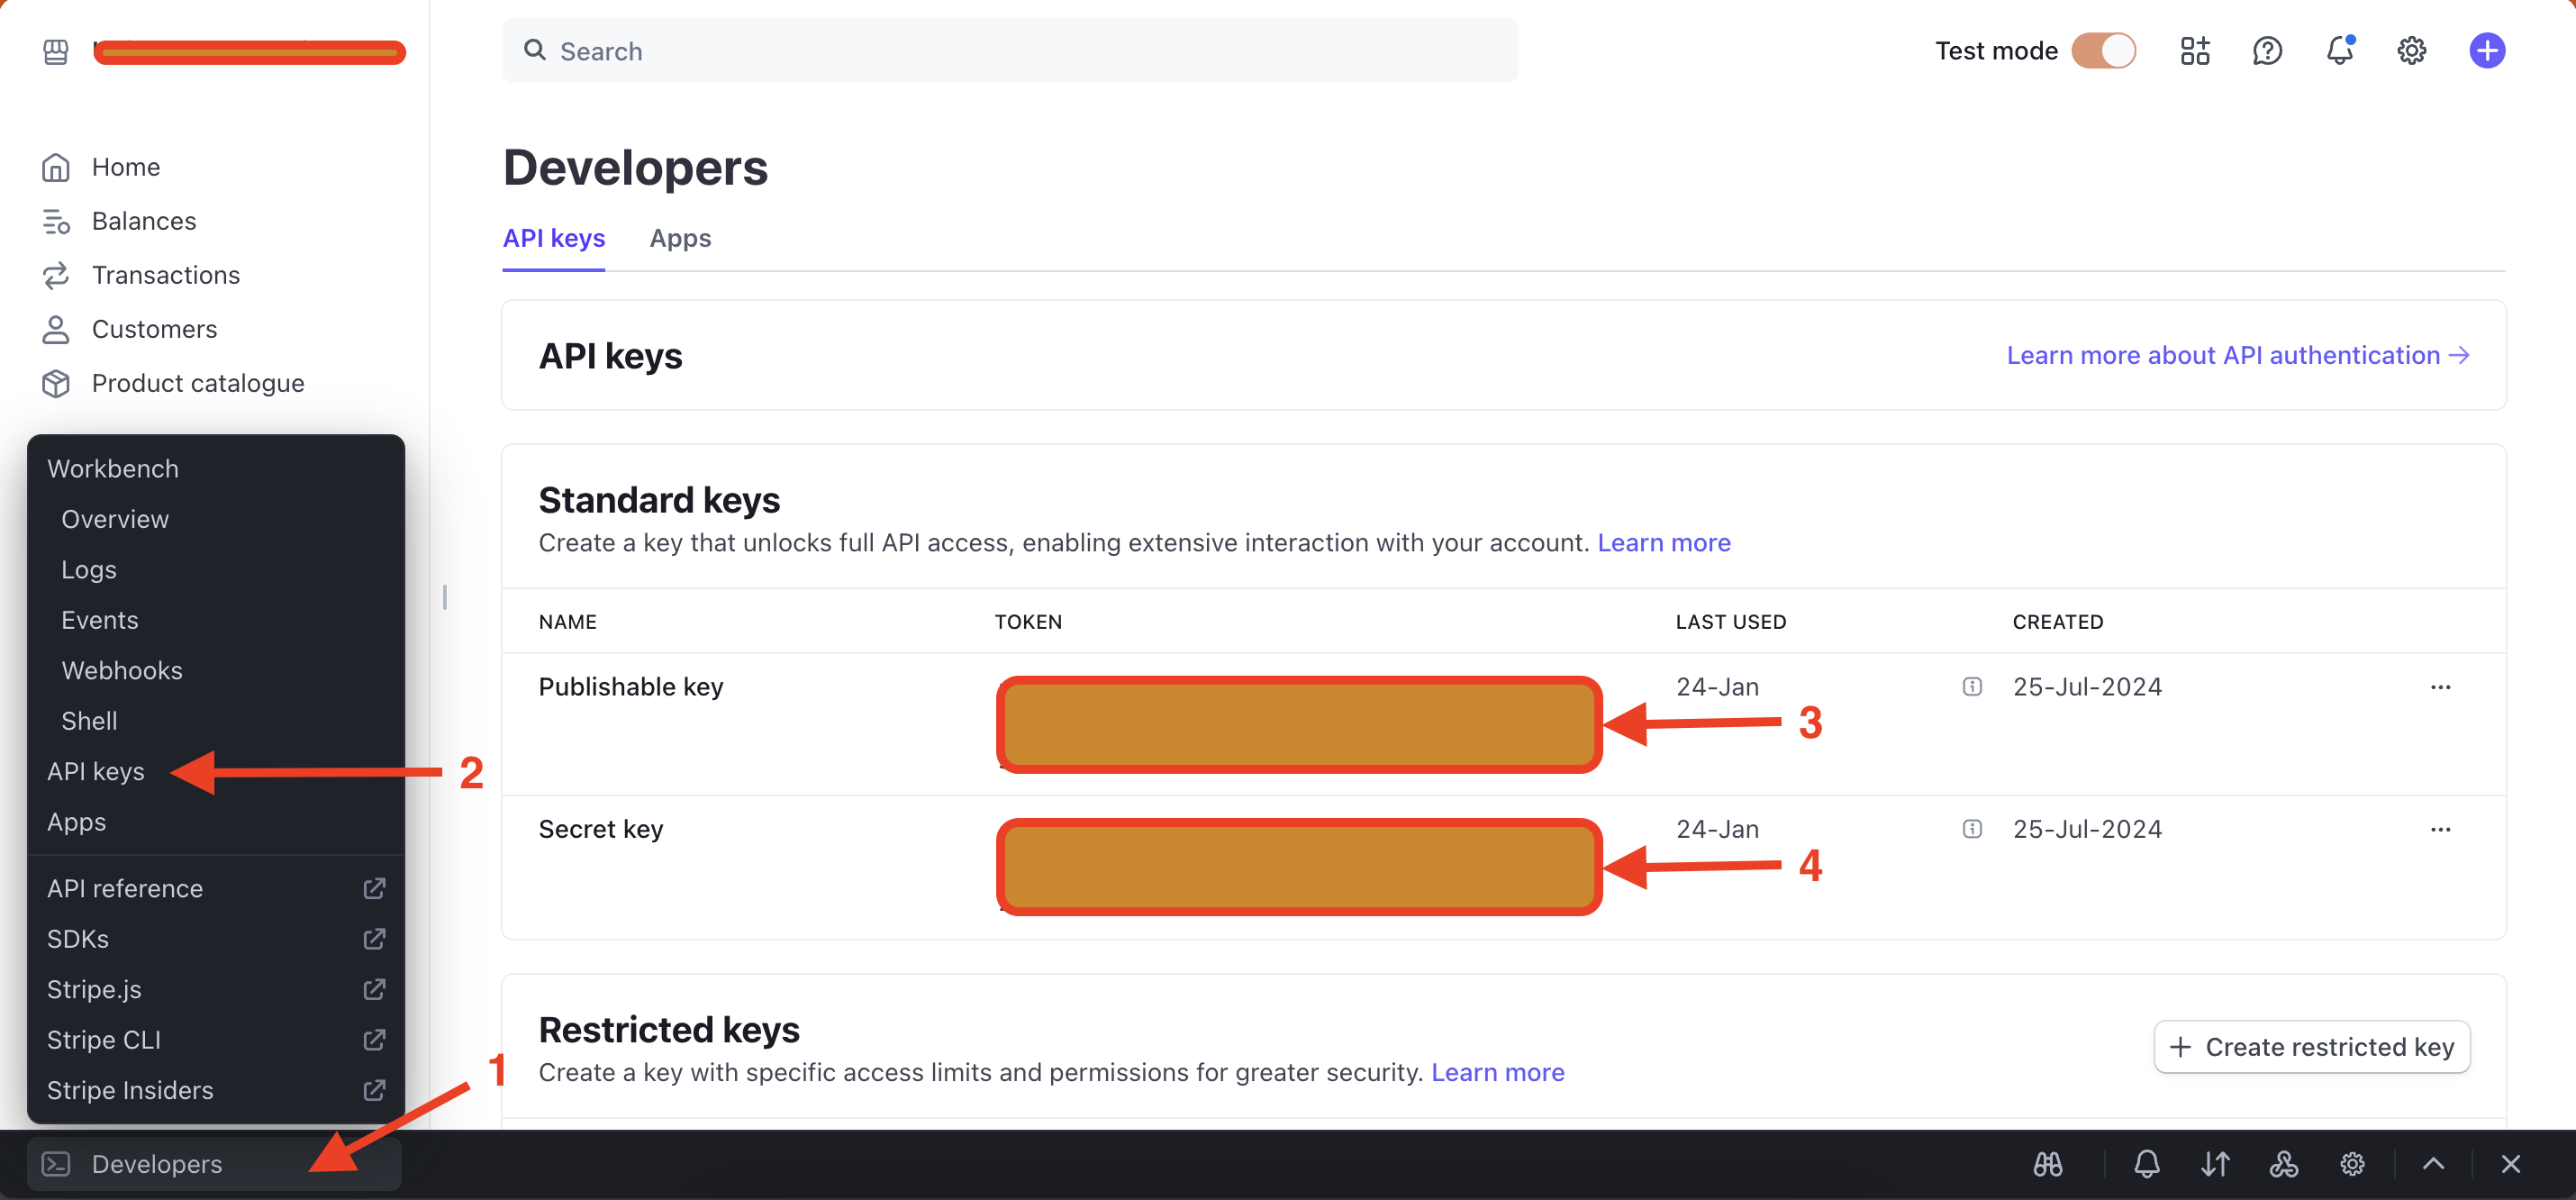
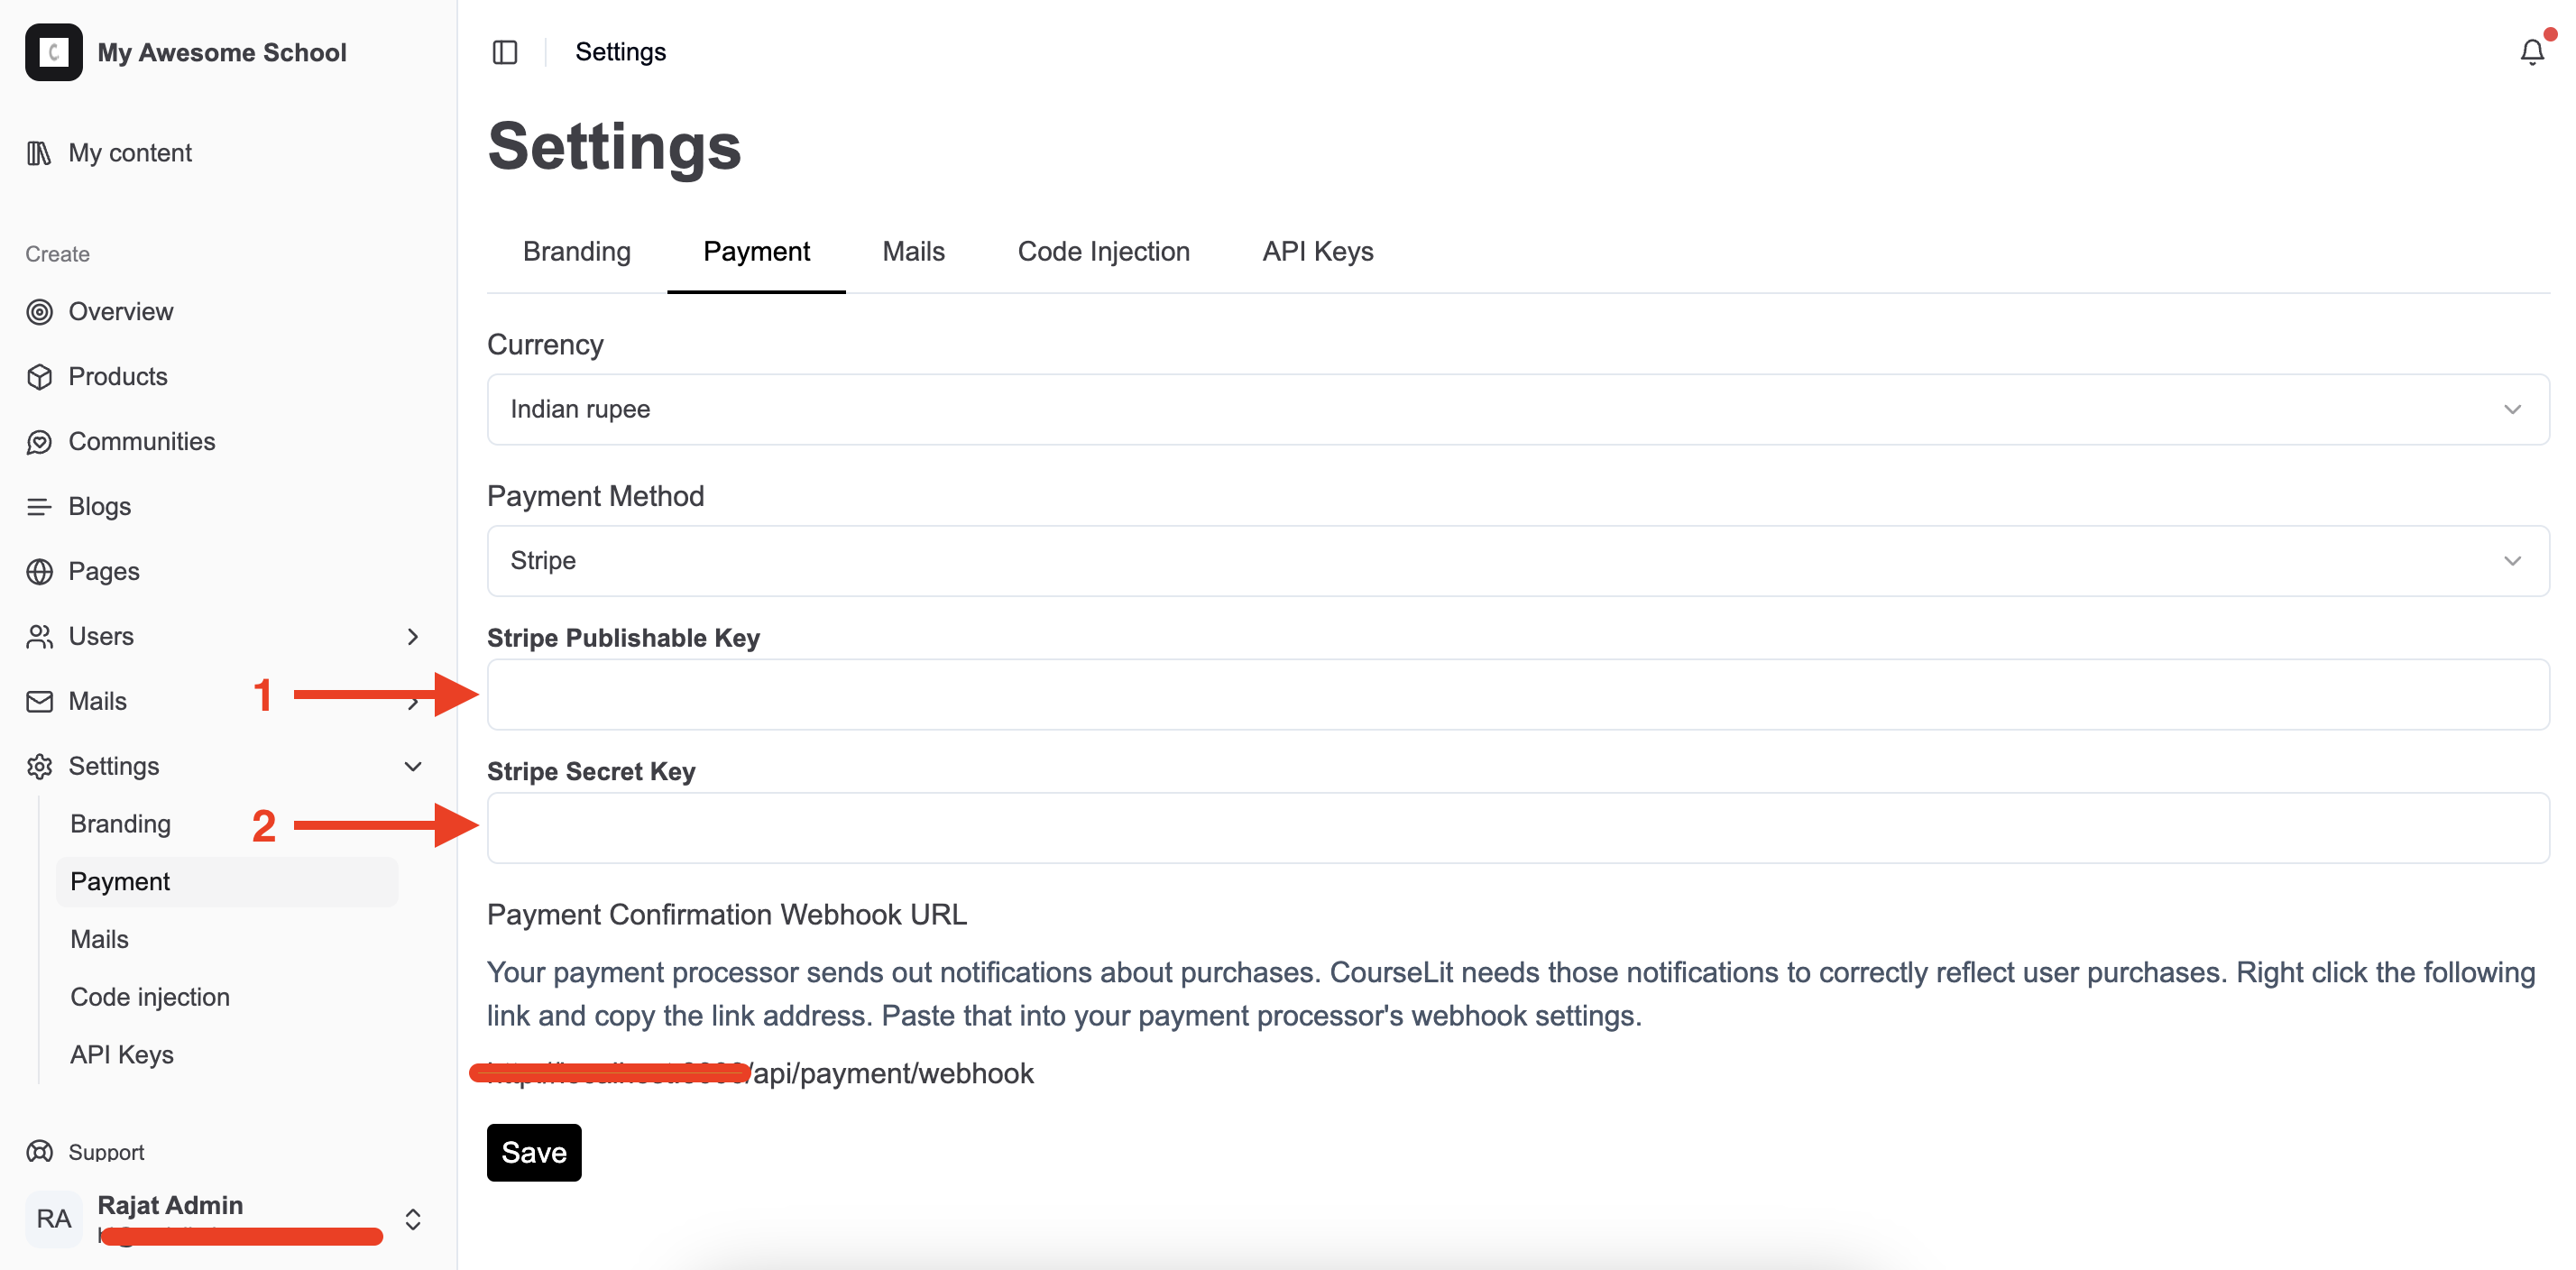
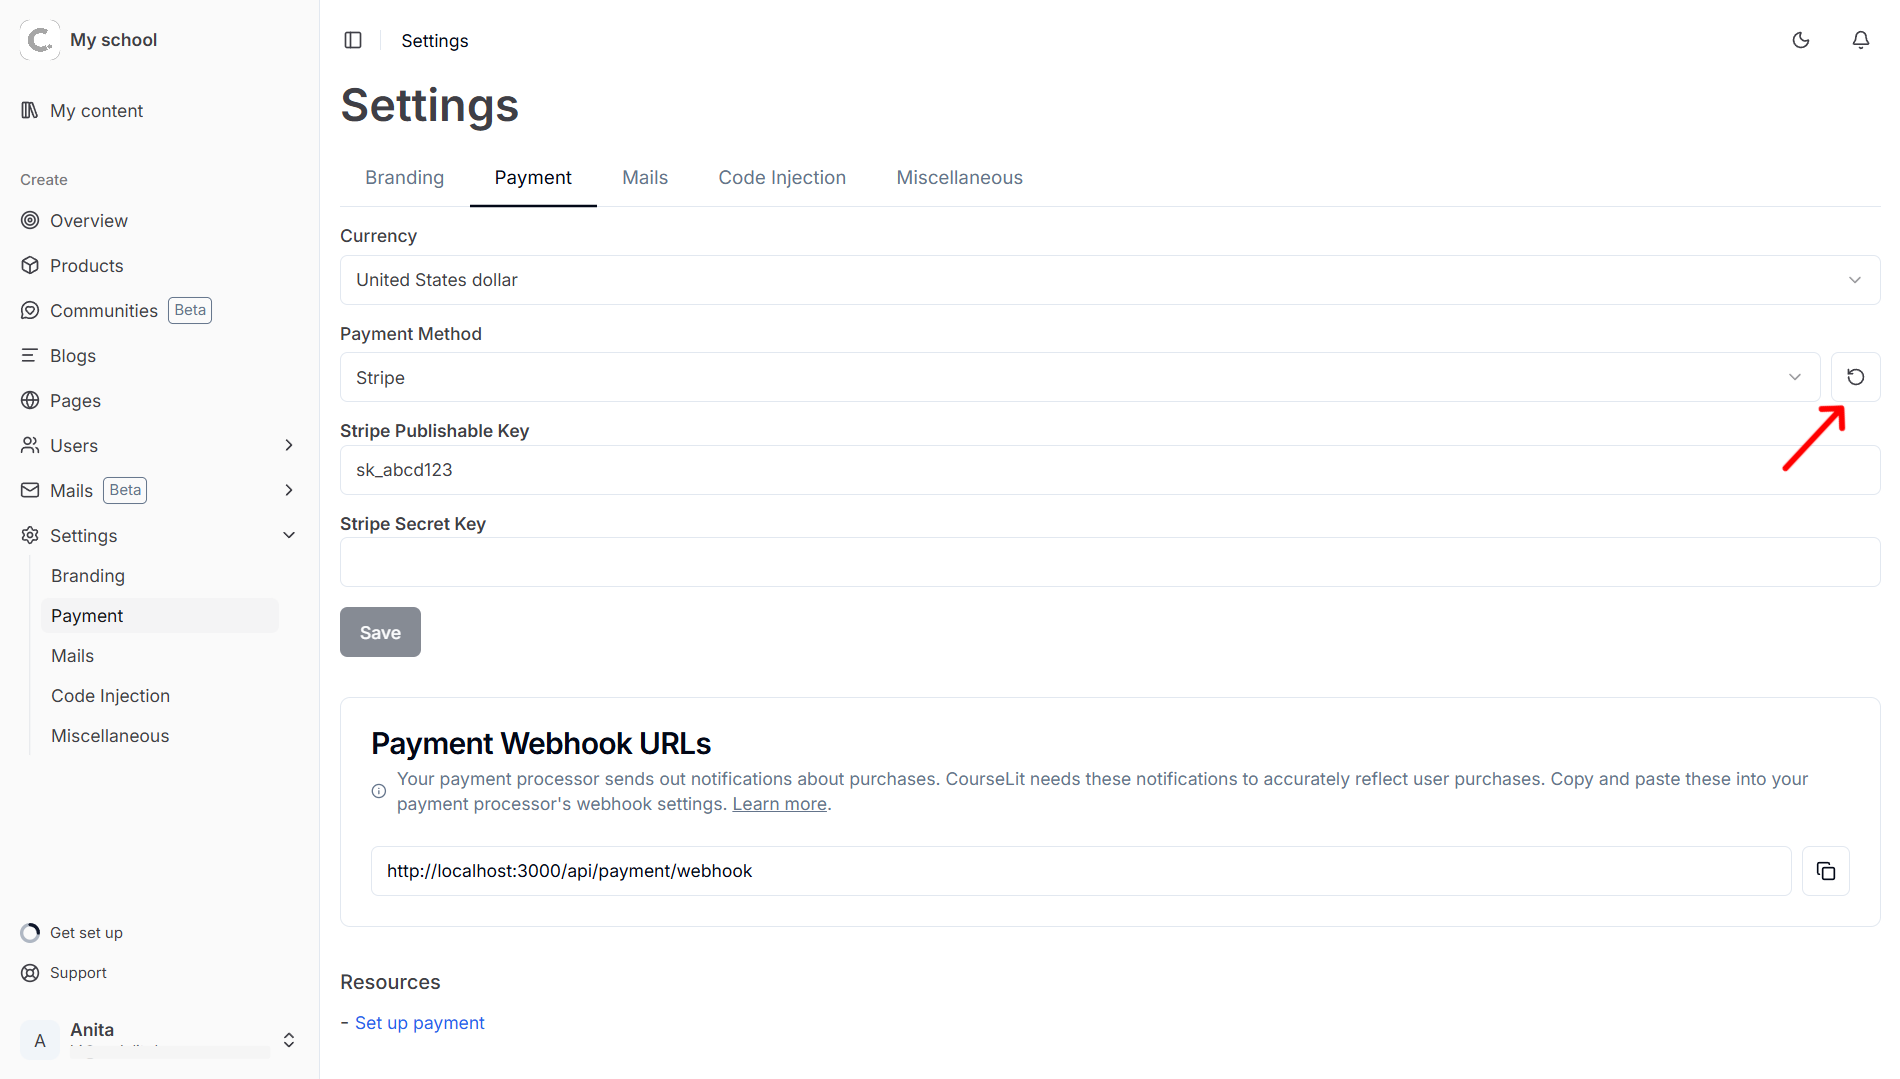
- In your CourseLit school, go to the
Settings > Paymenttab and selectStripein thePayment Methoddropdown. - Enter your Stripe publishable key and secret key in the
Stripe Publishable KeyandStripe Secret Keyinput boxes as shown below:
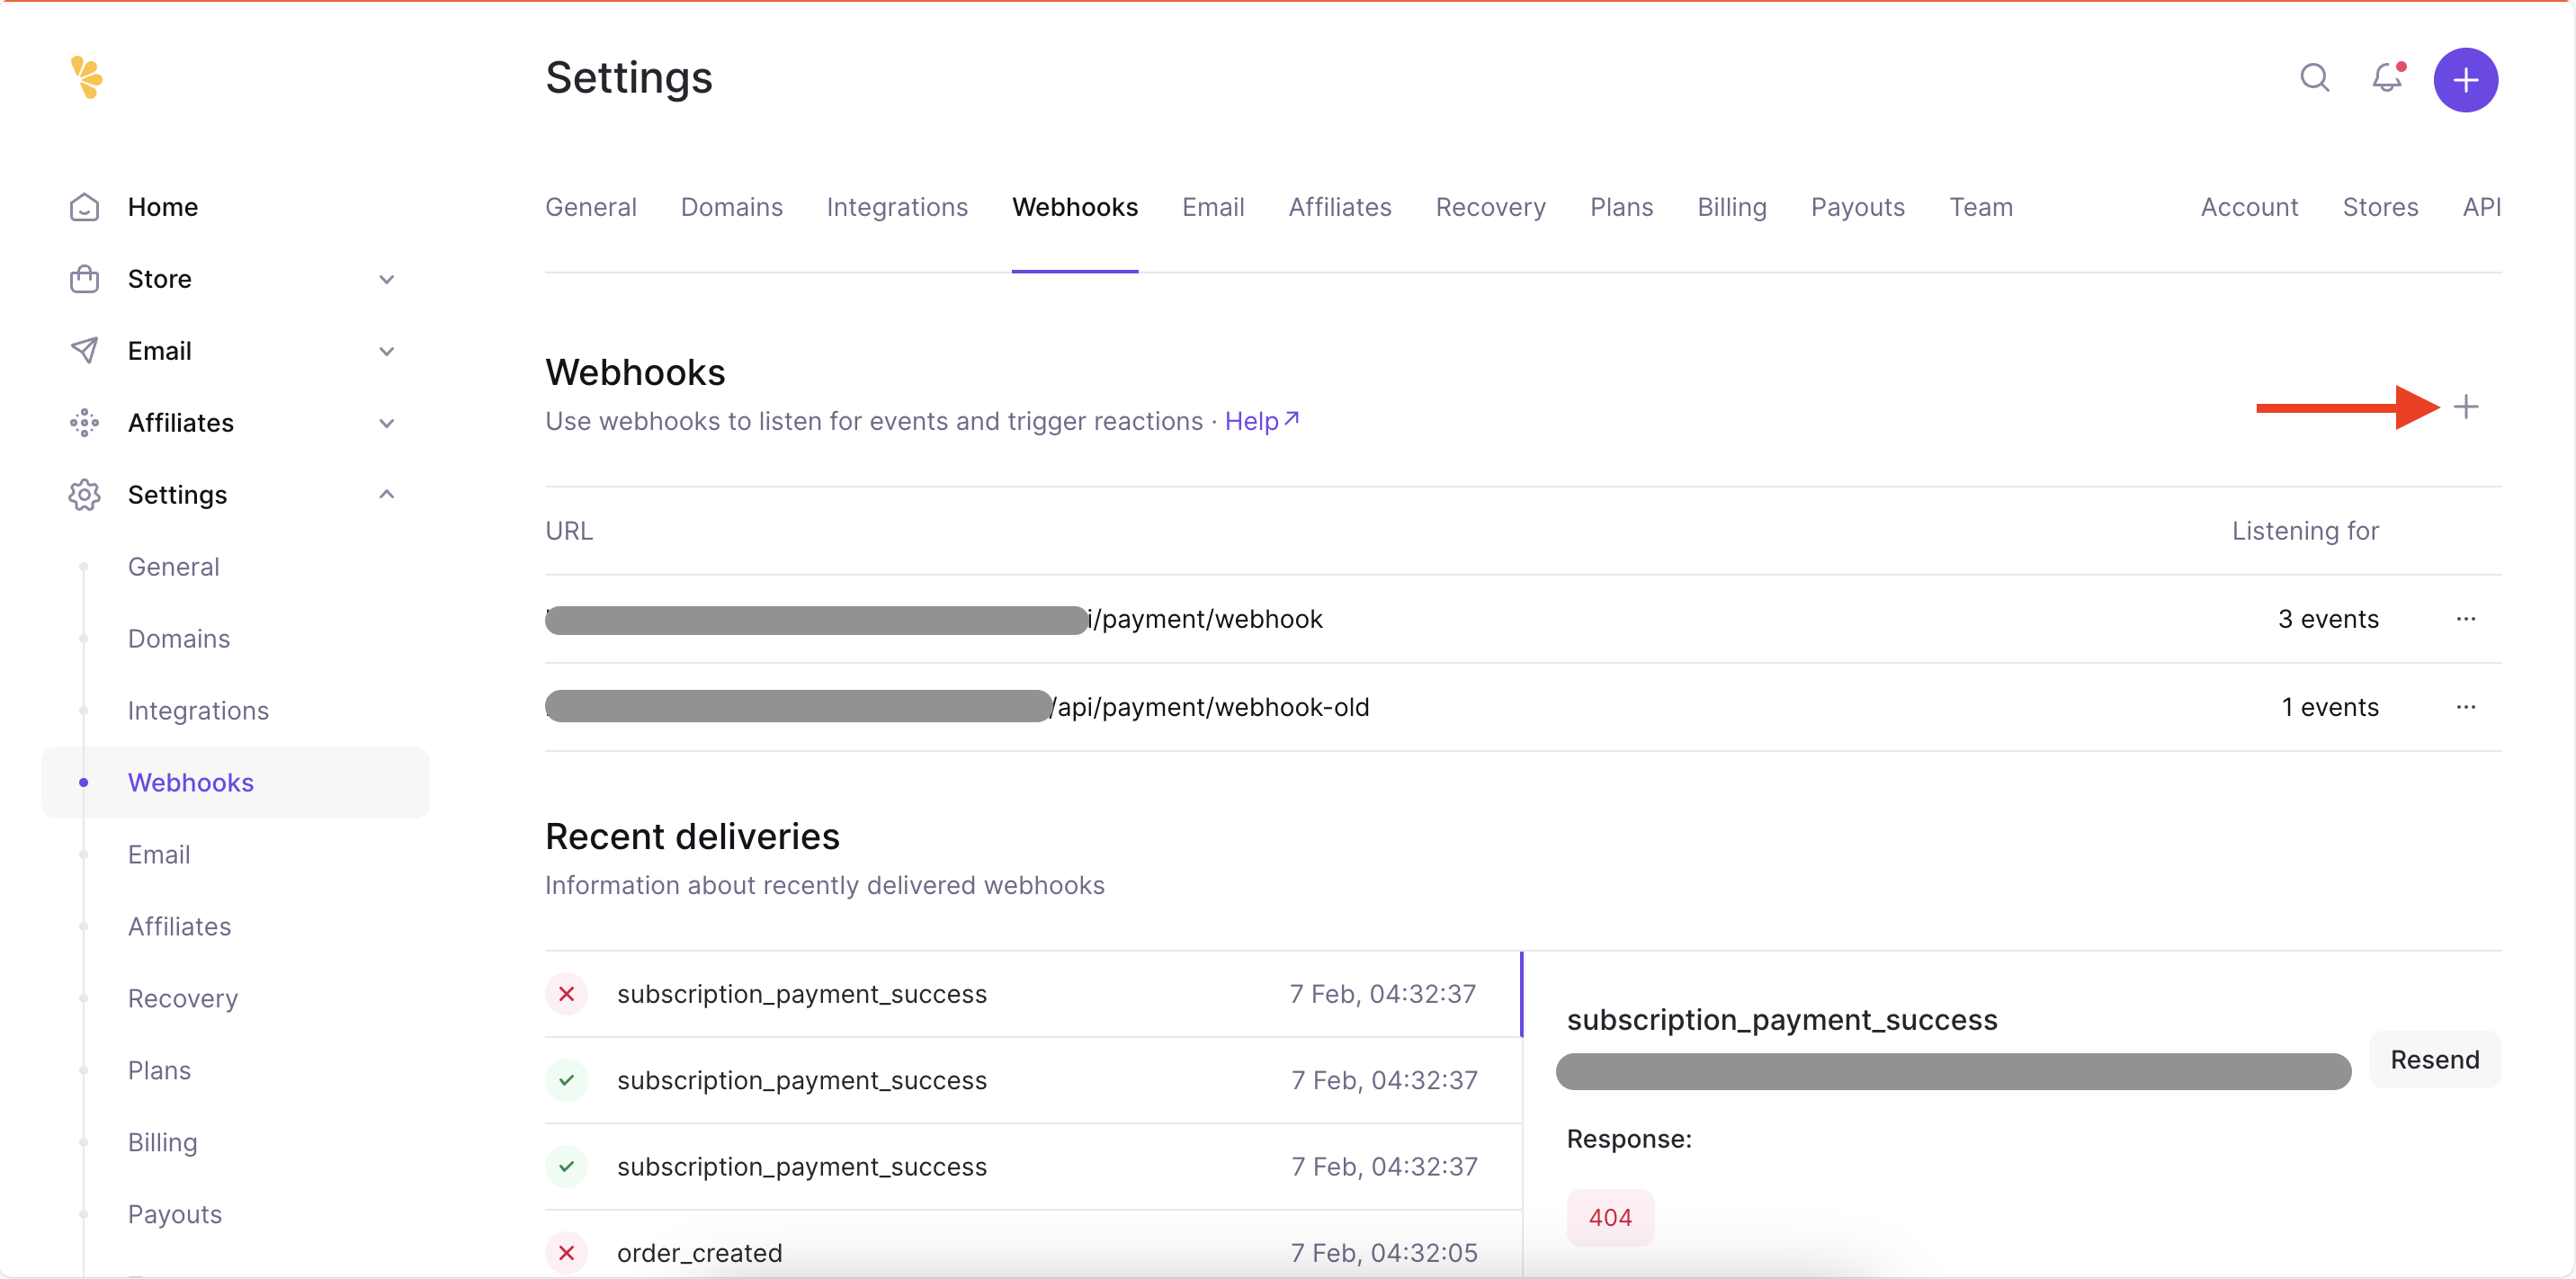
- Set up the webhooks. Using webhooks, your school receives timely updates about payments from Stripe.
- Open the webhook configuration dock by clicking on the
Developers > Webhooksmenu option.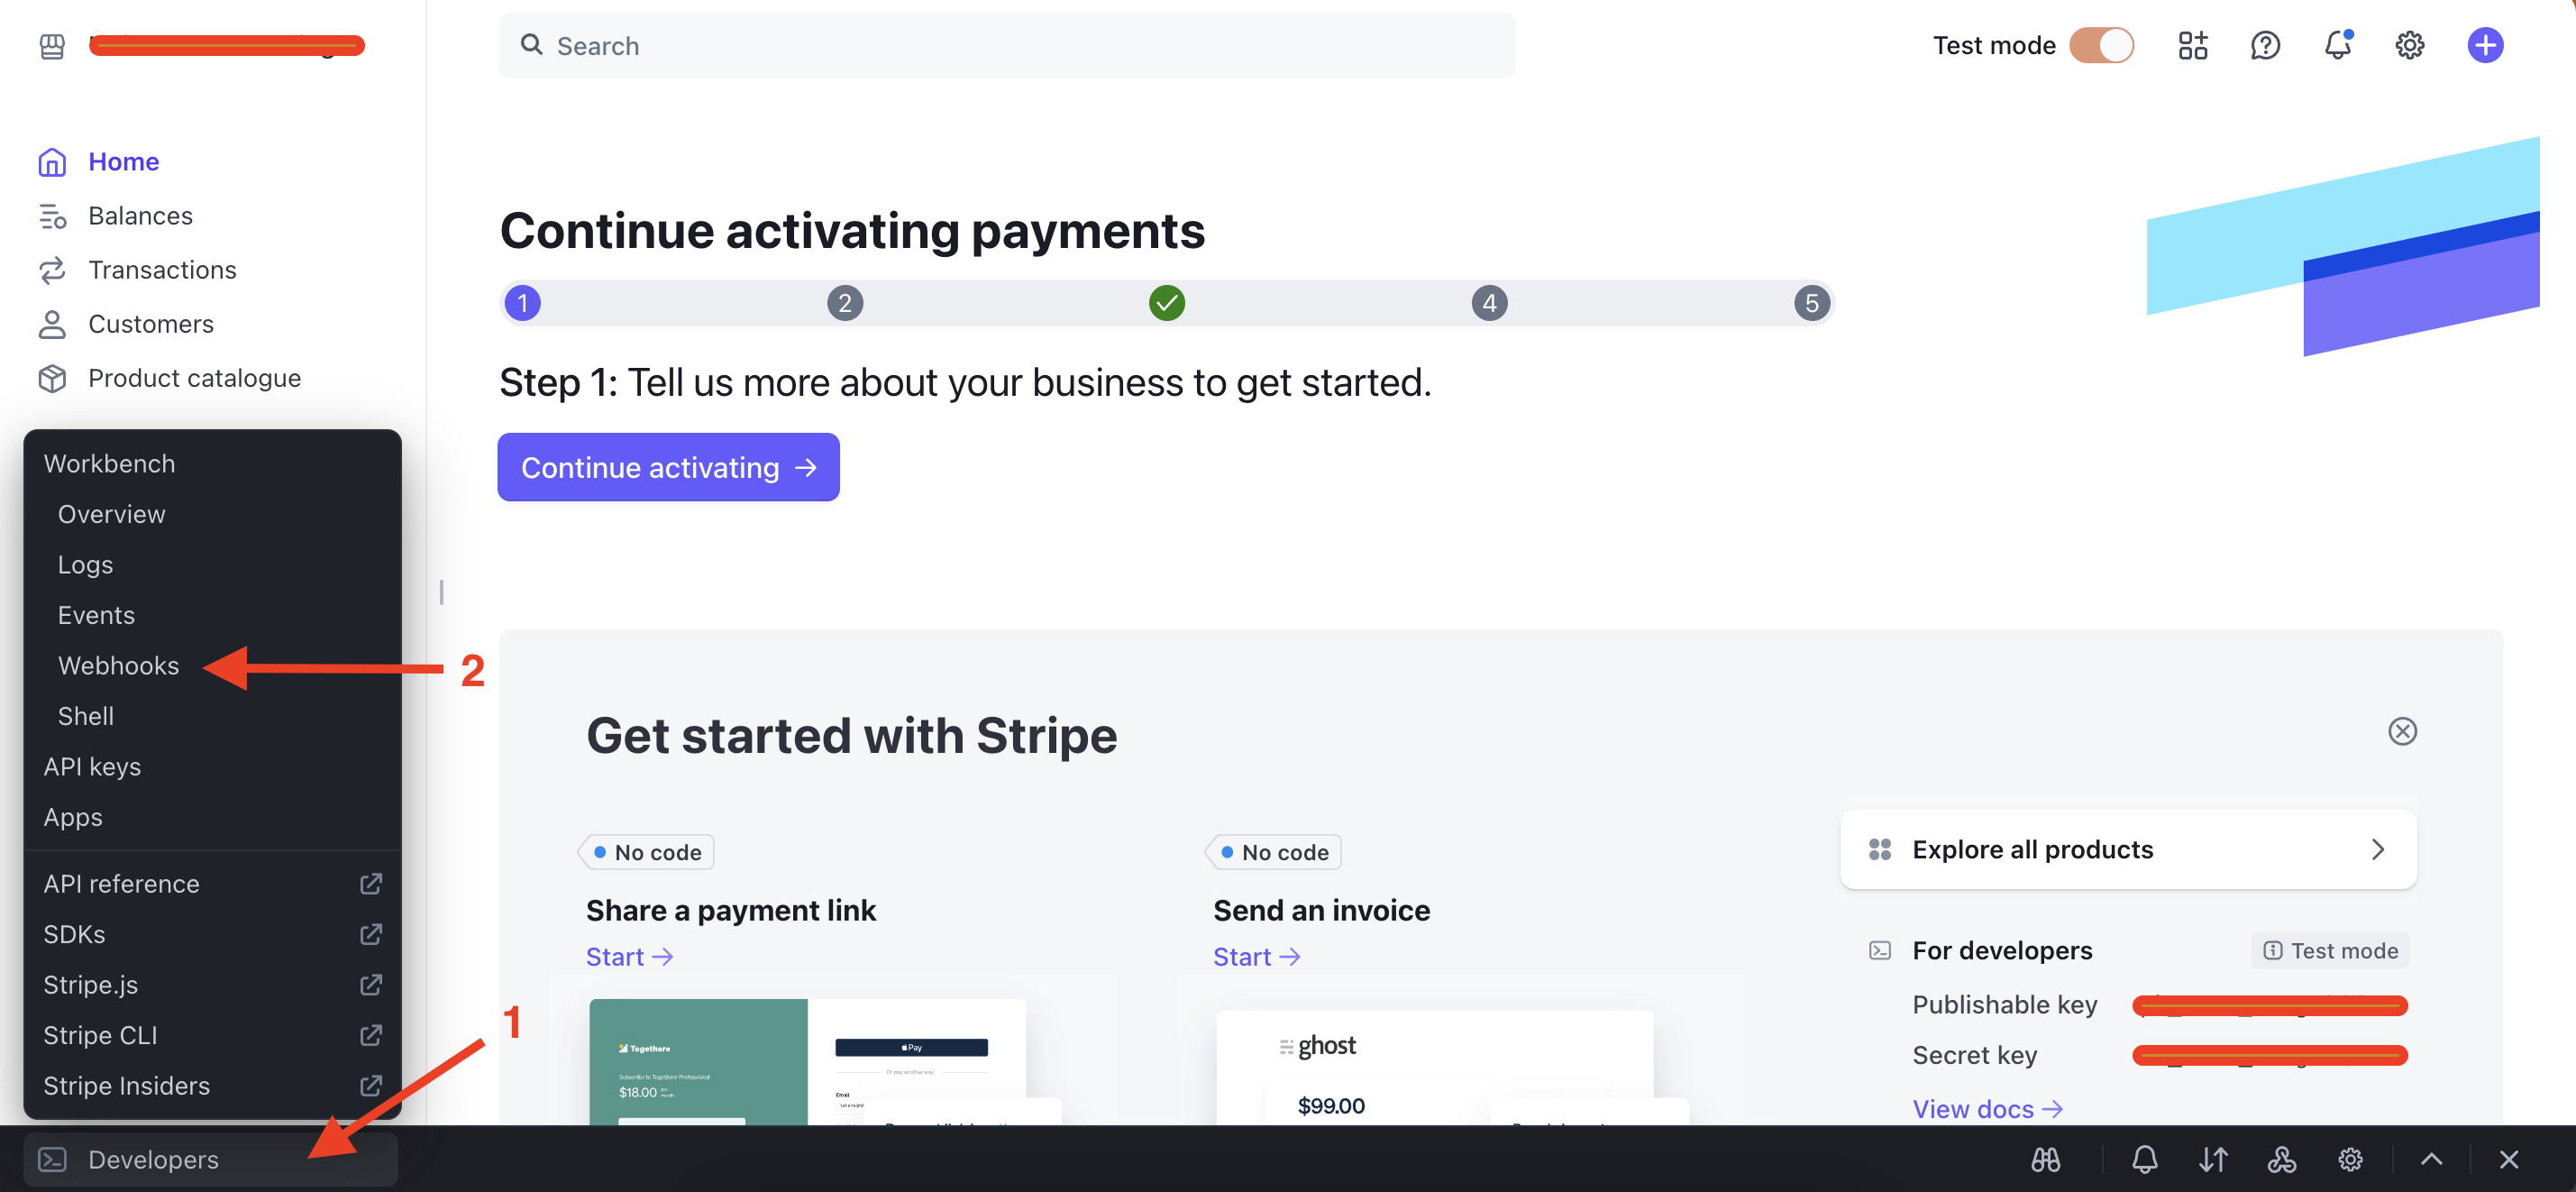
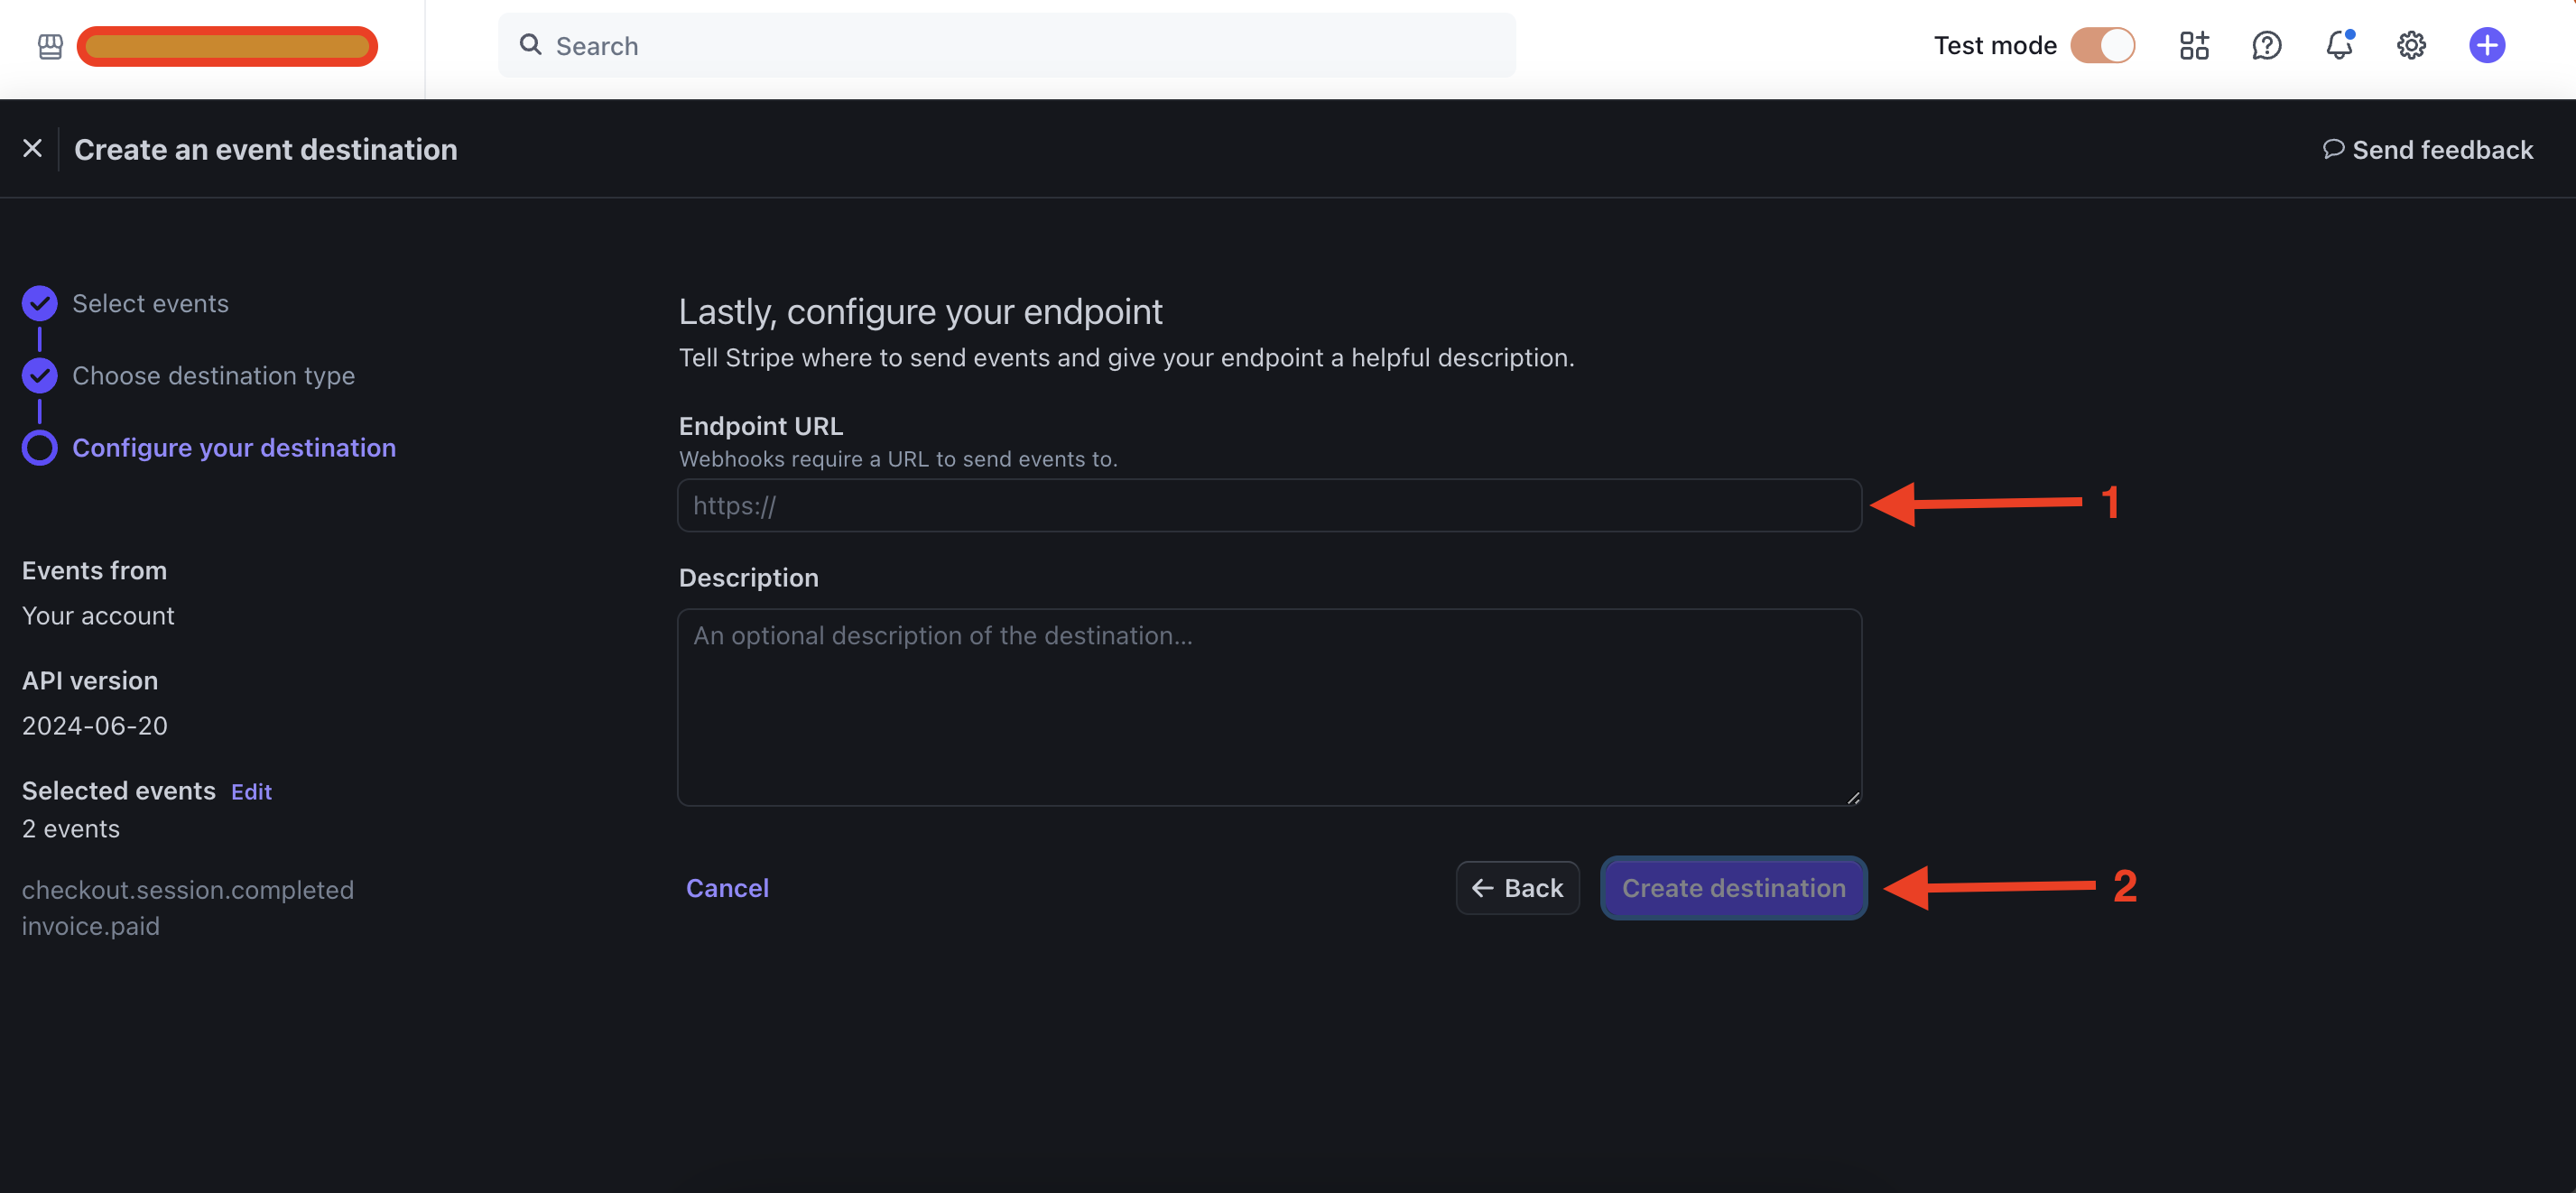
- Create a new webhook using the button as shown below:
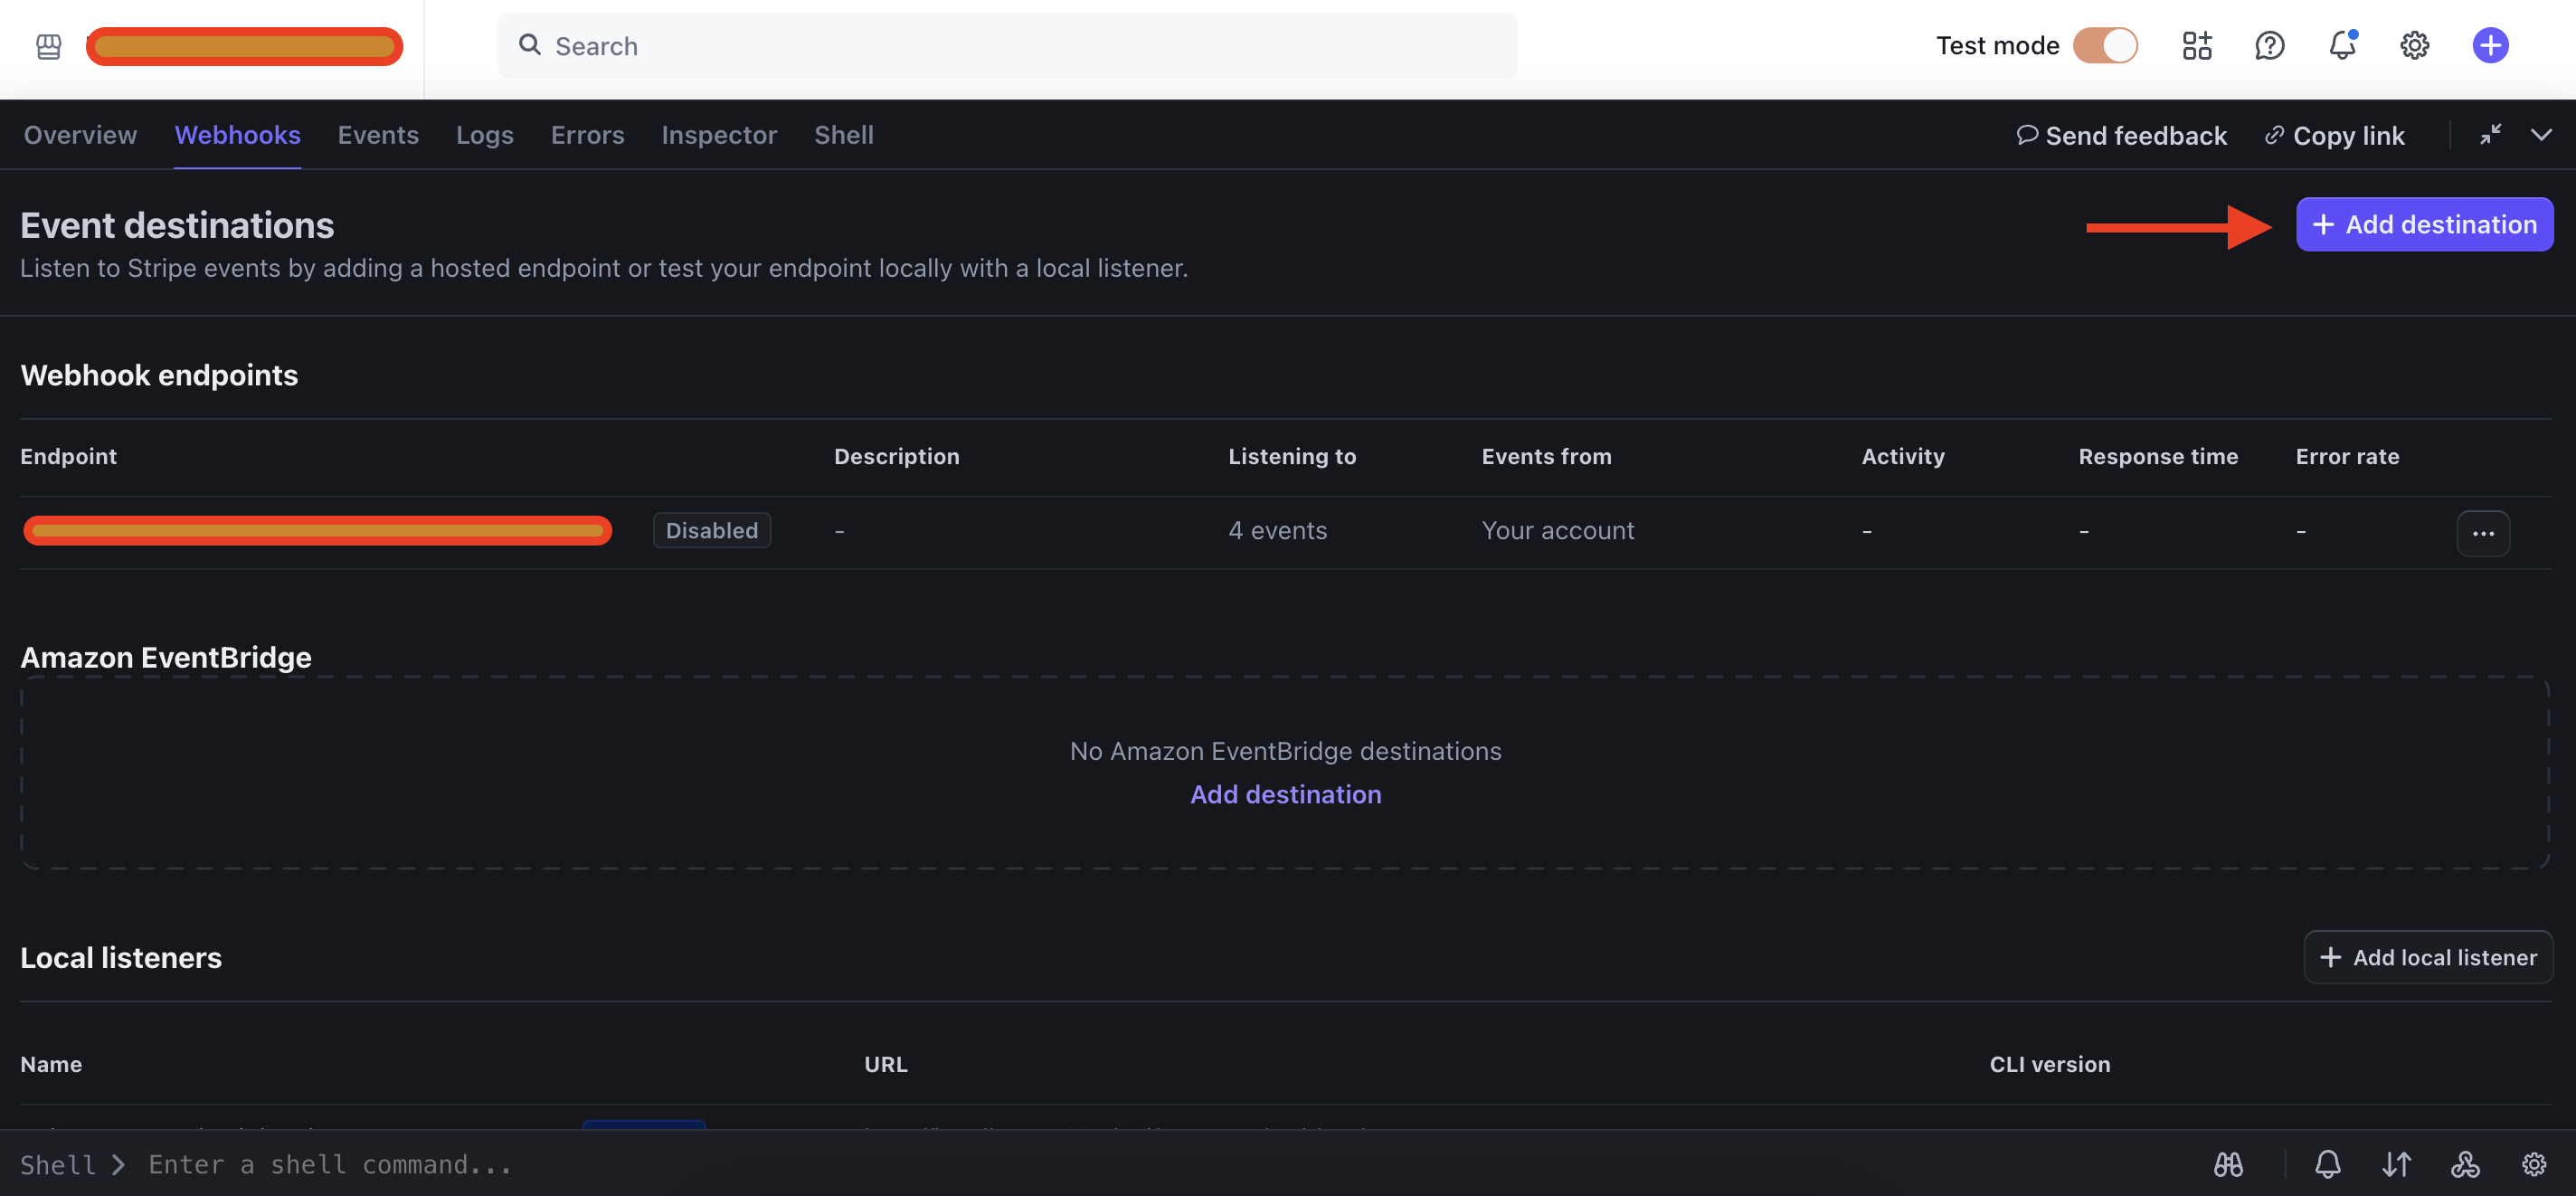
- In the webhook dialog, perform the following actions:
- Select the following events:
checkout.session.completed: For confirming one-time paymentsinvoice.paid: For confirming subscription payments
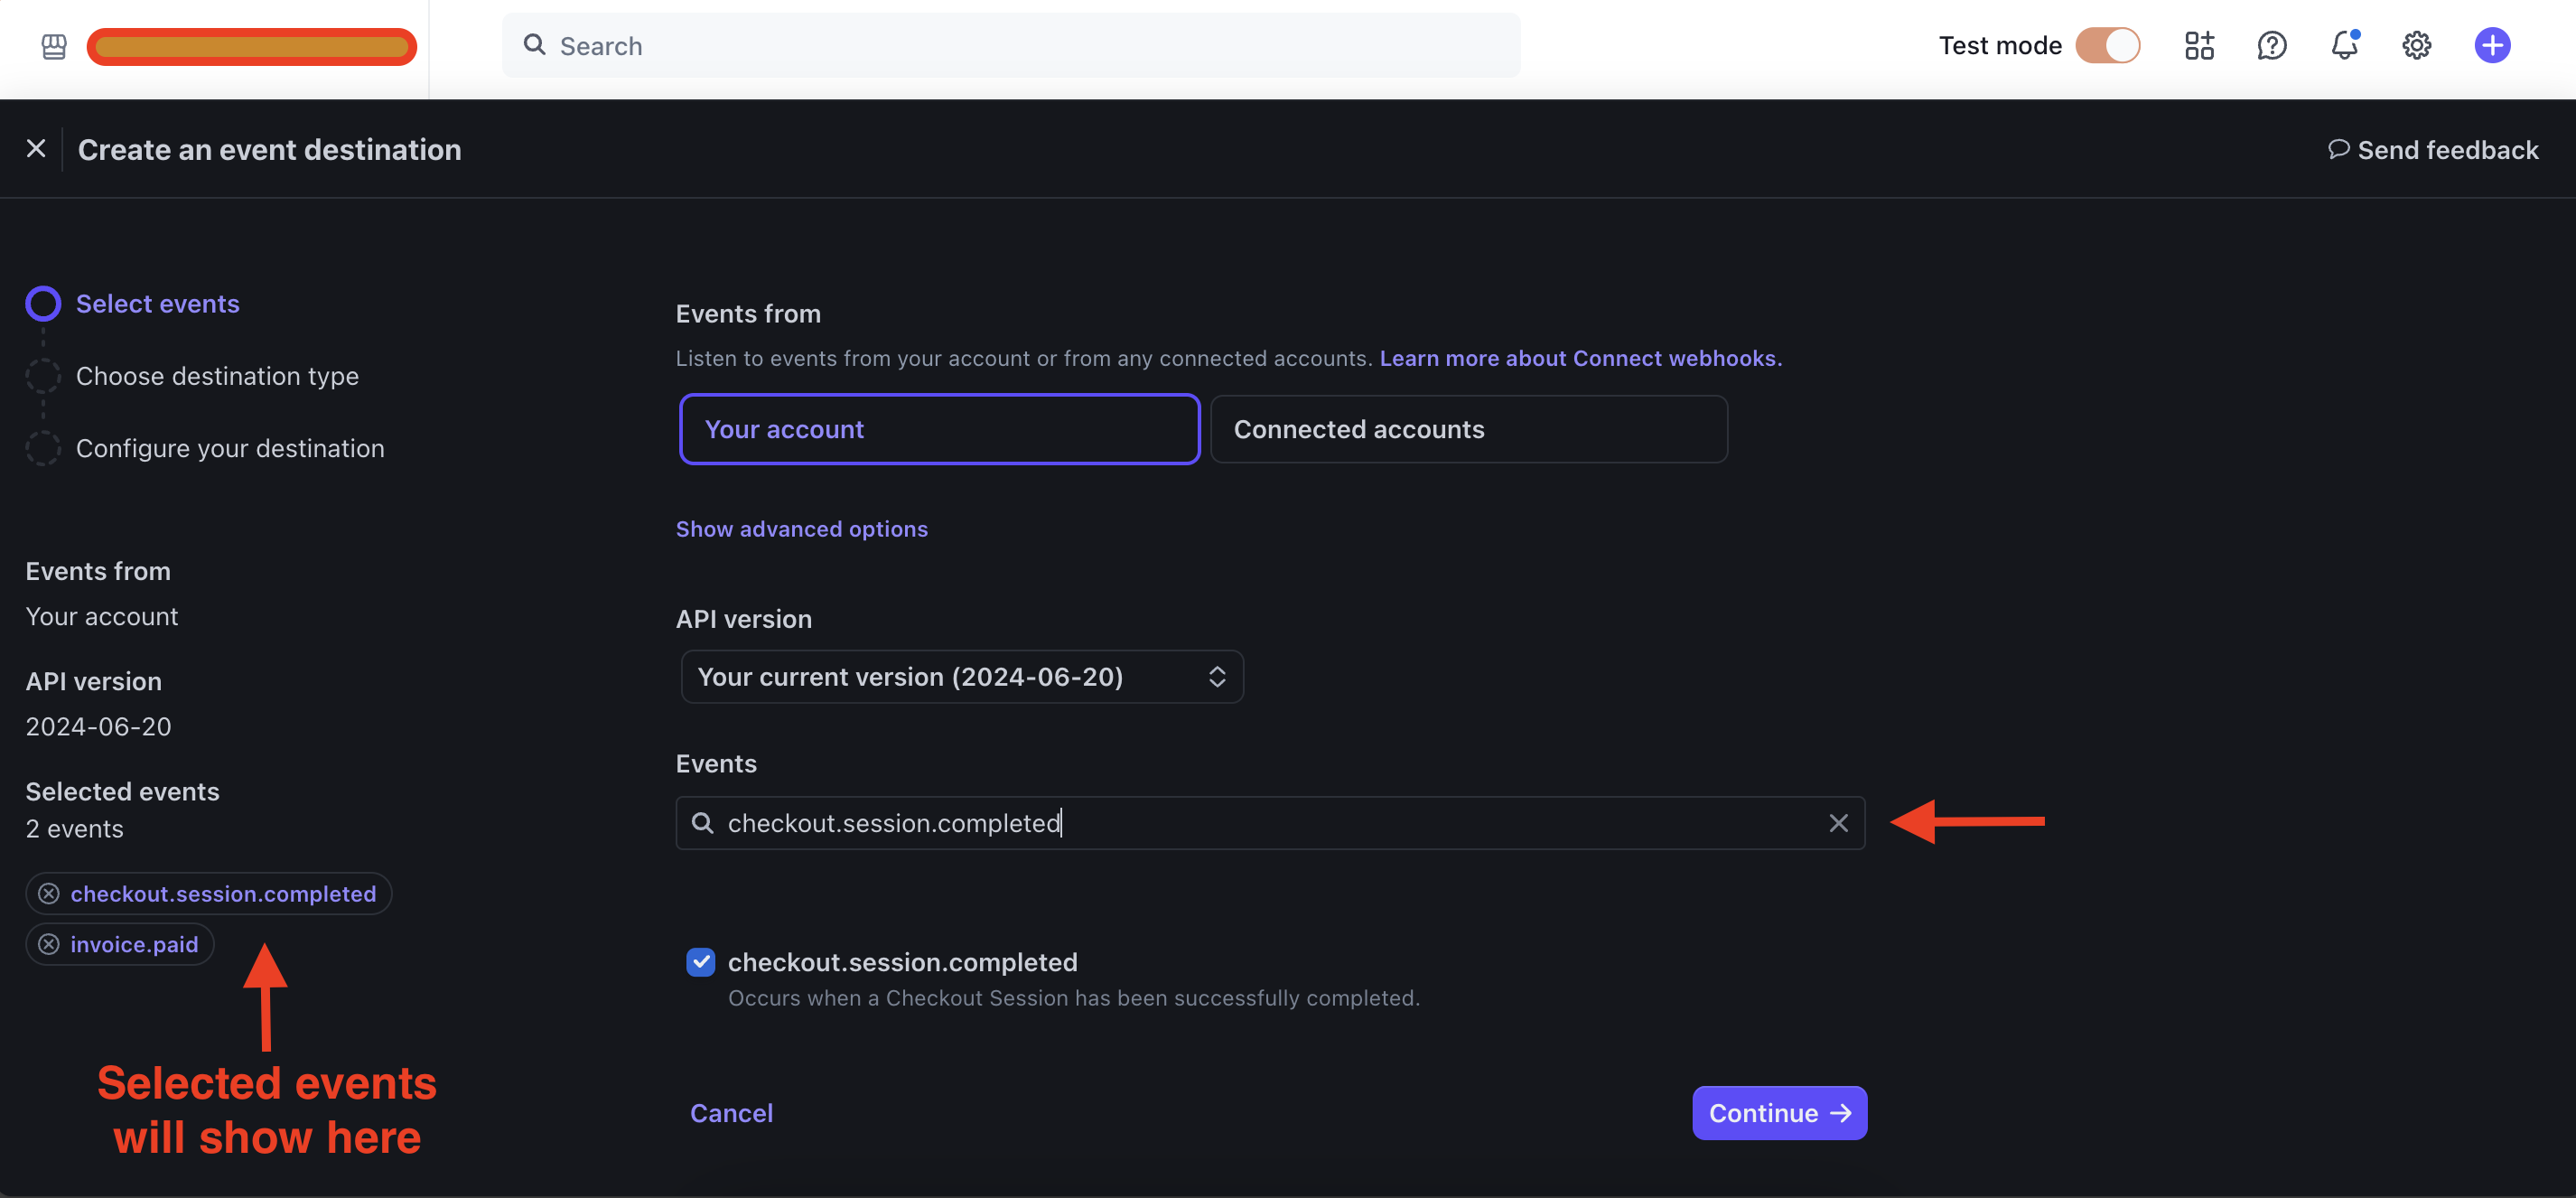
- In the destination type, select
Webhook endpoint. - In the destination, enter your CourseLit school’s webhook endpoint (listed in the same payment screen in your school).
- Select the following events:
- That’s it! Your Stripe configuration is complete, and you are ready to receive payments.
Razorpay setup
- Sign up for an account on Razorpay and get your business approved (or use a test account).
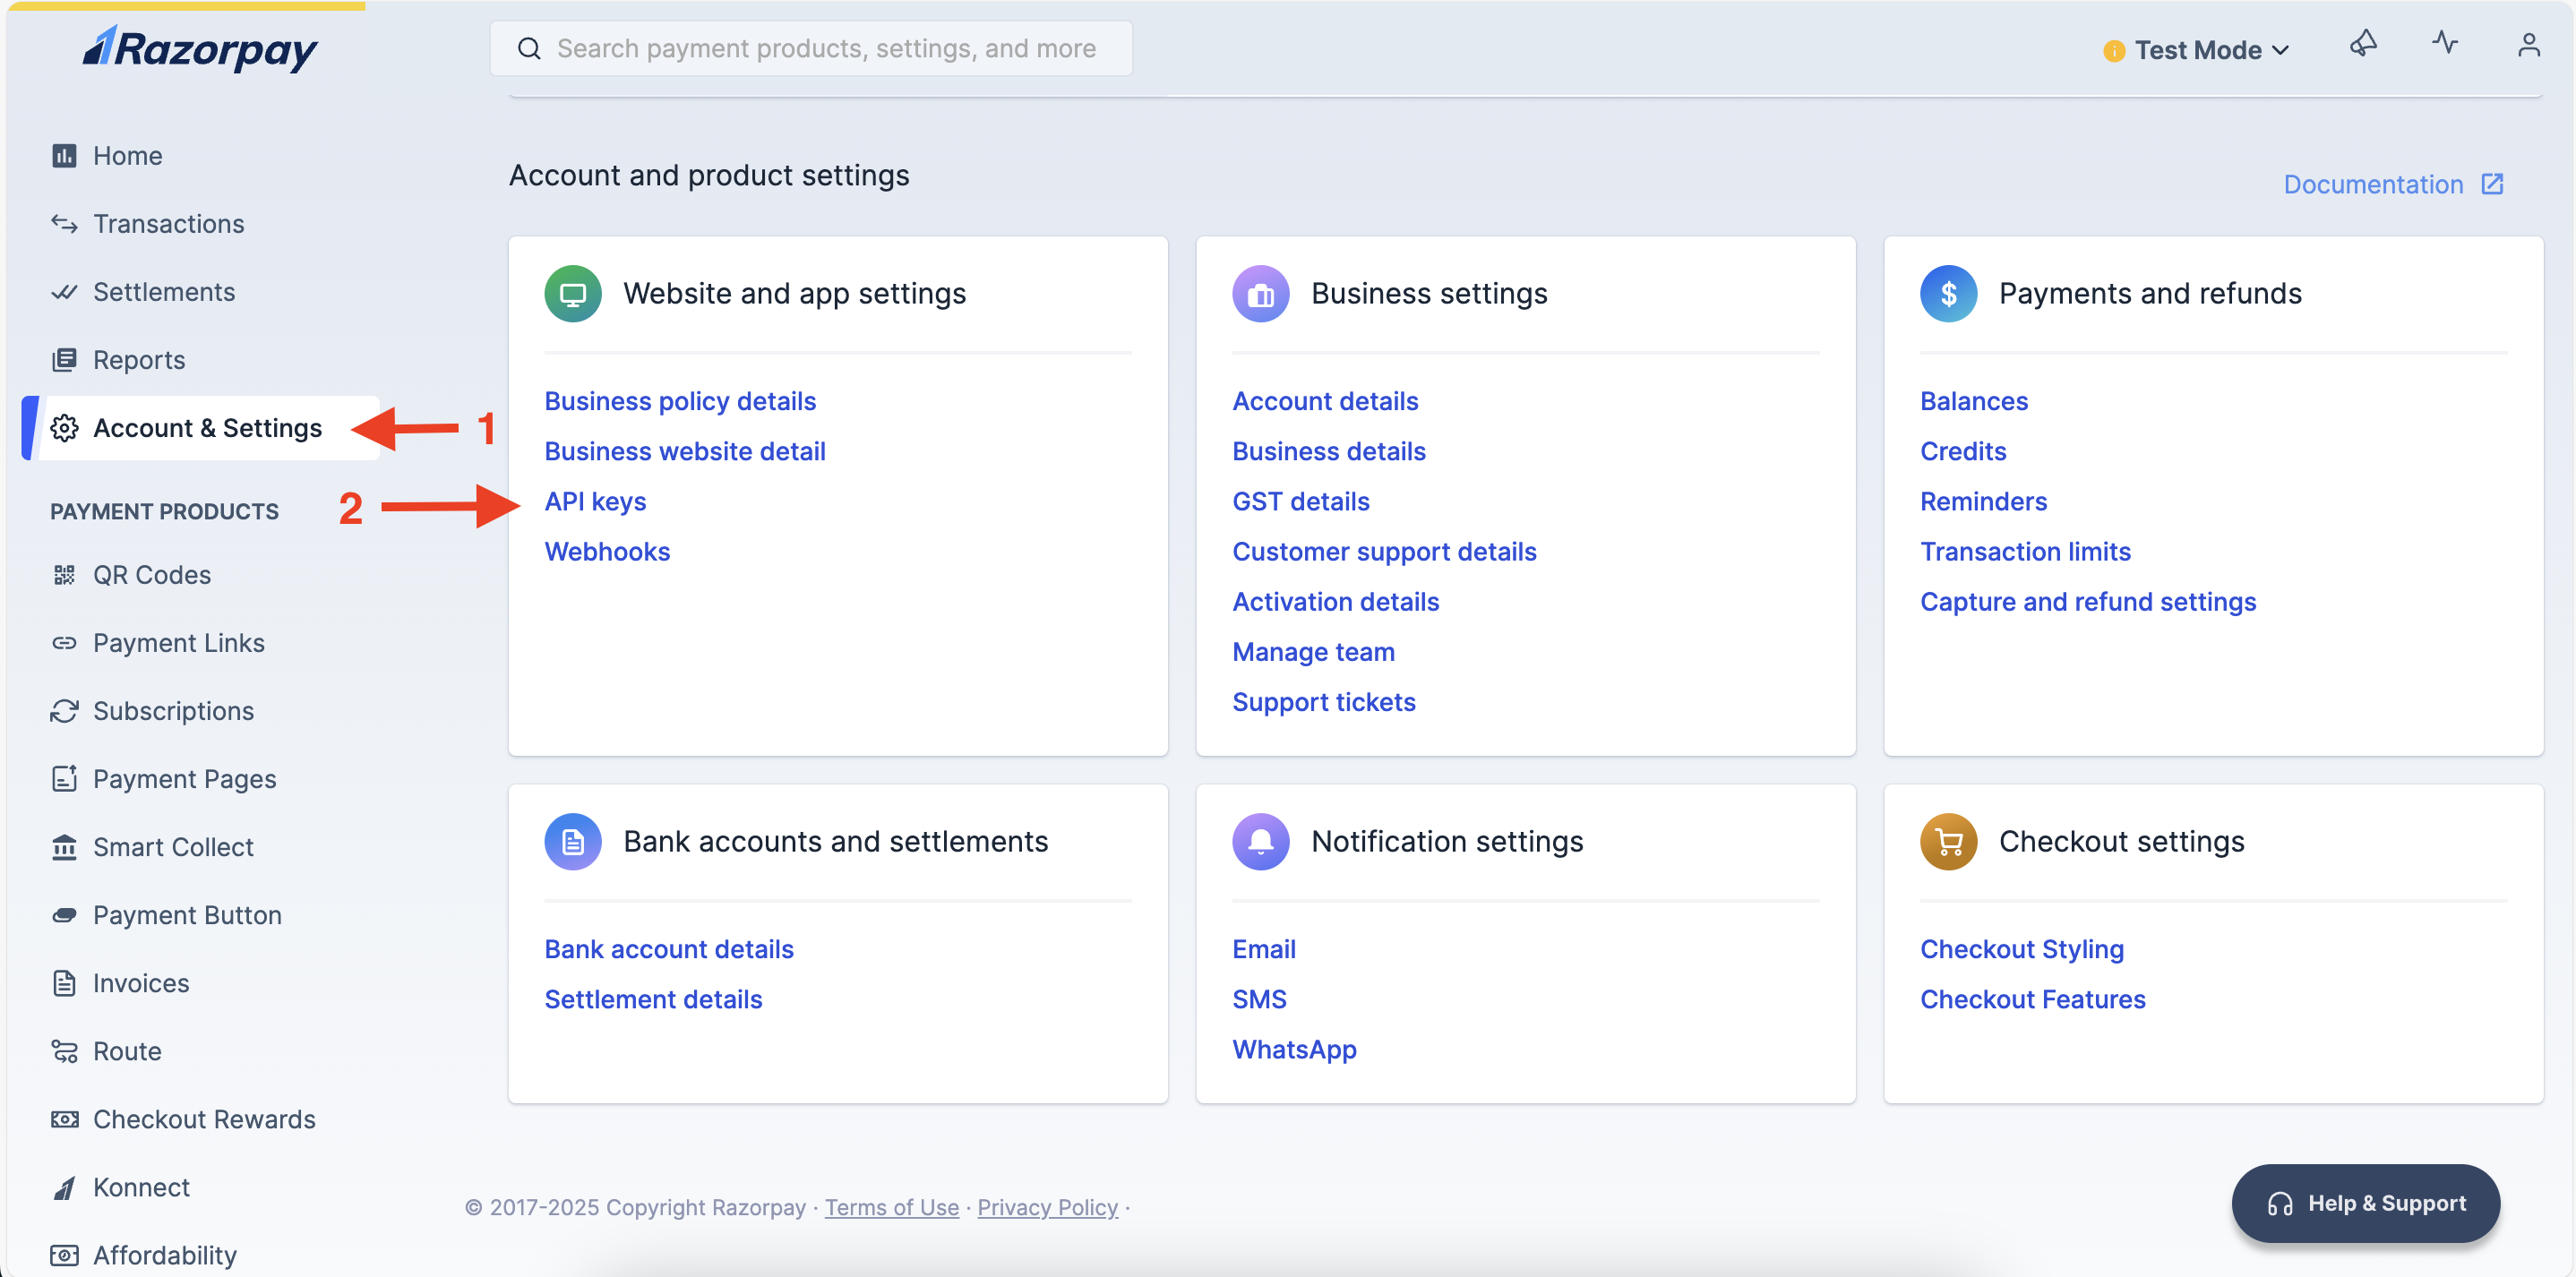
- In the Razorpay dashboard, go to the
Account & Settingstab and selectAPI keysas shown below:
- Generate a new API key and keep this screen open.
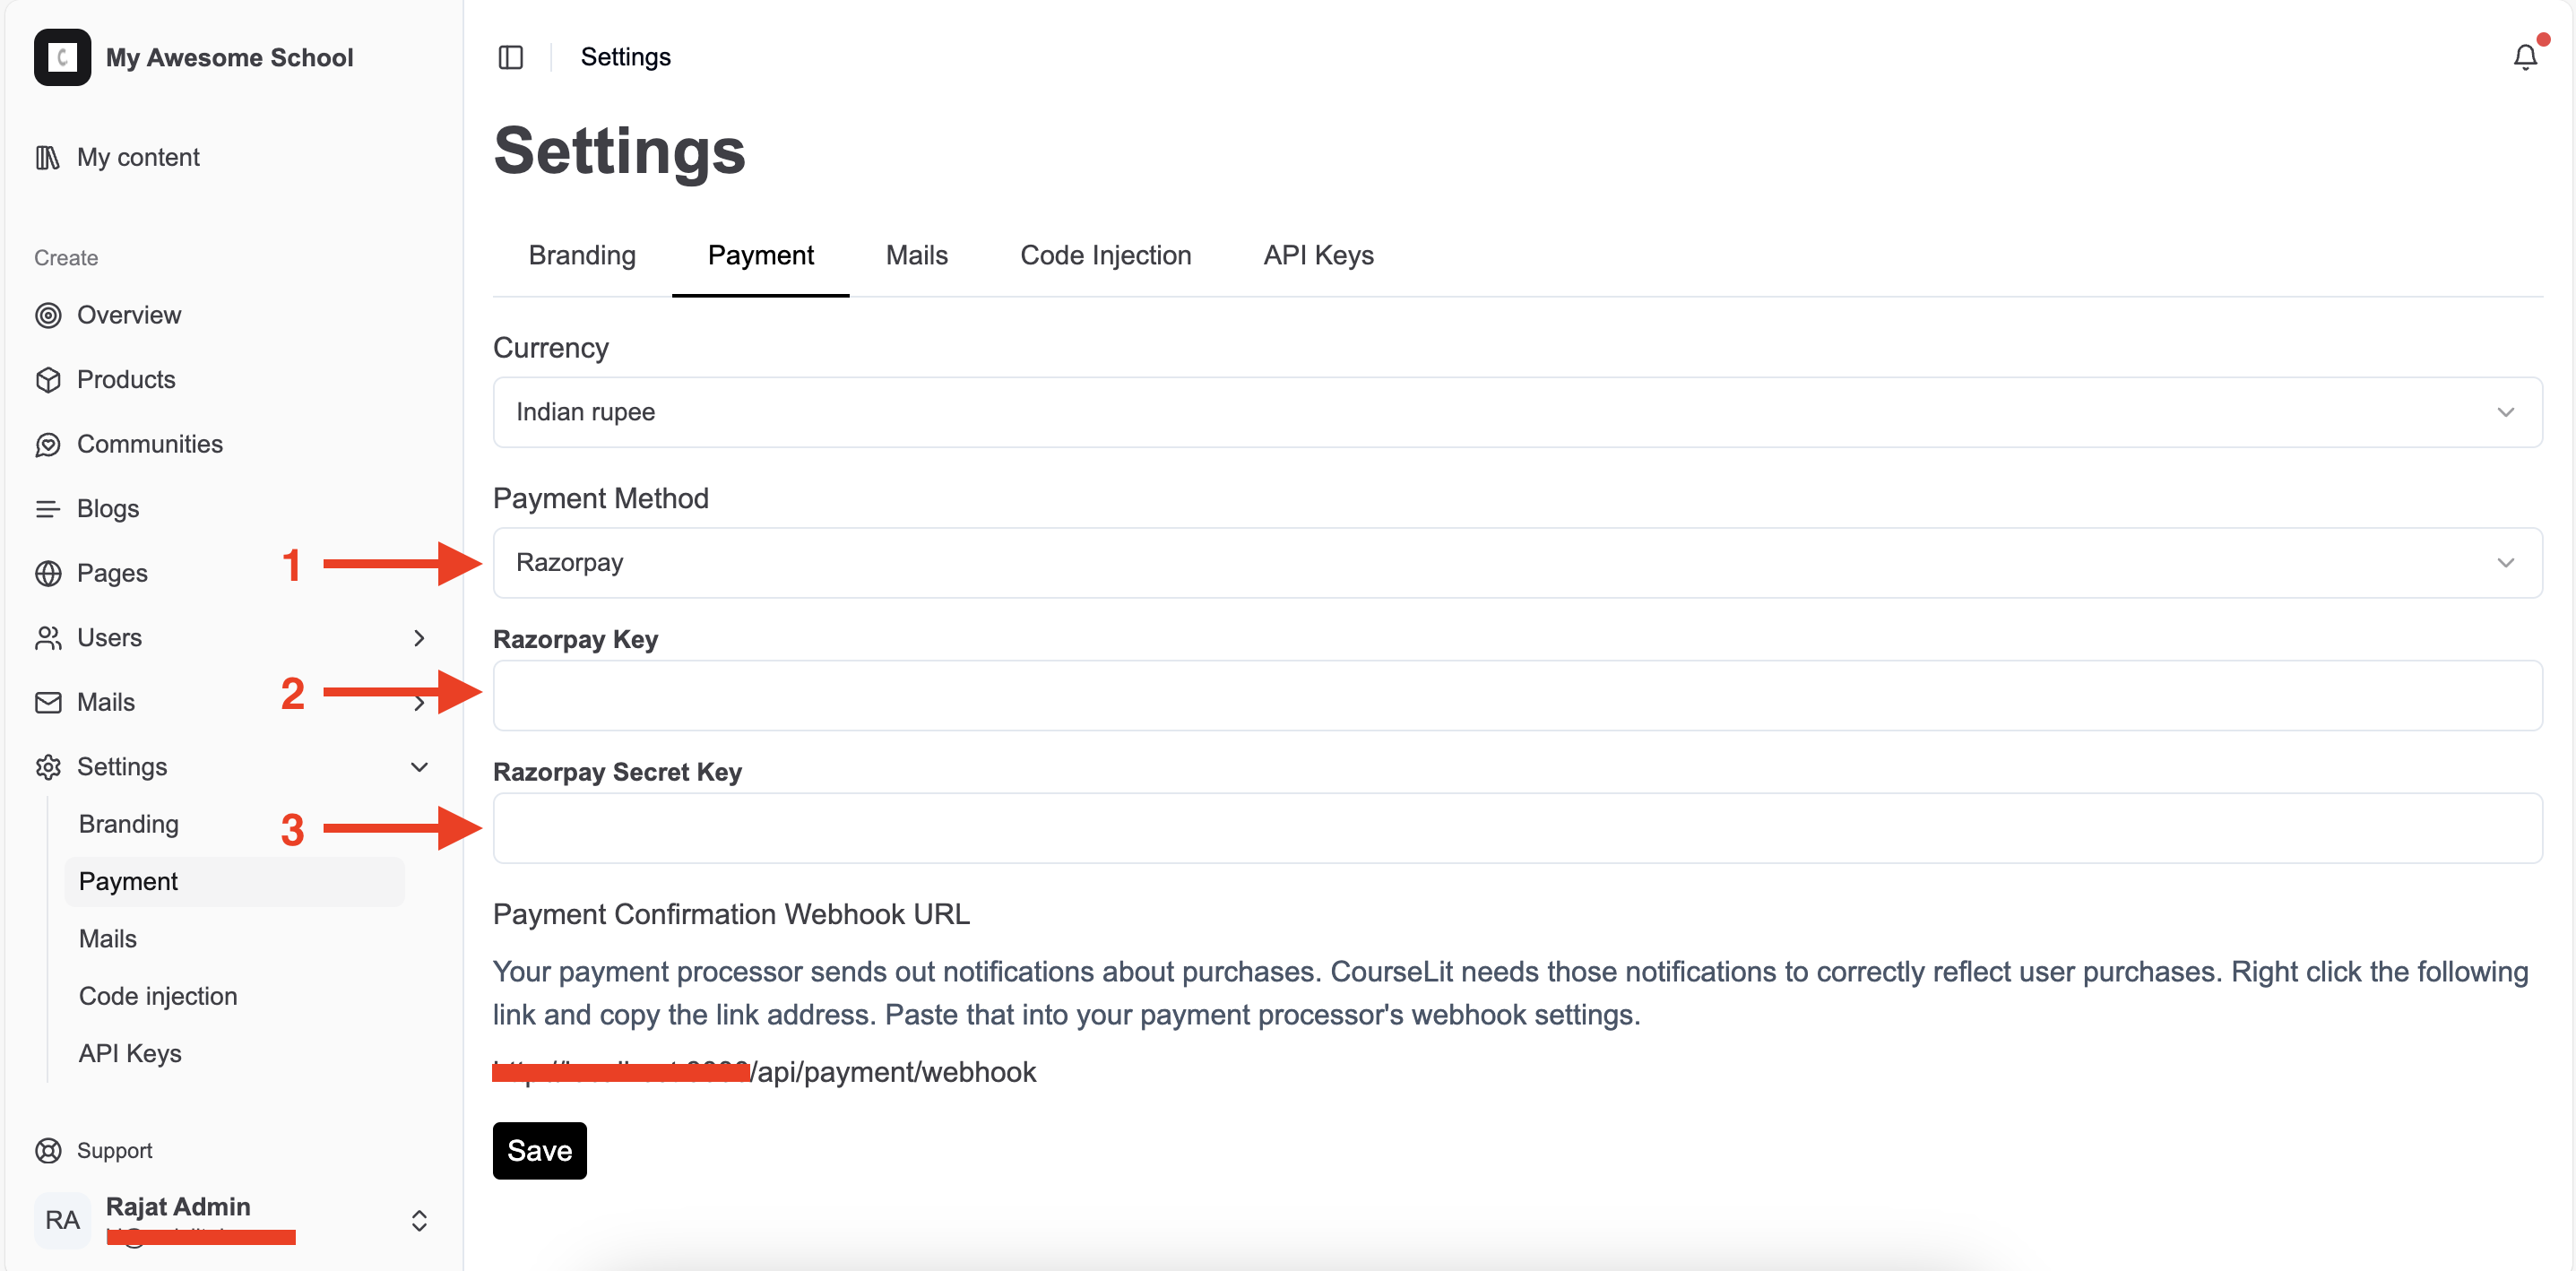
- In your CourseLit school, go to the
Settings > Paymenttab and selectRazorpayin thePayment Methoddropdown. - Enter your Razorpay key and its secret in the
Razorpay KeyandRazorpay Secret Keyinput boxes as shown below:
- Set up the webhooks. Using webhooks, your school receives timely updates about payments from Razorpay.
- In the Razorpay dashboard, go to the
Accounts & Settingstab and selectWebhooks. - Create a new webhook using the button as shown below:
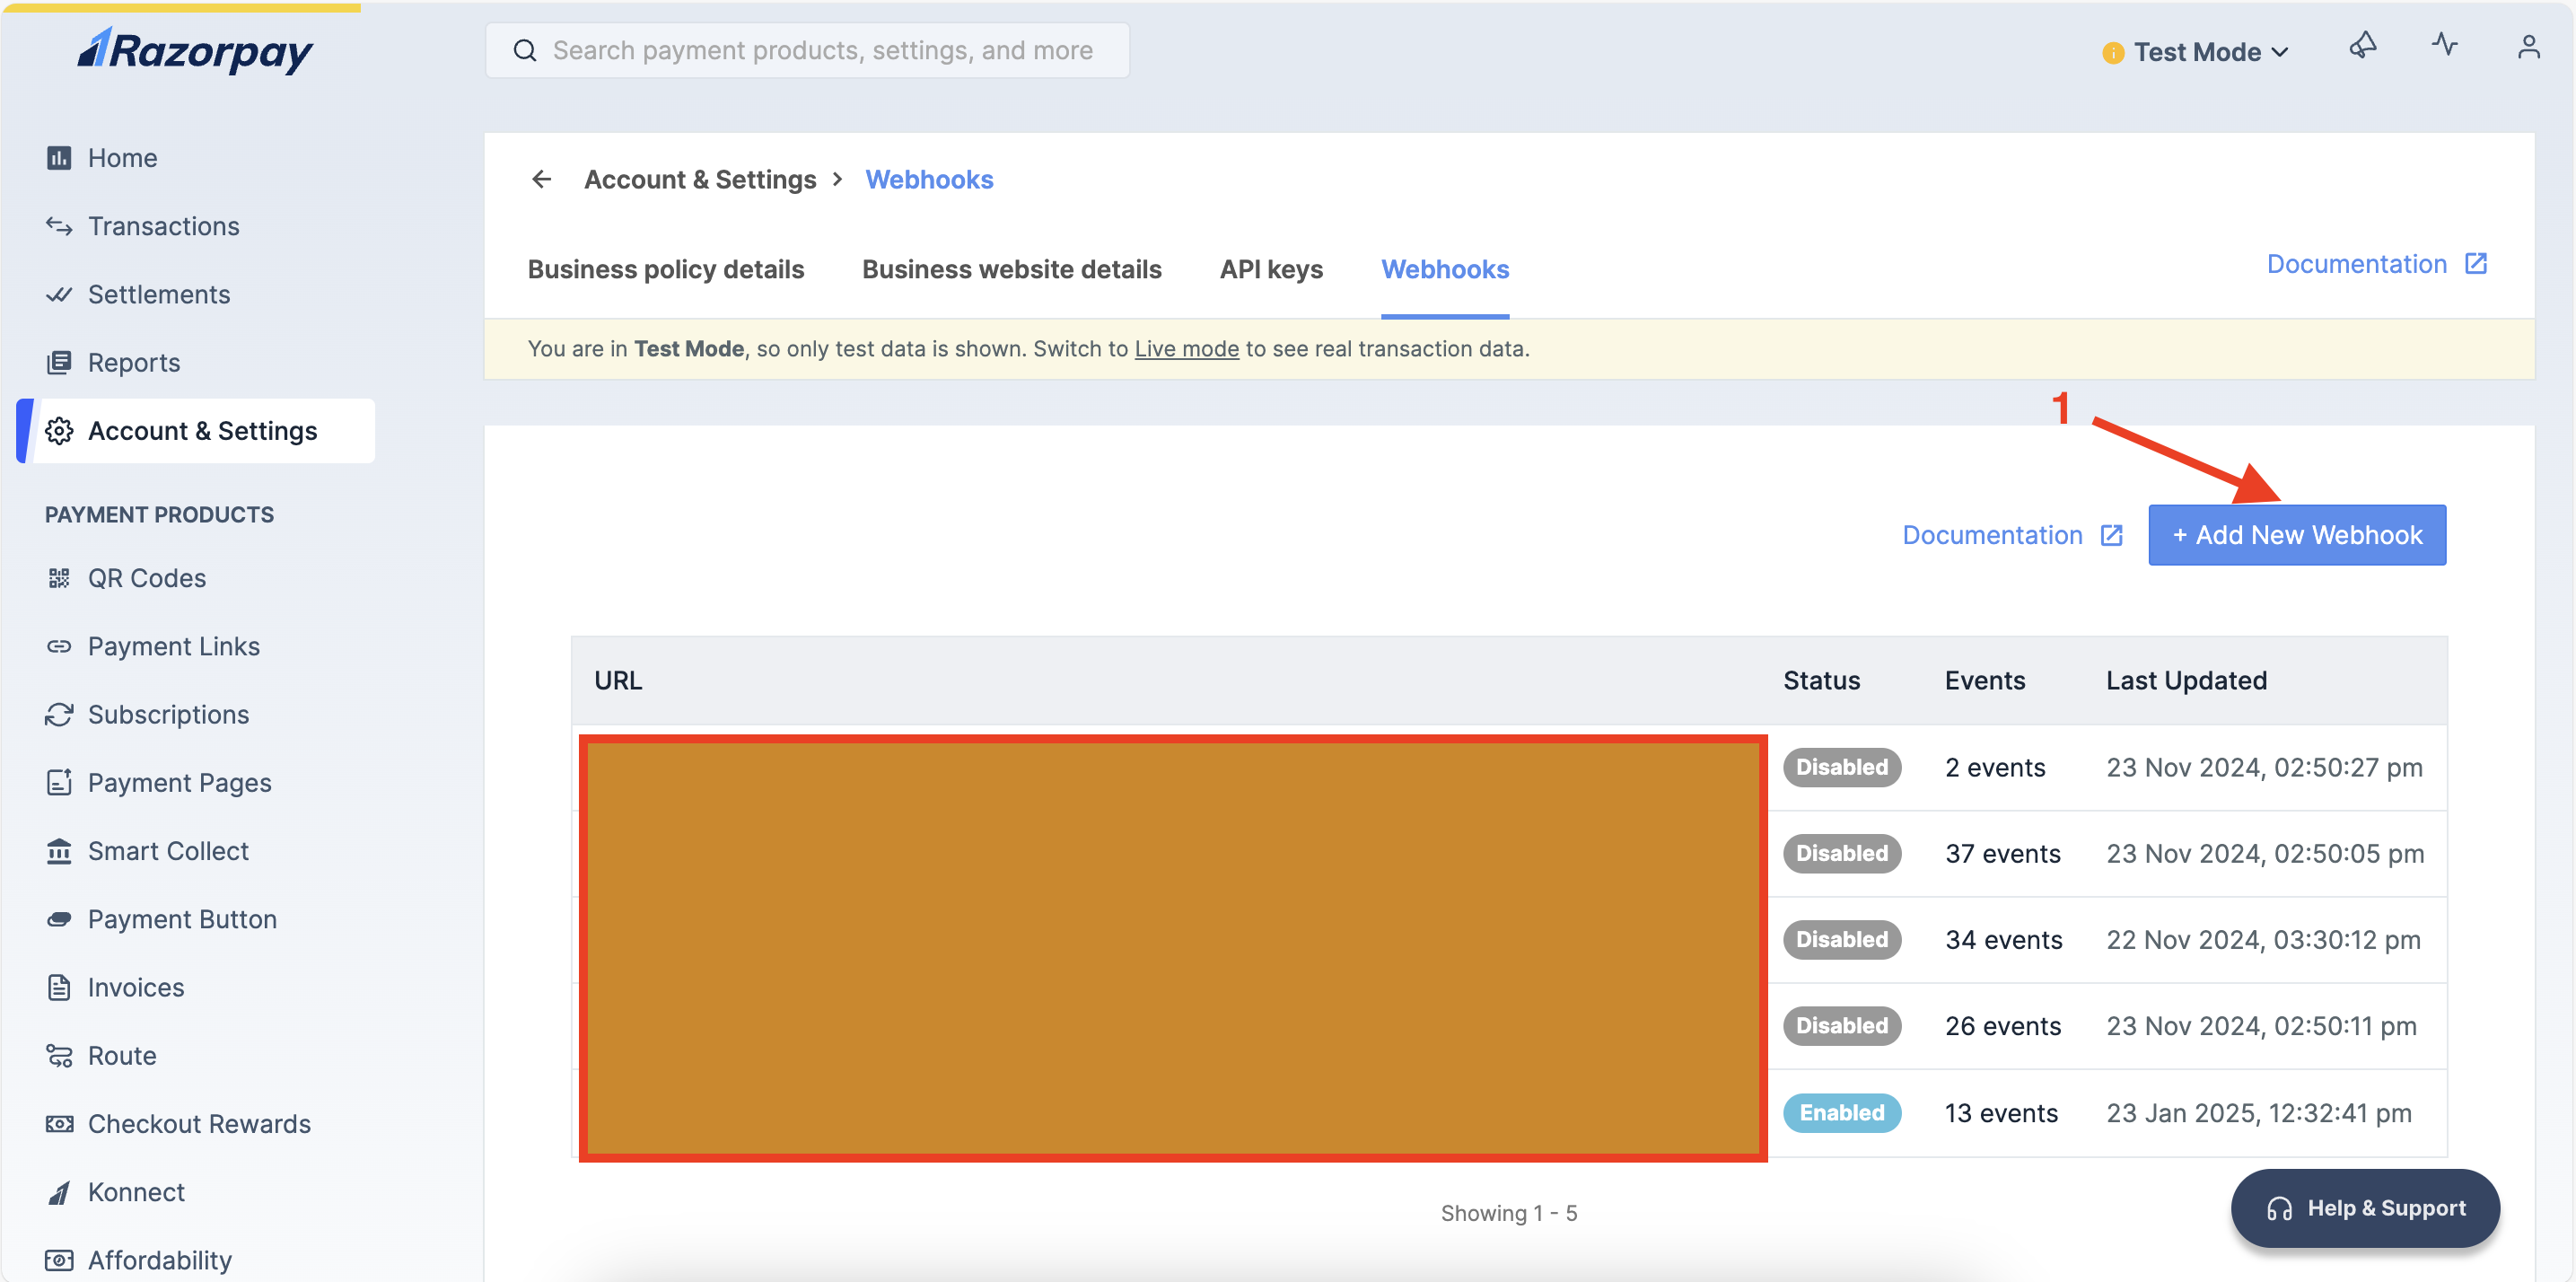
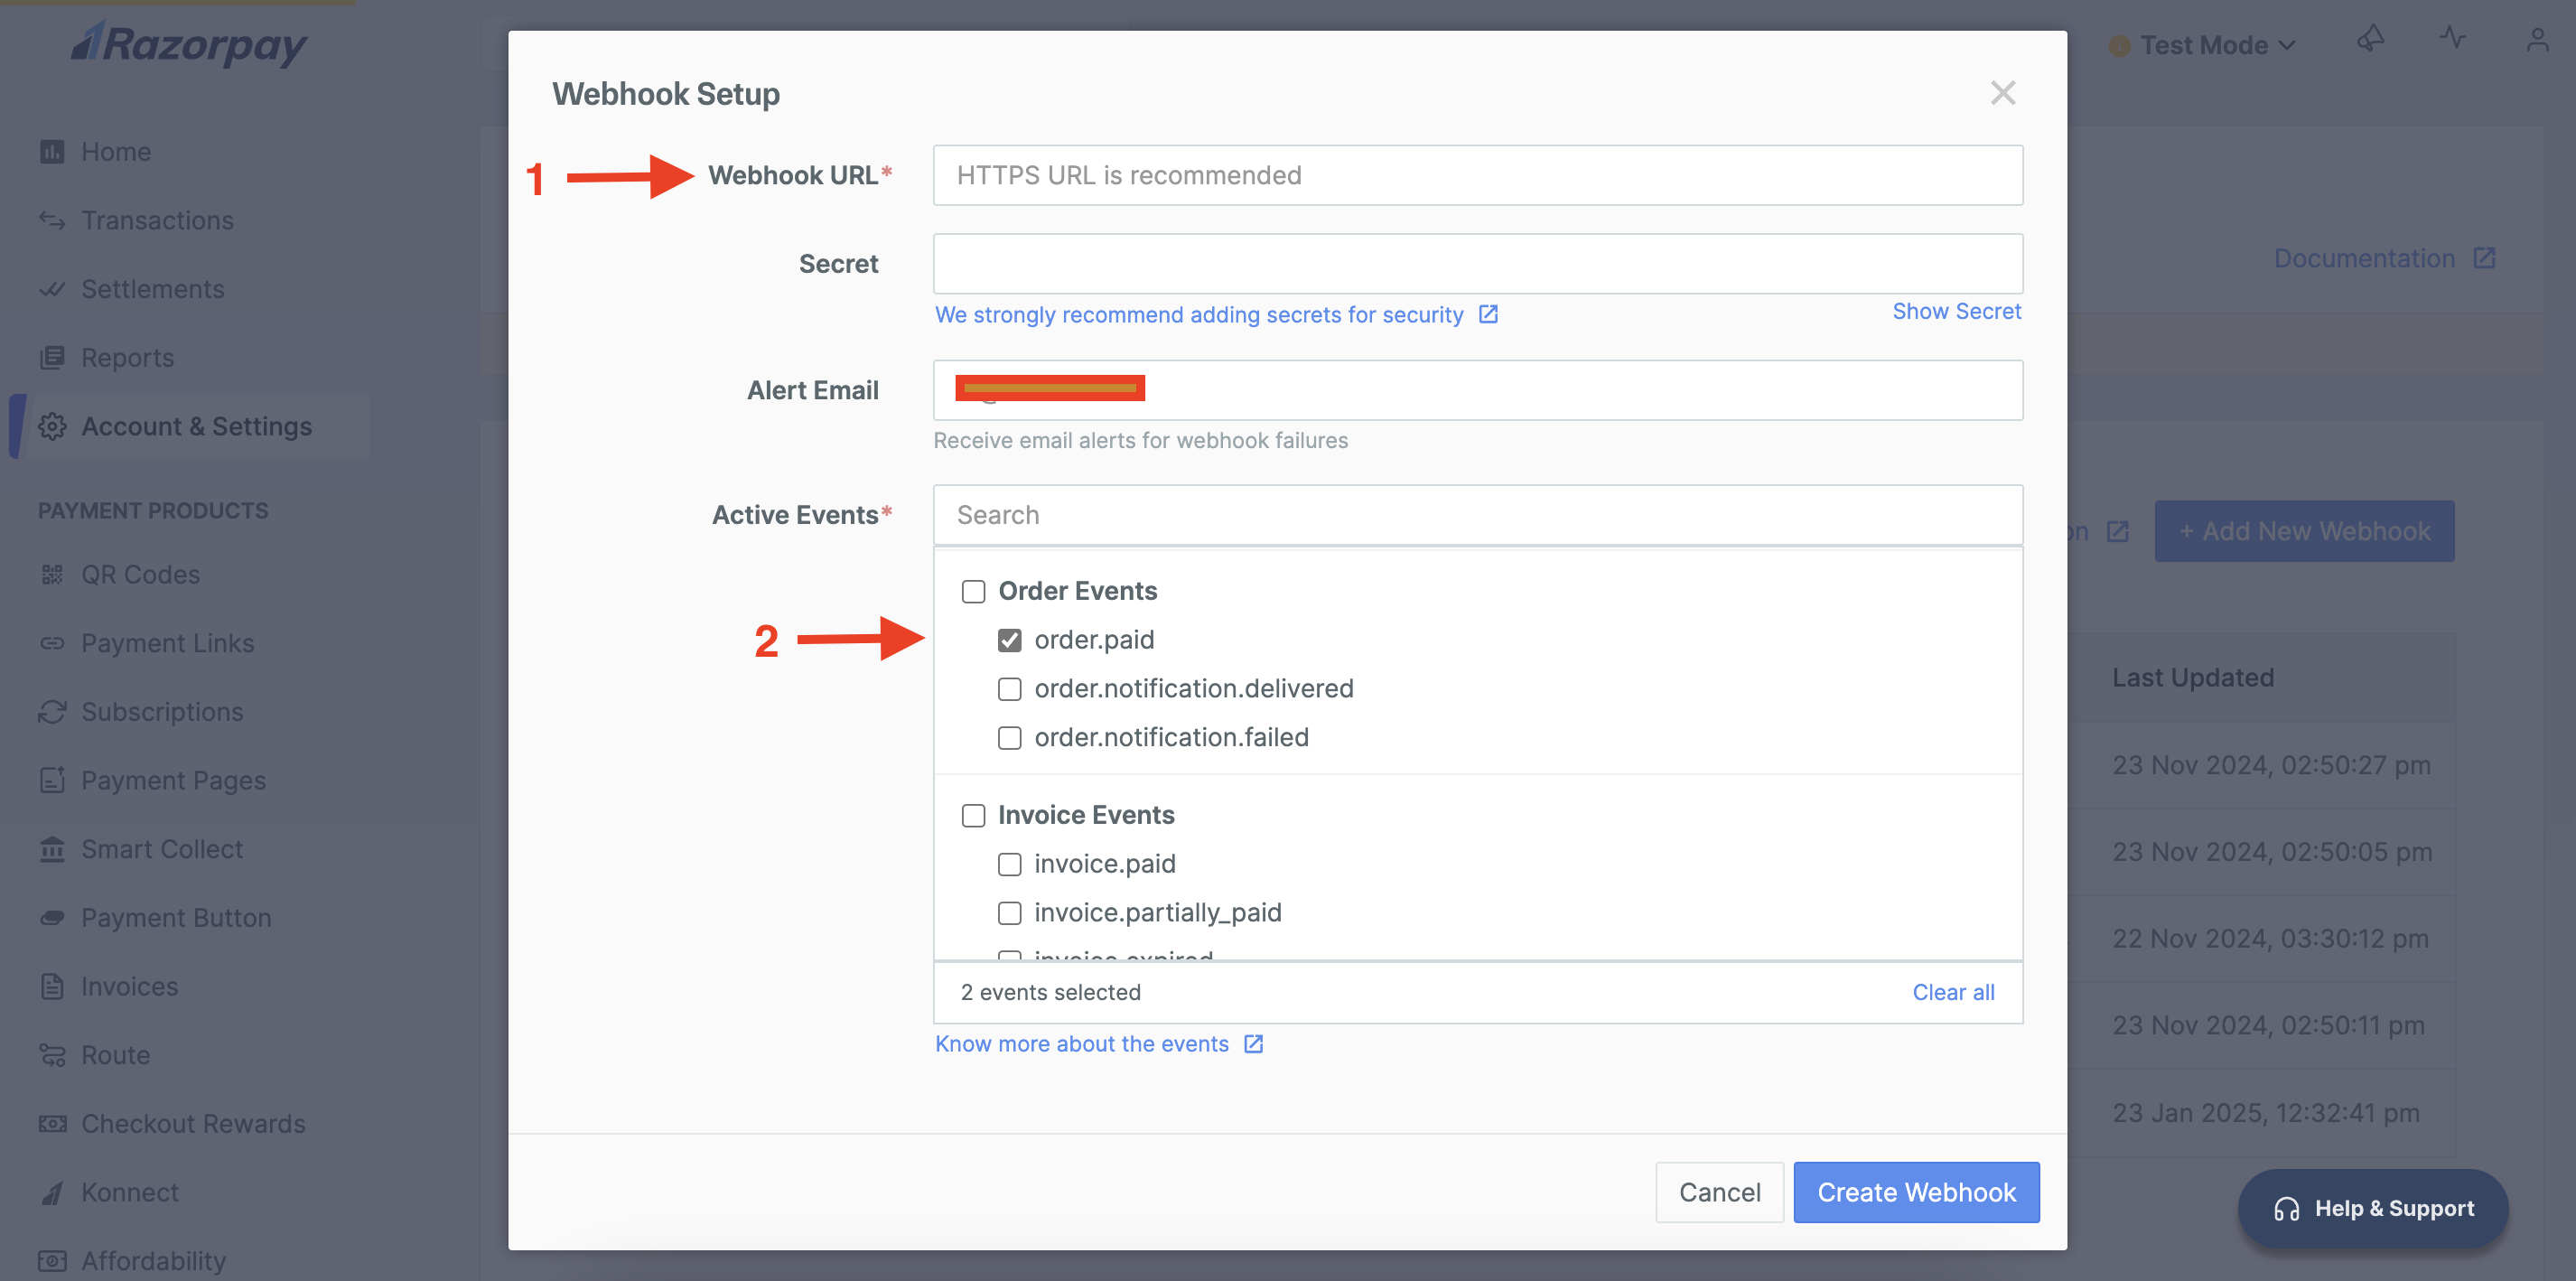
- In the webhook dialog, enter the following:
- The webhook URL for your CourseLit school (listed in the same payment screen in your school).
- Check the following events:
order.paid: For confirming one-time paymentssubscription.charged: For confirming subscription payments
- That’s it! Your Razorpay configuration is complete, and you are ready to receive payments.
Lemon Squeezy setup
Lemon Squeezy does not support creating custom products on the fly. Hence, we have built around the restrictions laid down by Lemon Squeezy. That’s why we call our integration experimental. If something does not work, reach out to us.
-
Sign up for an account on Lemon Squeezy and get your business approved (or use a test account).
-
In the Lemon Squeezy dashboard, go to
Productsand click on theNew productbutton to create a generic product.
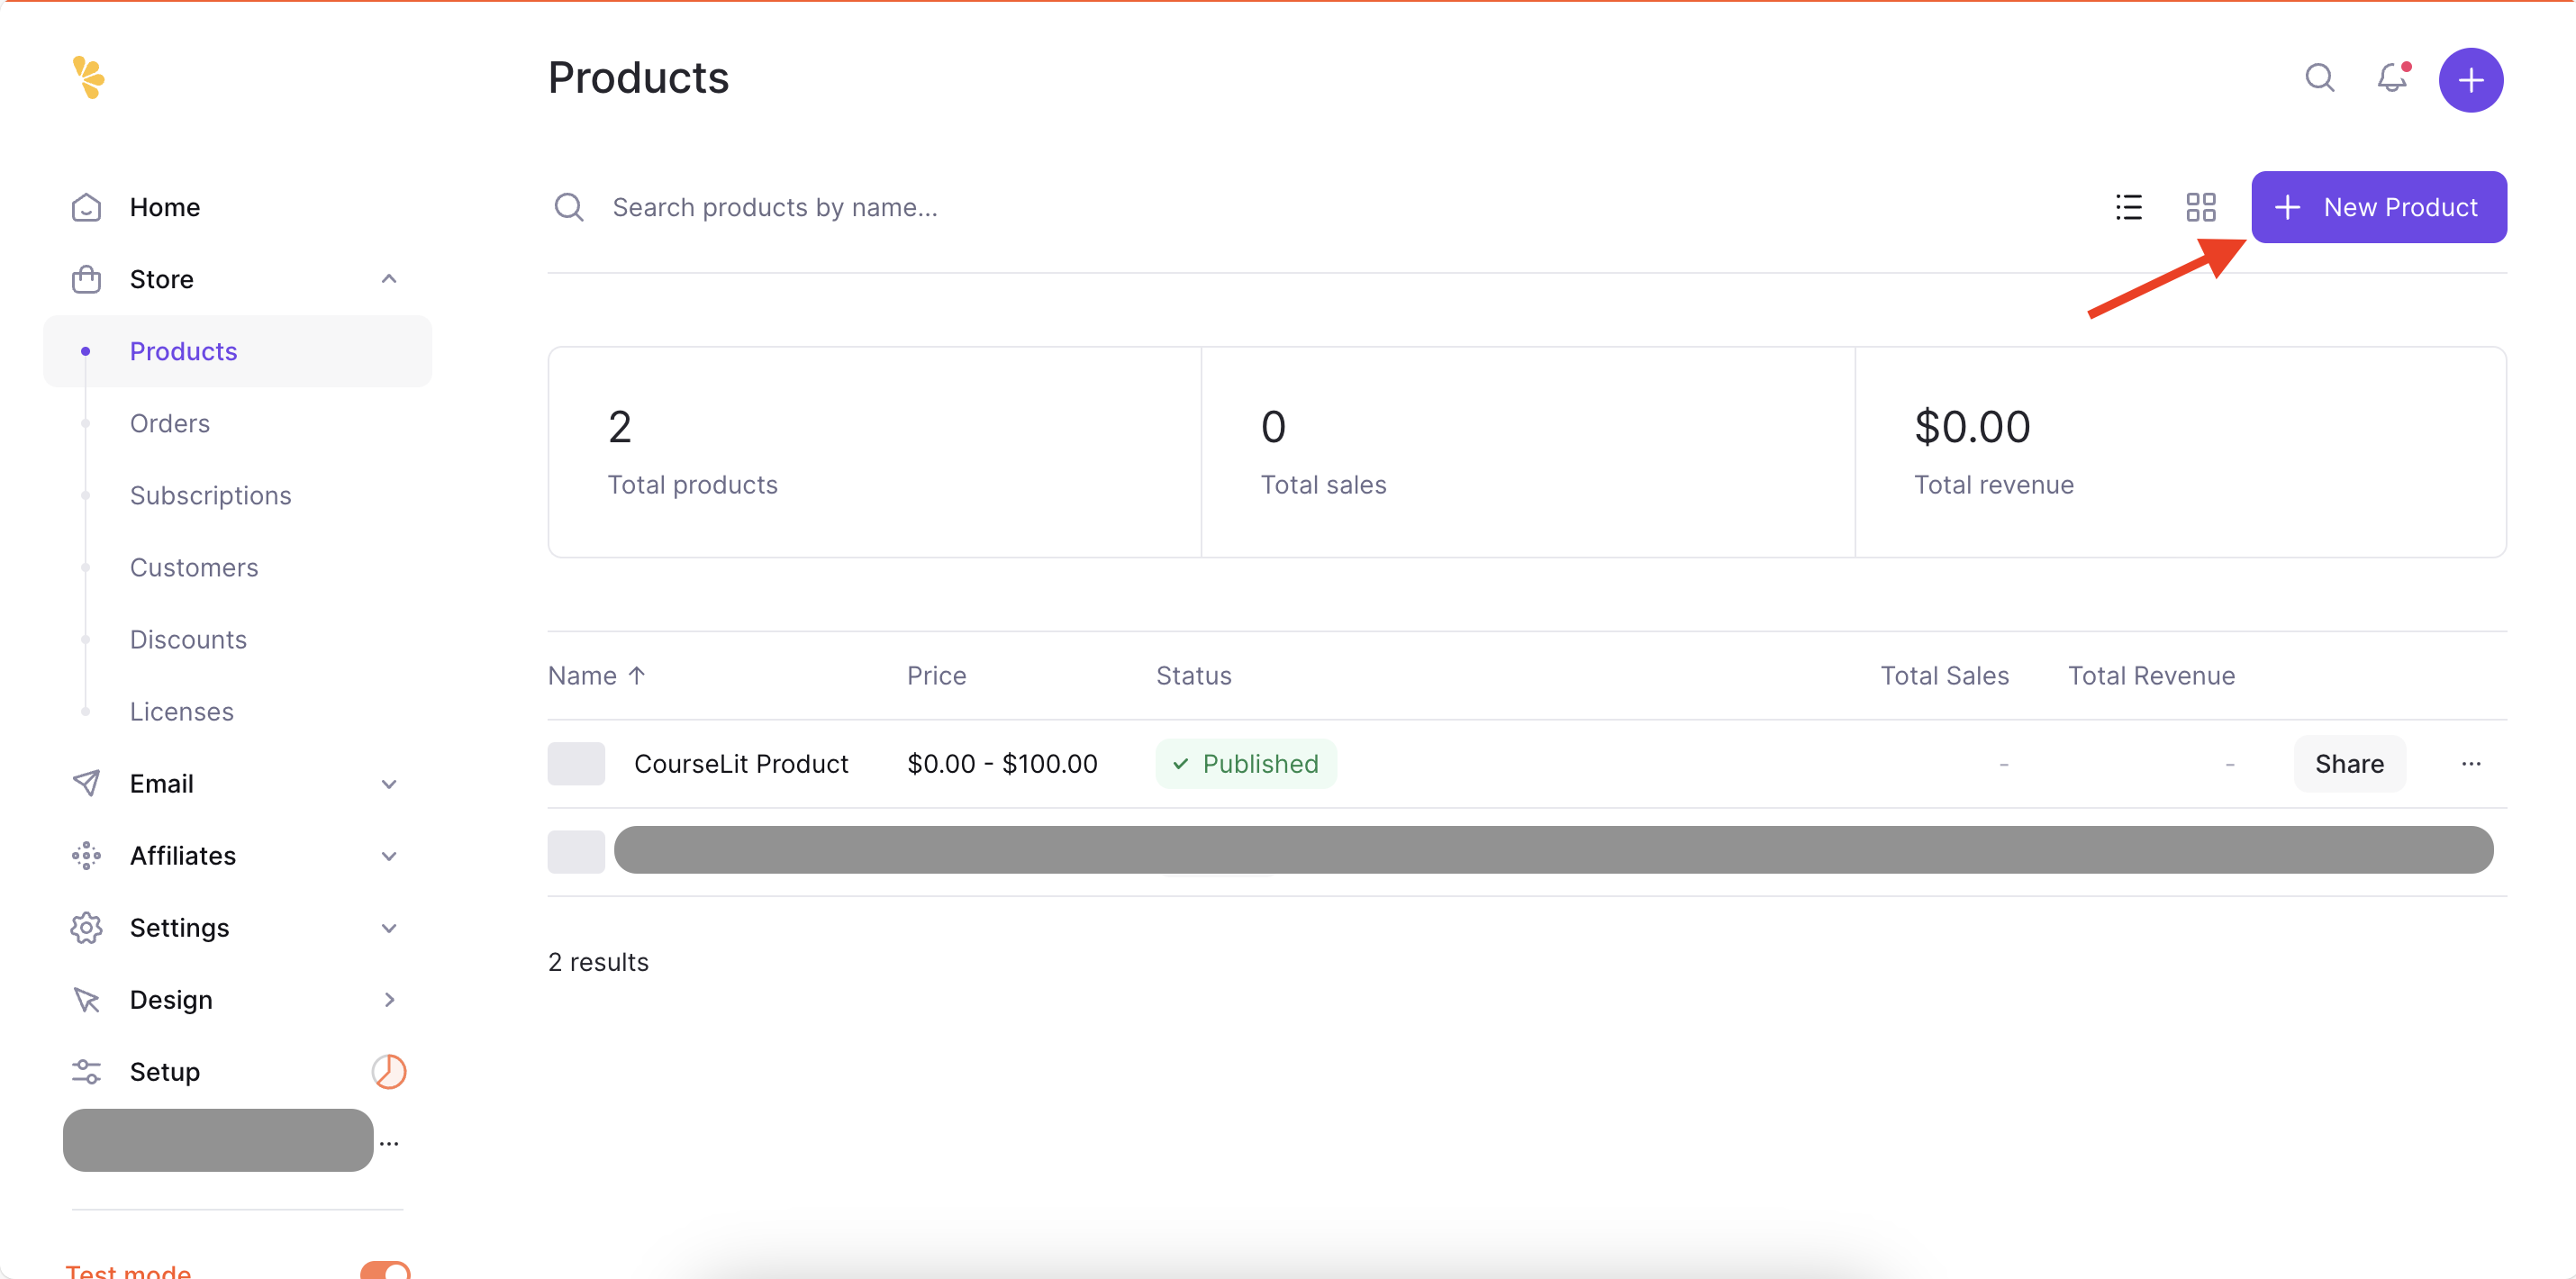
This generic product will be used to create checkouts since Lemon Squeezy does not allow creating custom products on the fly. -
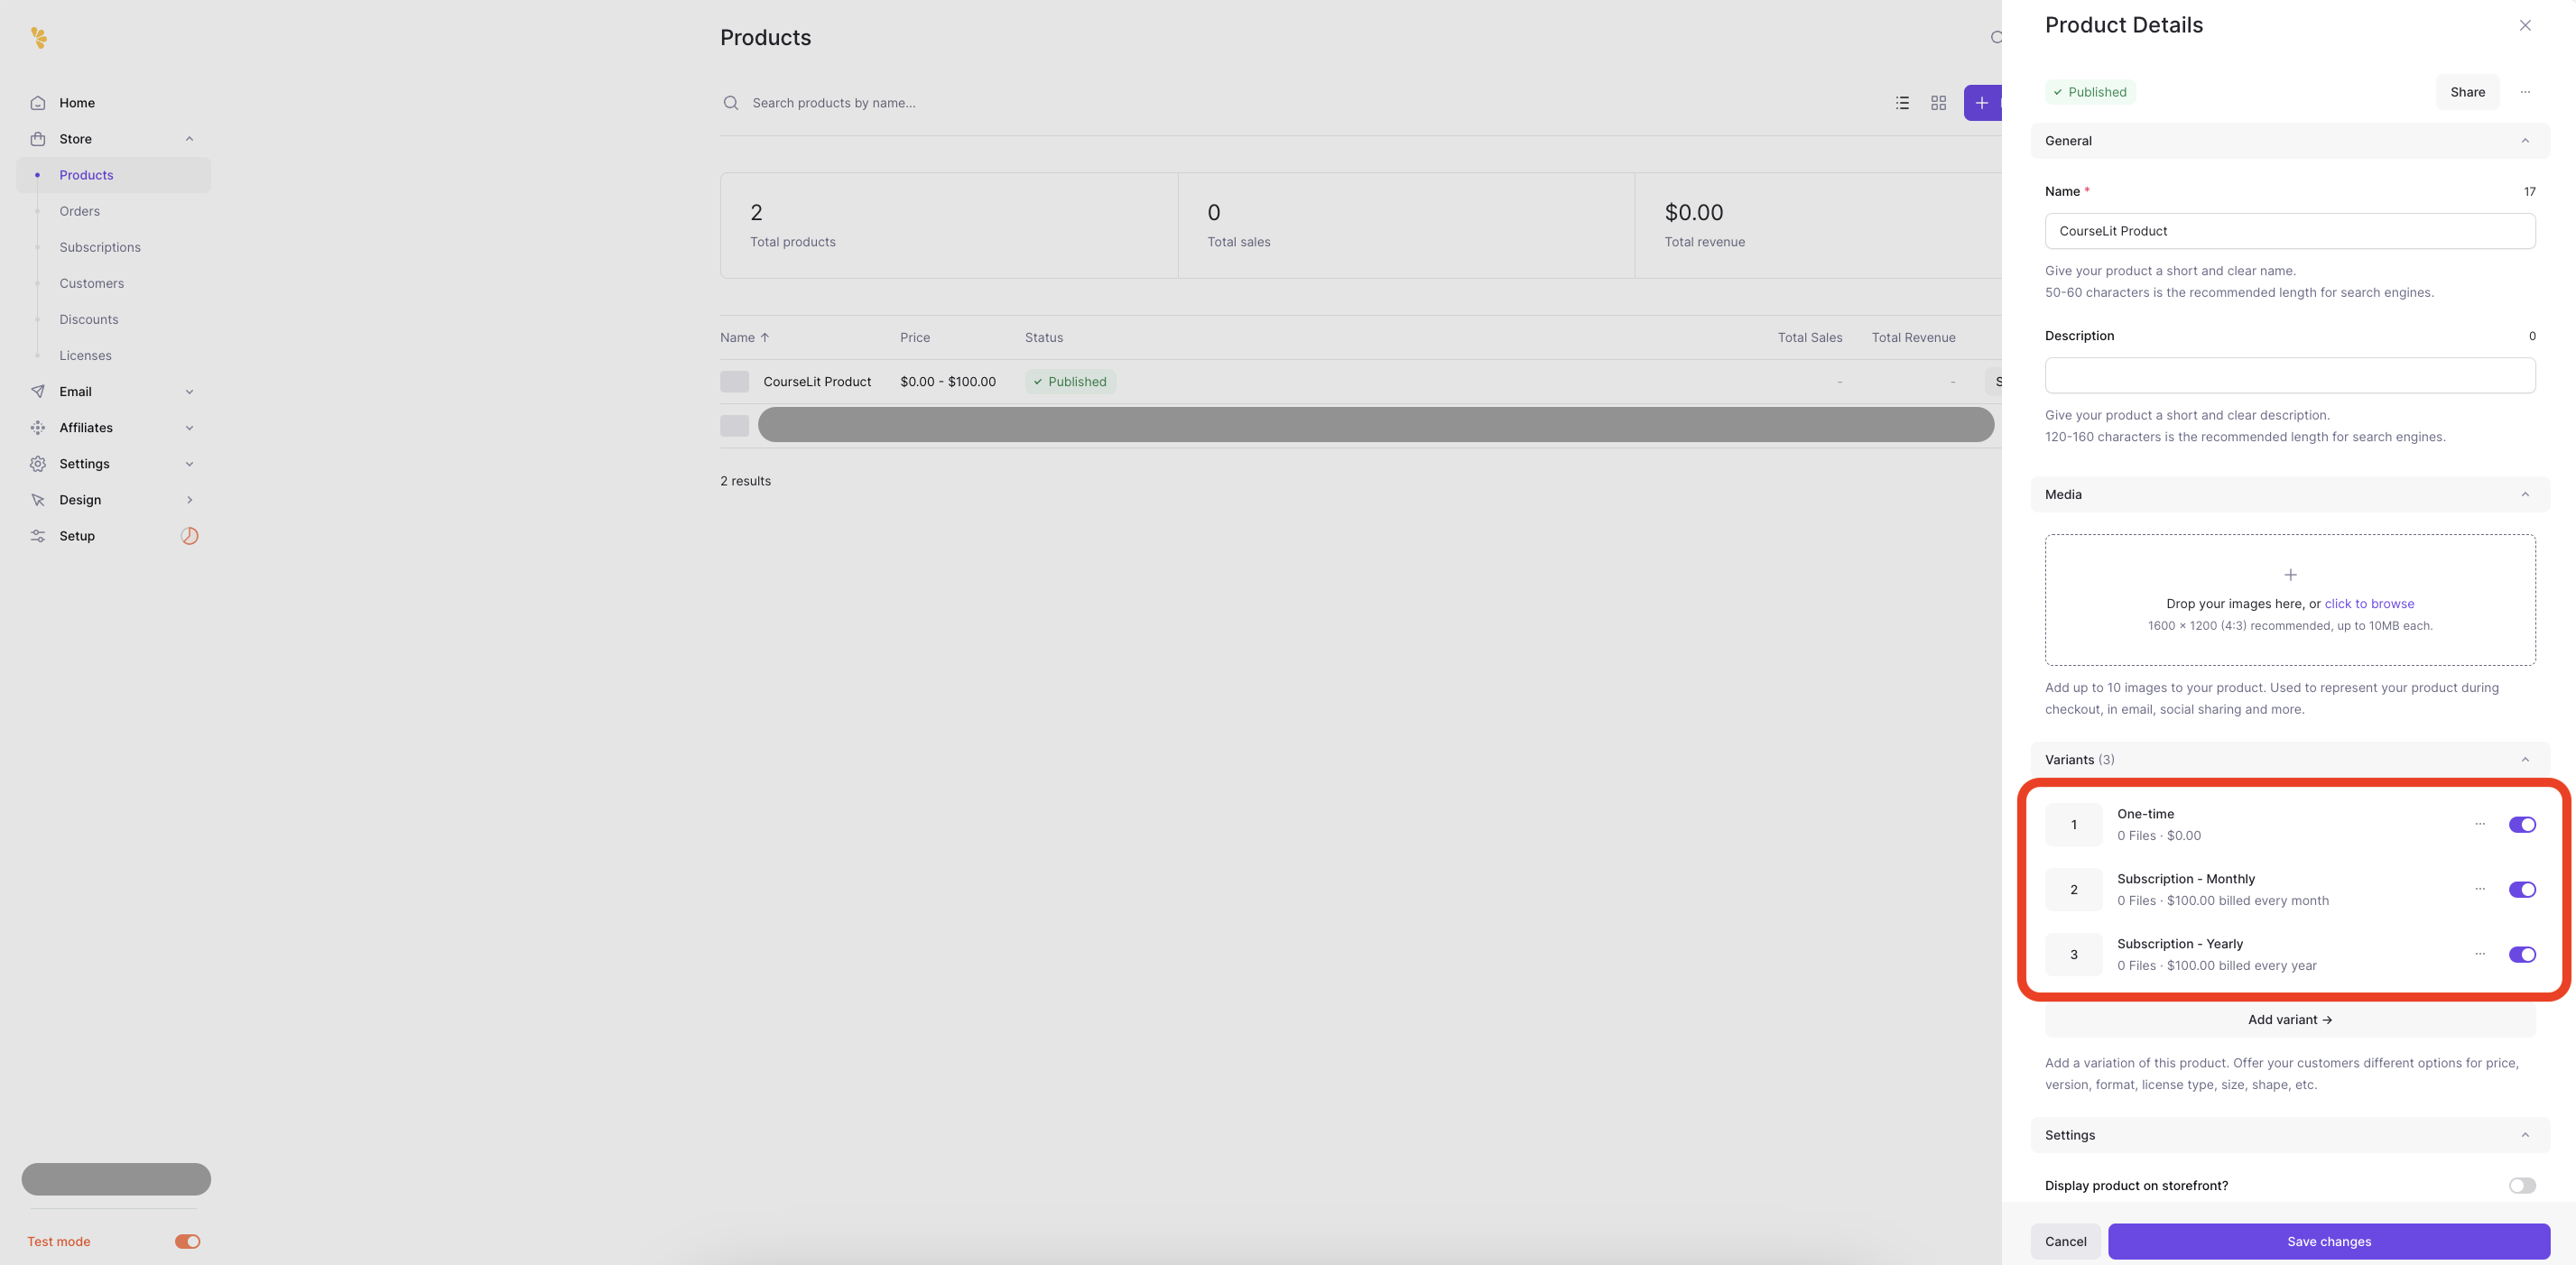
In the sidebar form that slides in, enter the product name and create three variants as described below.
You can name these variants whatever you like, as we will use the
Variant IDsinstead of variant names. The same goes for pricing—we only care about the pricing type, not the actual price set on a variant, as we will override it during checkout.- A variant with one-time pricing: To enable one-time payments in CourseLit
- A variant with subscription pricing with a monthly frequency: To enable monthly subscriptions and EMIs in CourseLit
- A variant with subscription pricing with a yearly frequency: To enable yearly subscriptions in CourseLit
-
The following screenshot shows how to select a variant’s pricing.
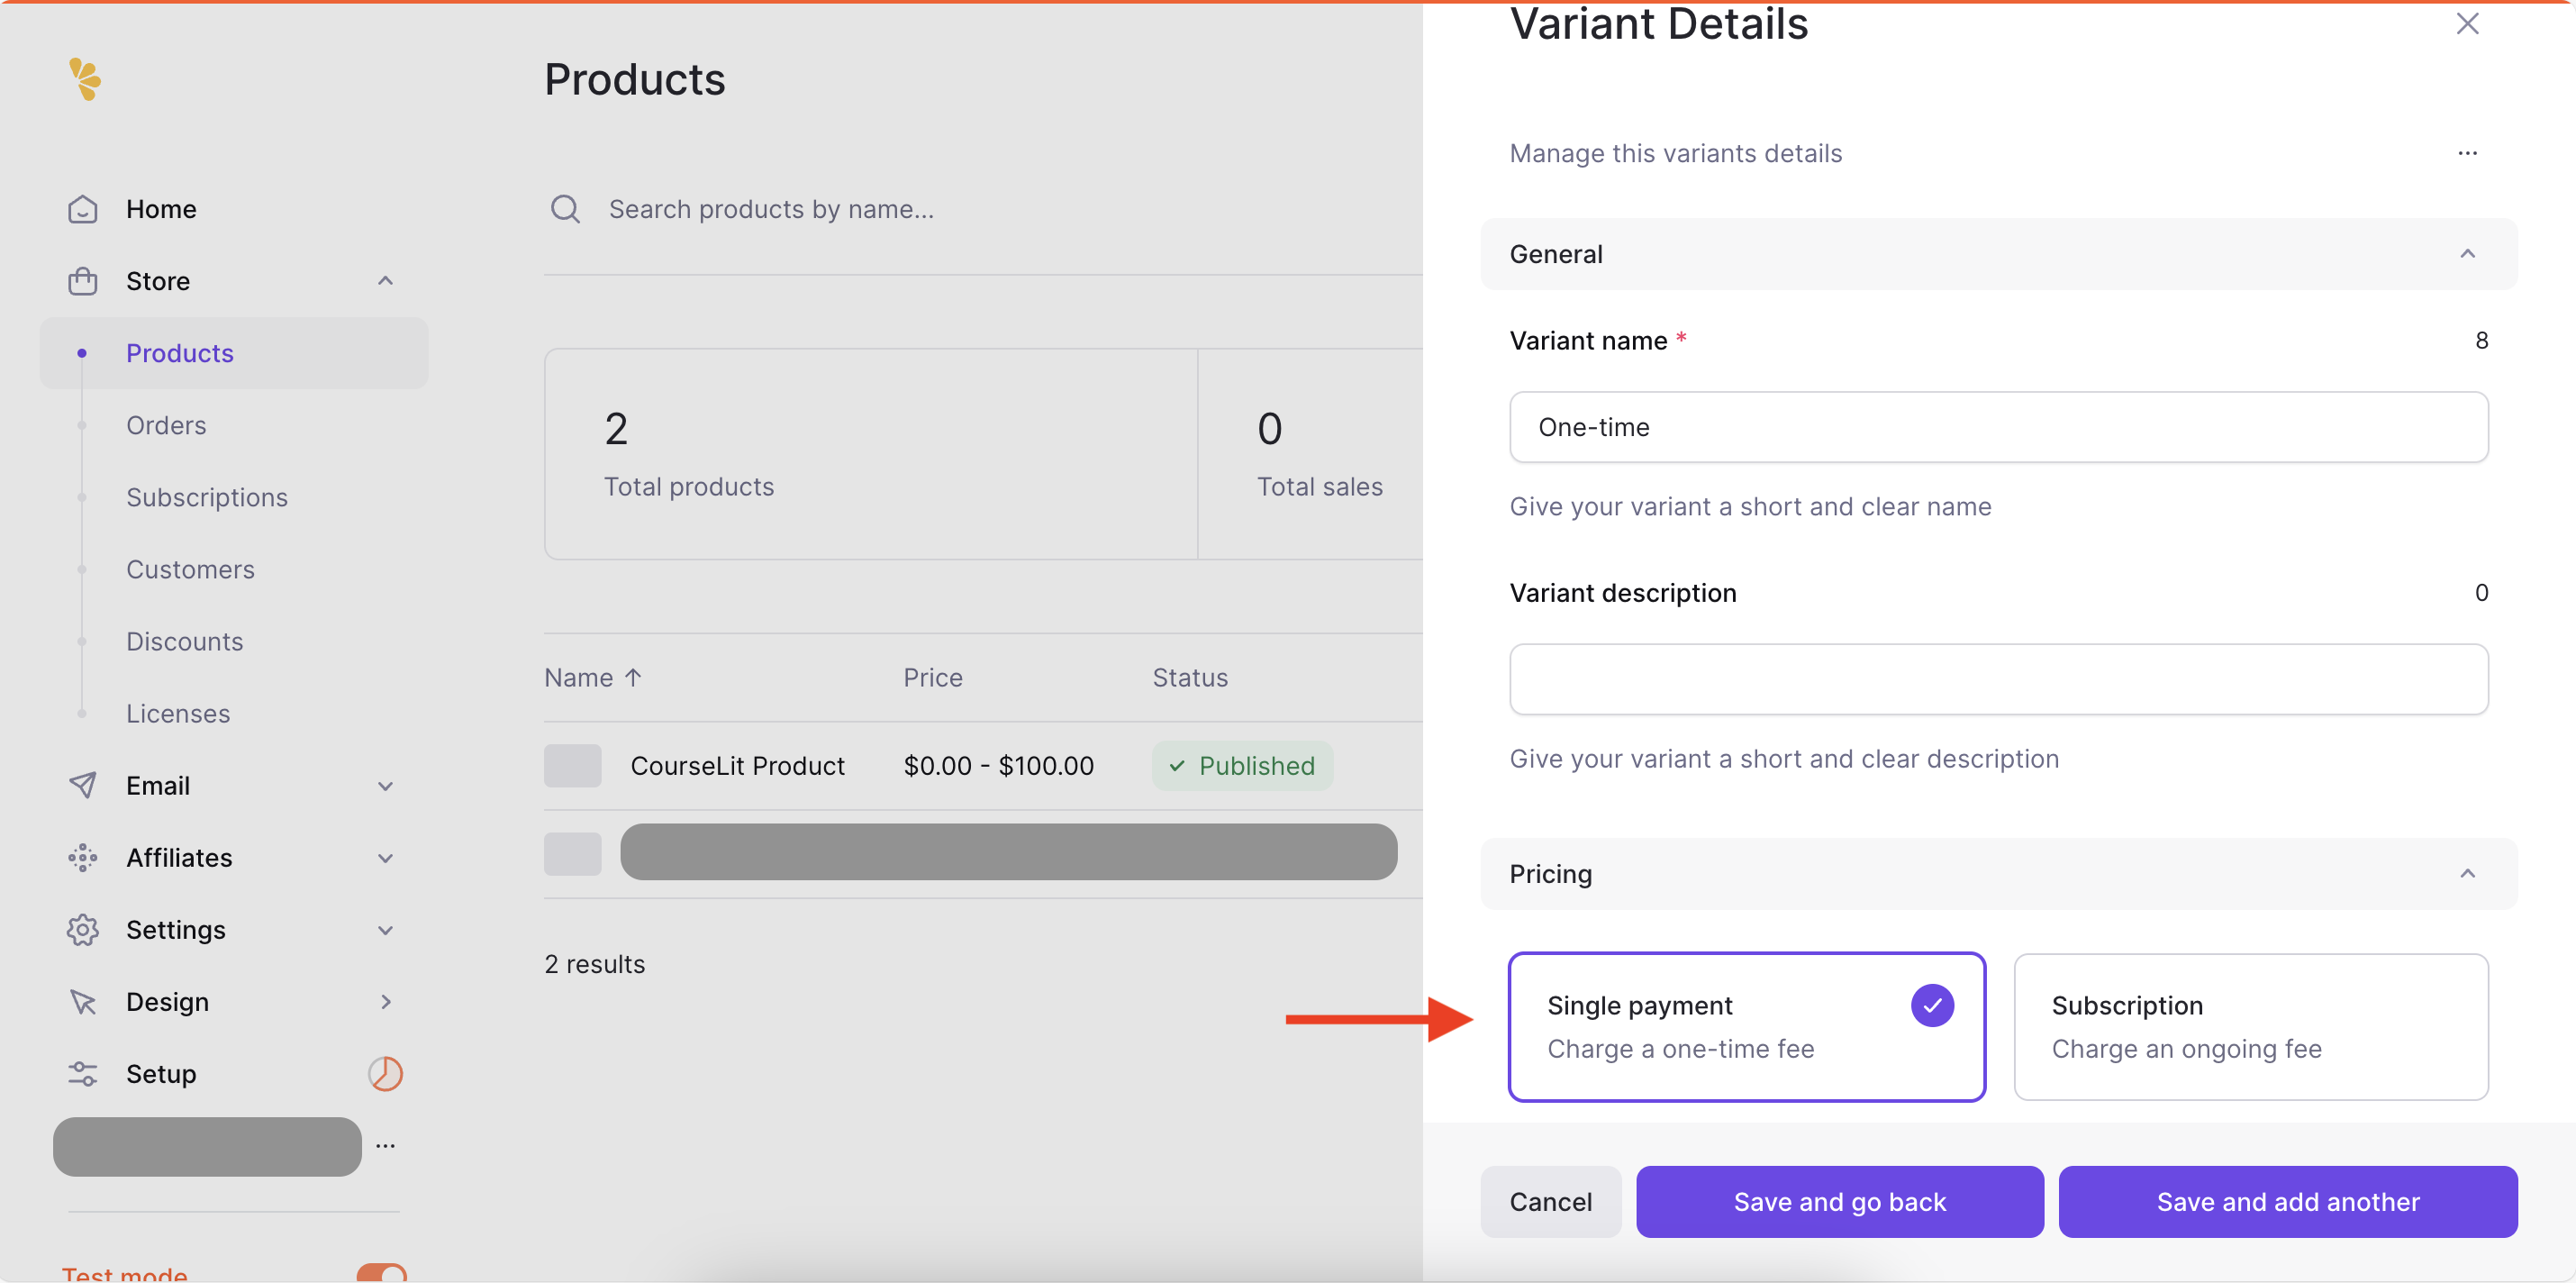
-
In your CourseLit school’s dashboard, go to
Settings > Paymentand configure the settings as described below.
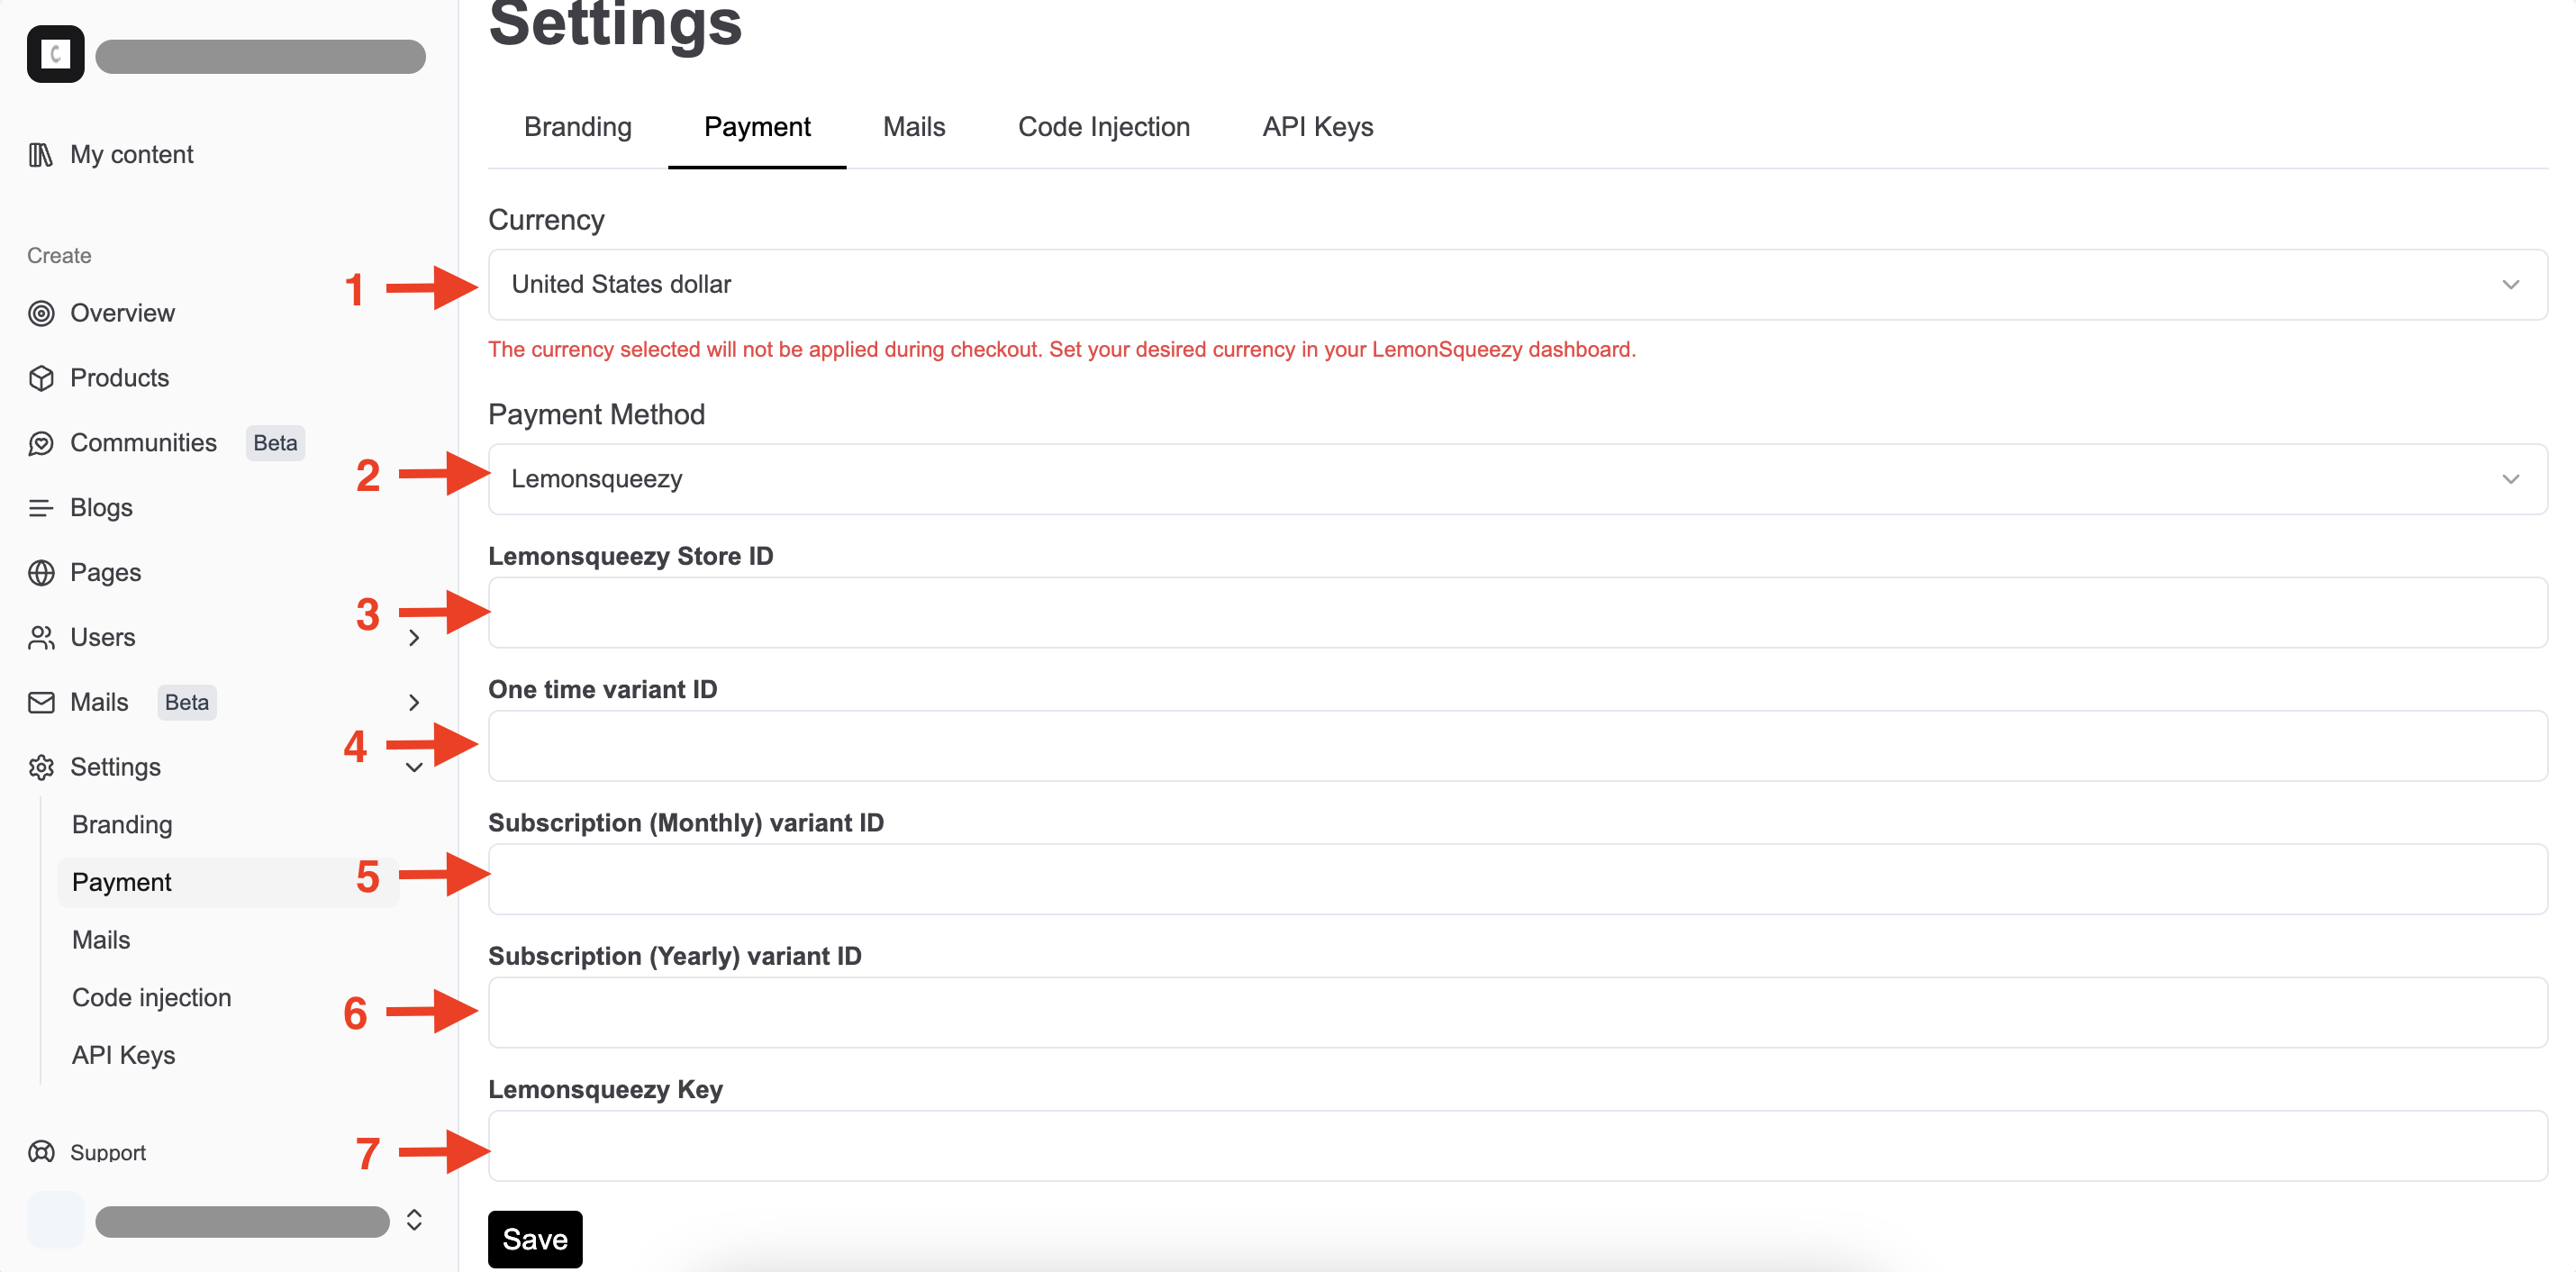
- Currency: This will be visible throughout your school but won’t affect Lemon Squeezy checkouts, as Lemon Squeezy does not allow overriding it via custom checkout.
- Payment method: Select Lemon Squeezy.
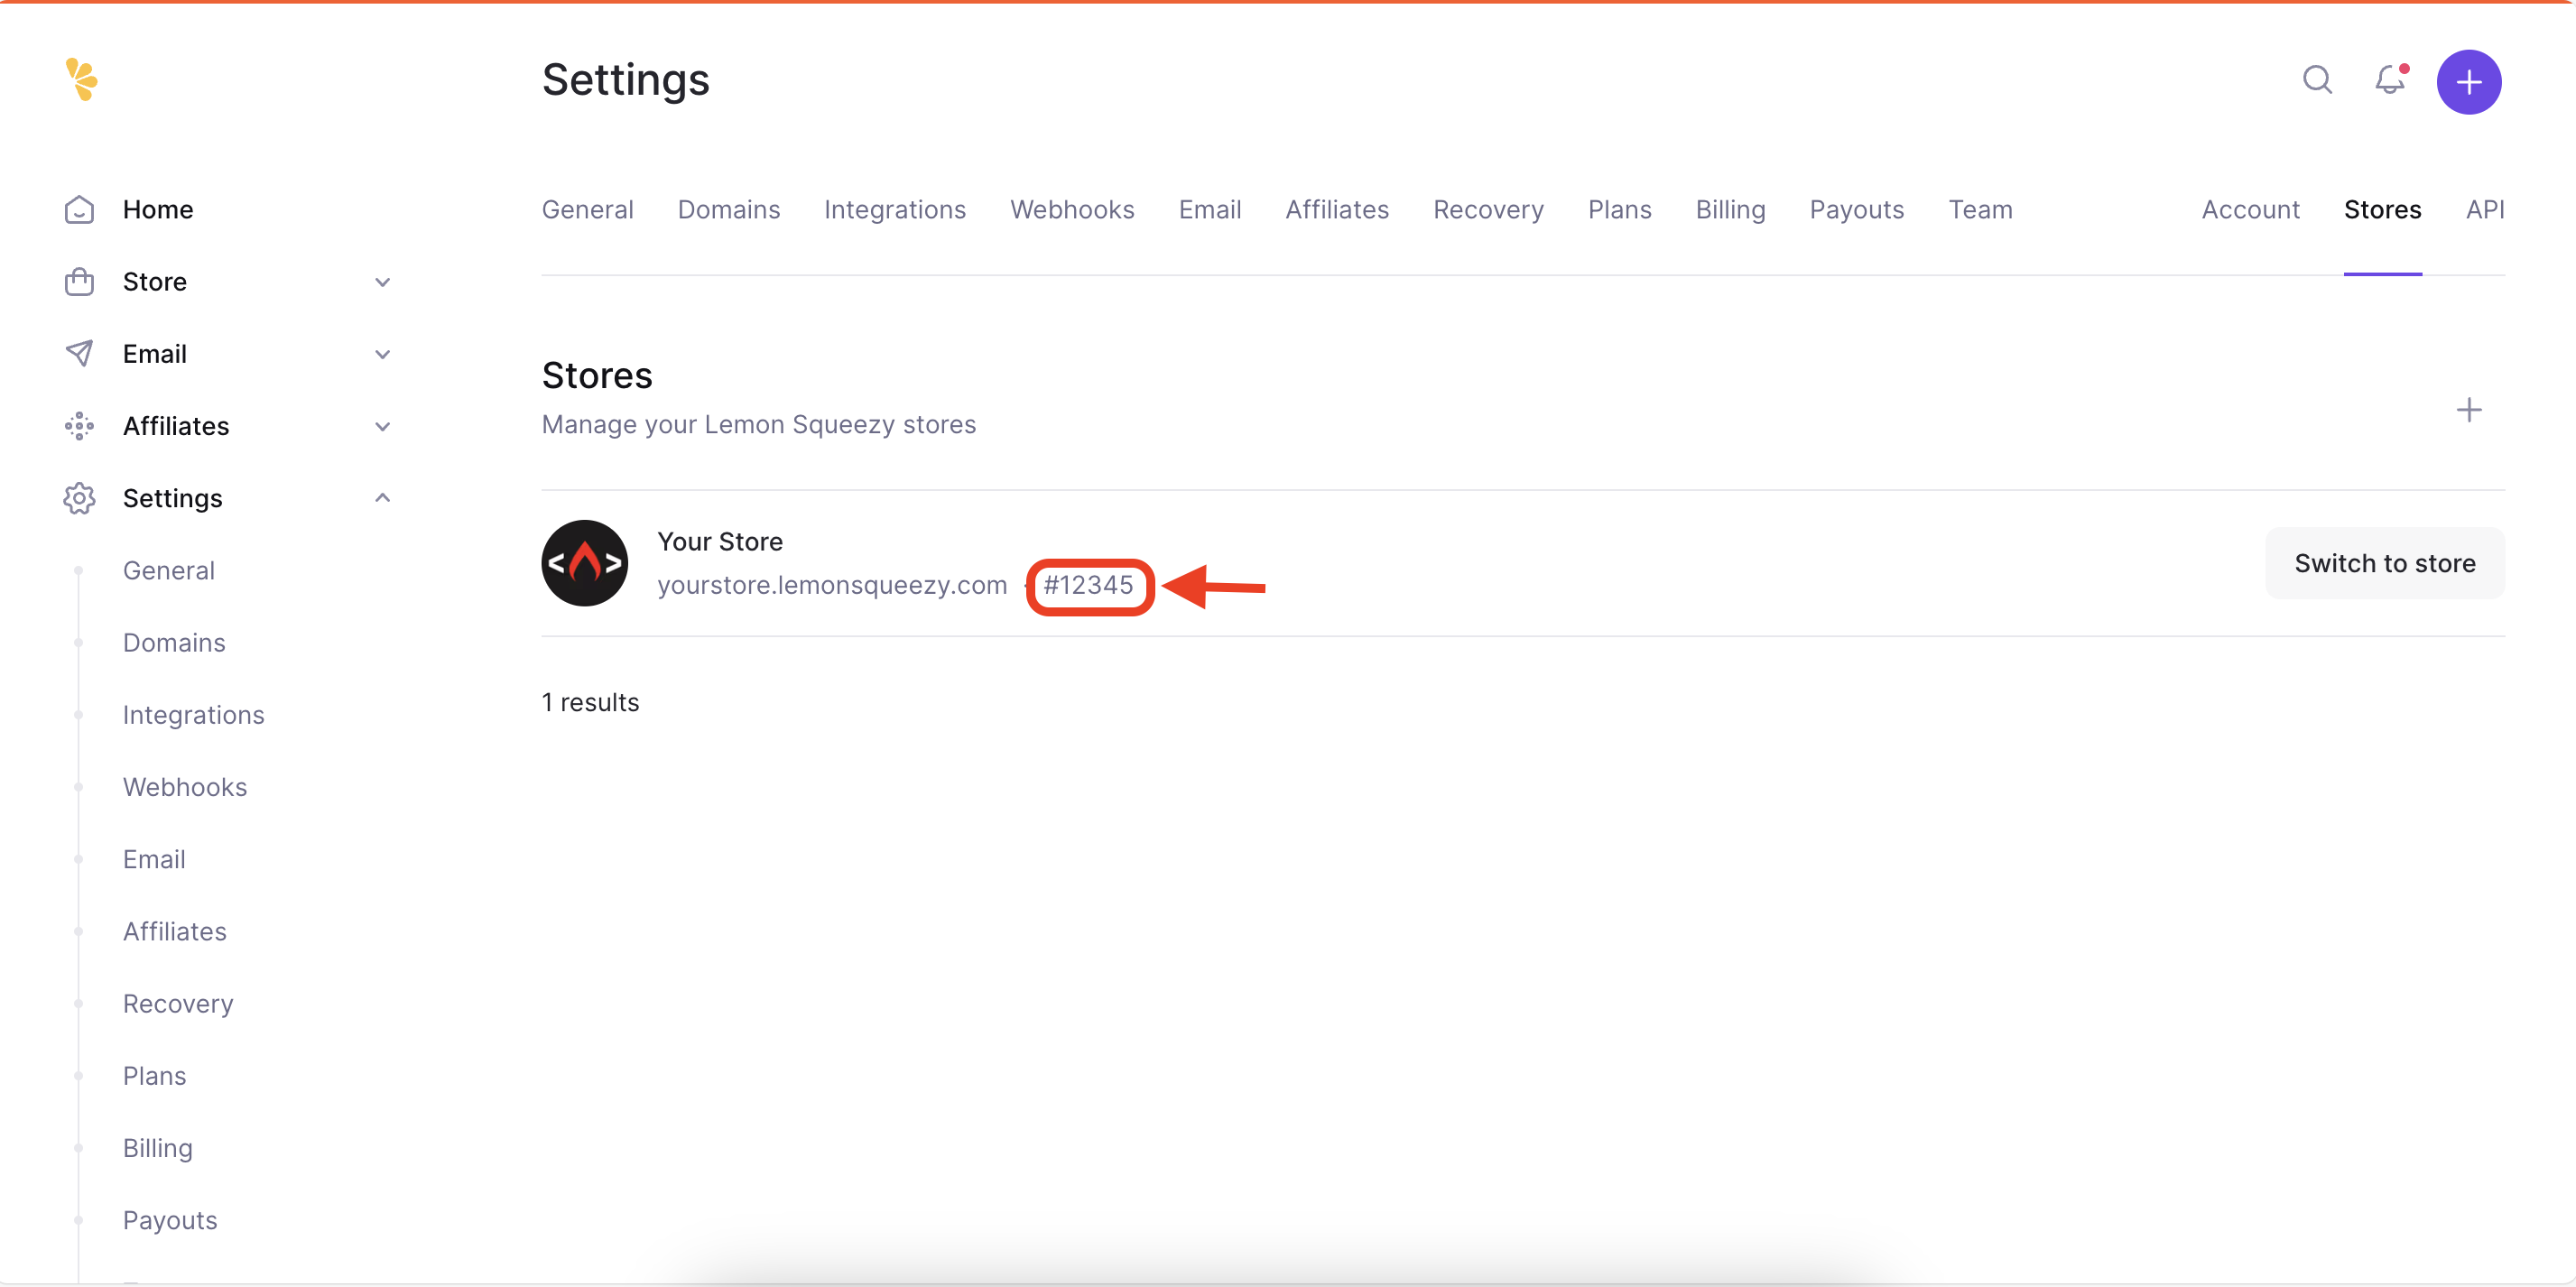
- Lemon Squeezy Store ID: In the Lemon Squeezy dashboard, go to
Settings > Storesas shown below. Copy and paste this ID into the CourseLit settings.
- One-time variant ID: In the Lemon Squeezy dashboard, go to
Productsand click on the product you configured in the steps above. In the slider popup, scroll down to theVariantssection, click the three-dot menu for the one-time variant, and then clickCopy ID. Paste this ID into the CourseLit settings. - Subscription (Monthly) variant ID: Do the same as #4.
- Subscription (Yearly) variant ID: Do the same as #4.
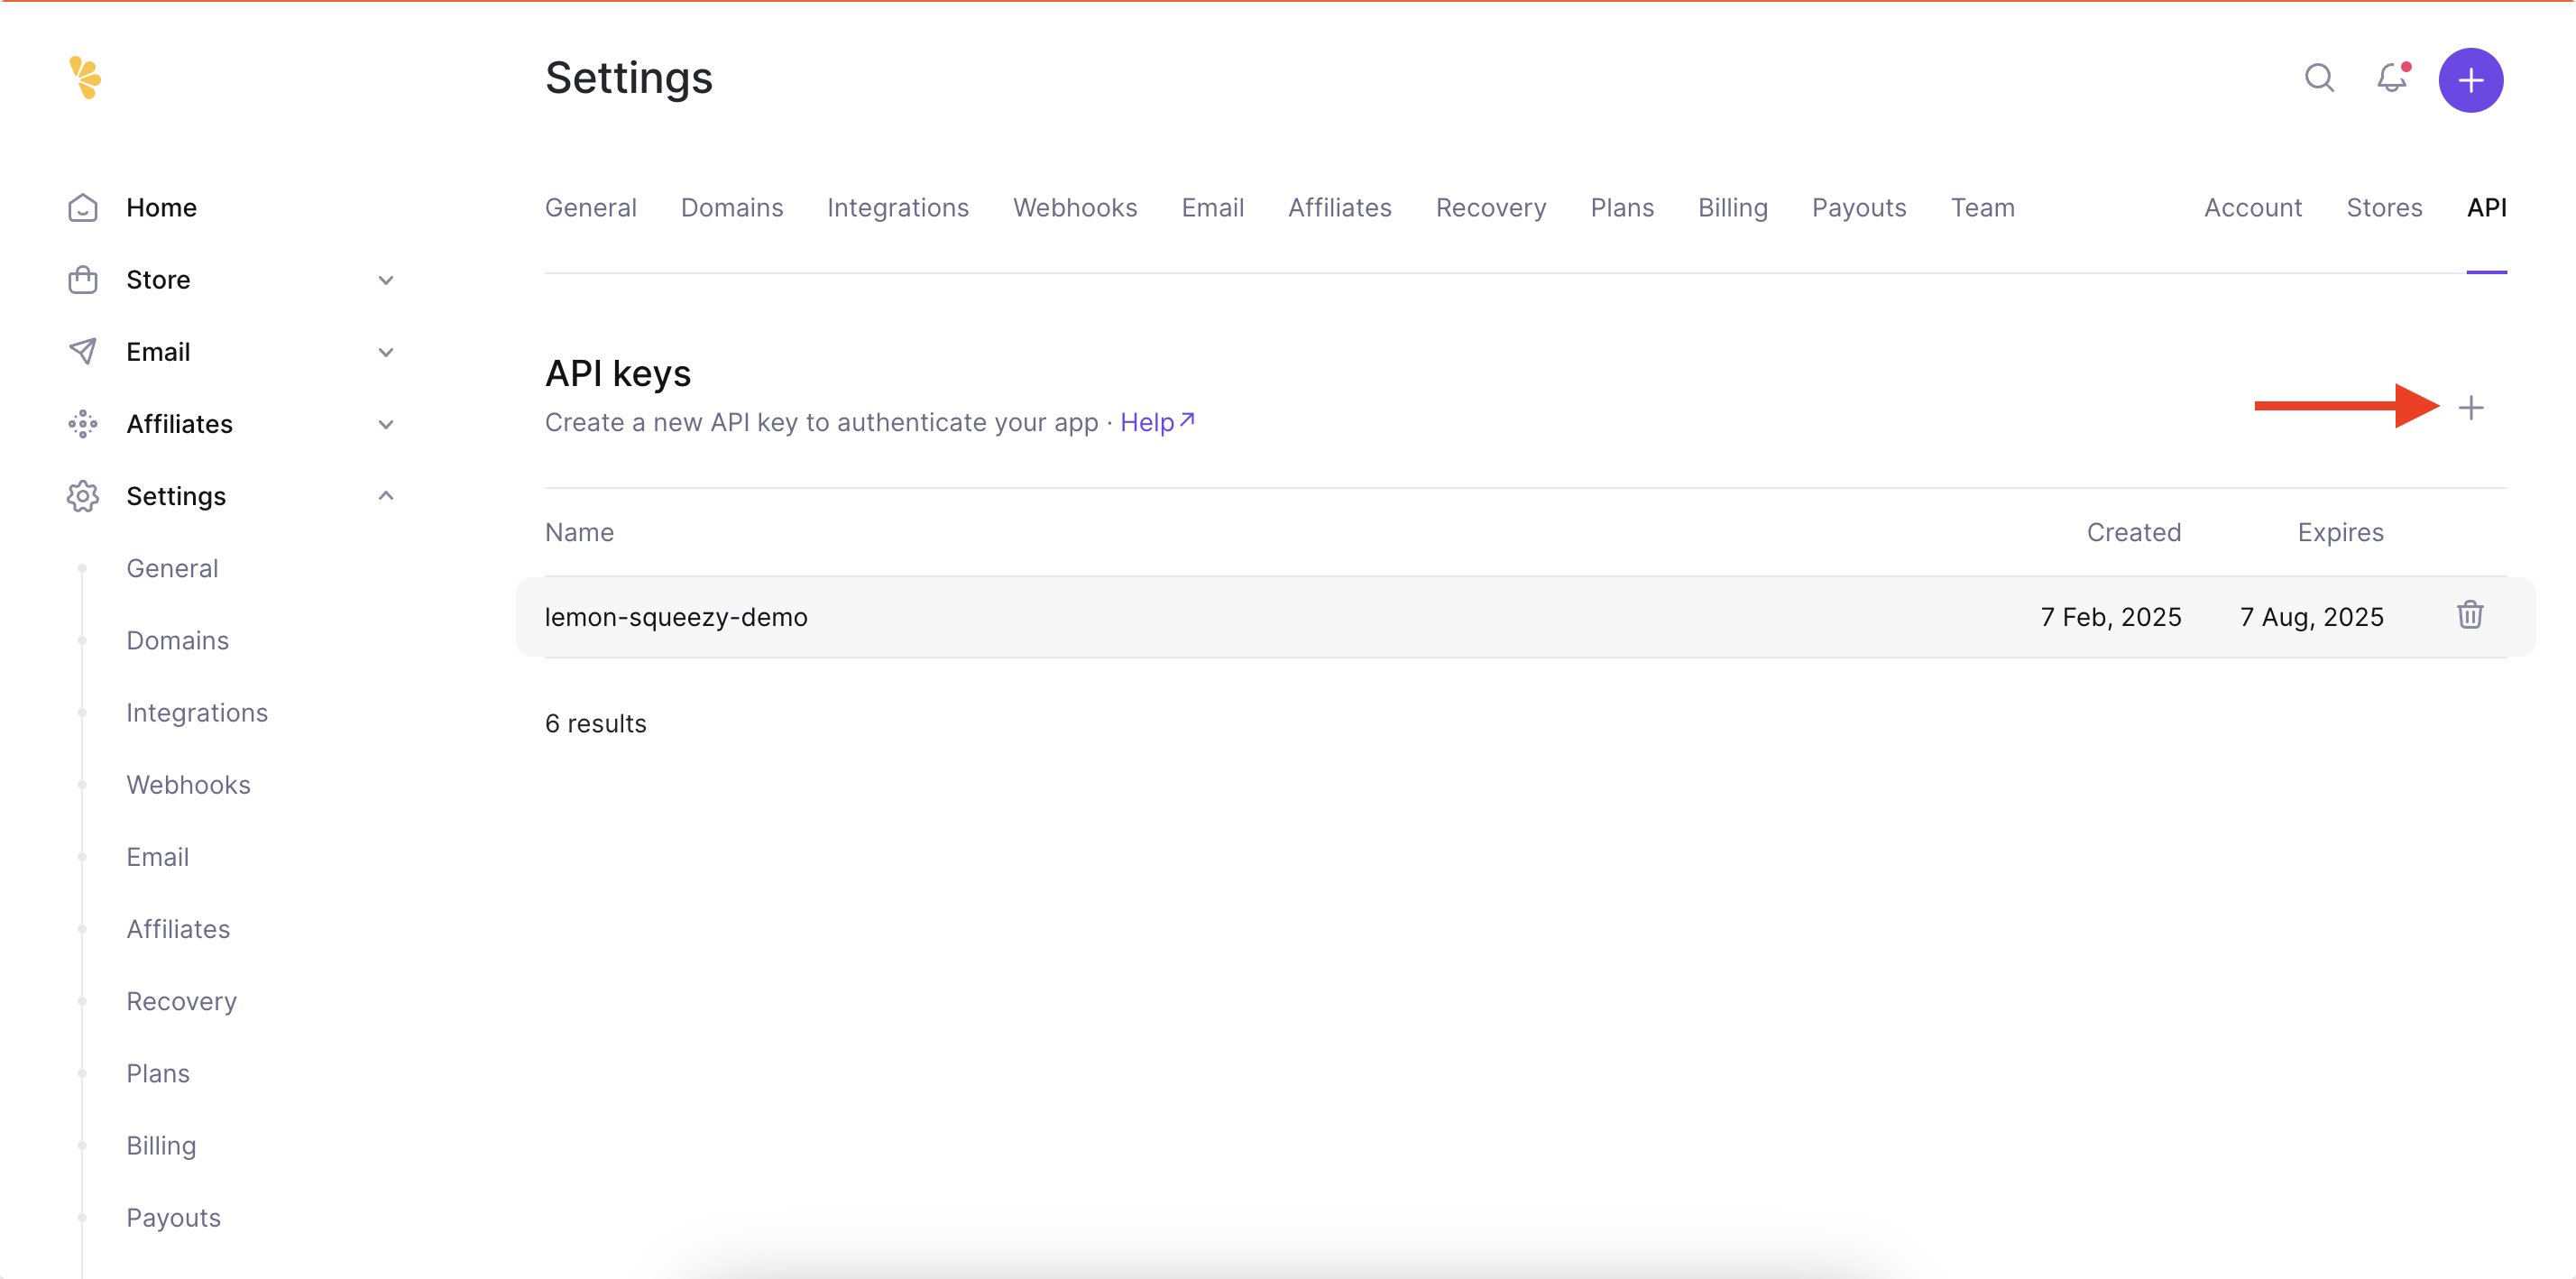
- Lemon Squeezy Key: In the Lemon Squeezy dashboard, go to
Settings > APIand click on the+icon to generate a new key. Paste this key into the CourseLit settings.
-
Set up the webhooks. Using webhooks, your school receives timely updates about payments from Lemon Squeezy.
-
In the Lemon Squeezy dashboard, go to
Settings > Webhooksand click on the+icon to create a new webhook.
-
In the webhook slider popup, enter the following:
- The webhook URL for your CourseLit school (listed in the same payment screen in your school).
- Enter any random string in
Signing secret(coming soon). - Check the following events:
order_created: For confirming one-time payments.subscription_payment_success: For confirming subscription payments.subscription_resumed: For detecting canceled subscriptions that are resumed automatically by Lemon Squeezy. It is an edge case that we need to handle.

-
That’s it! Your Lemon Squeezy configuration is complete, and you are ready to receive payments.
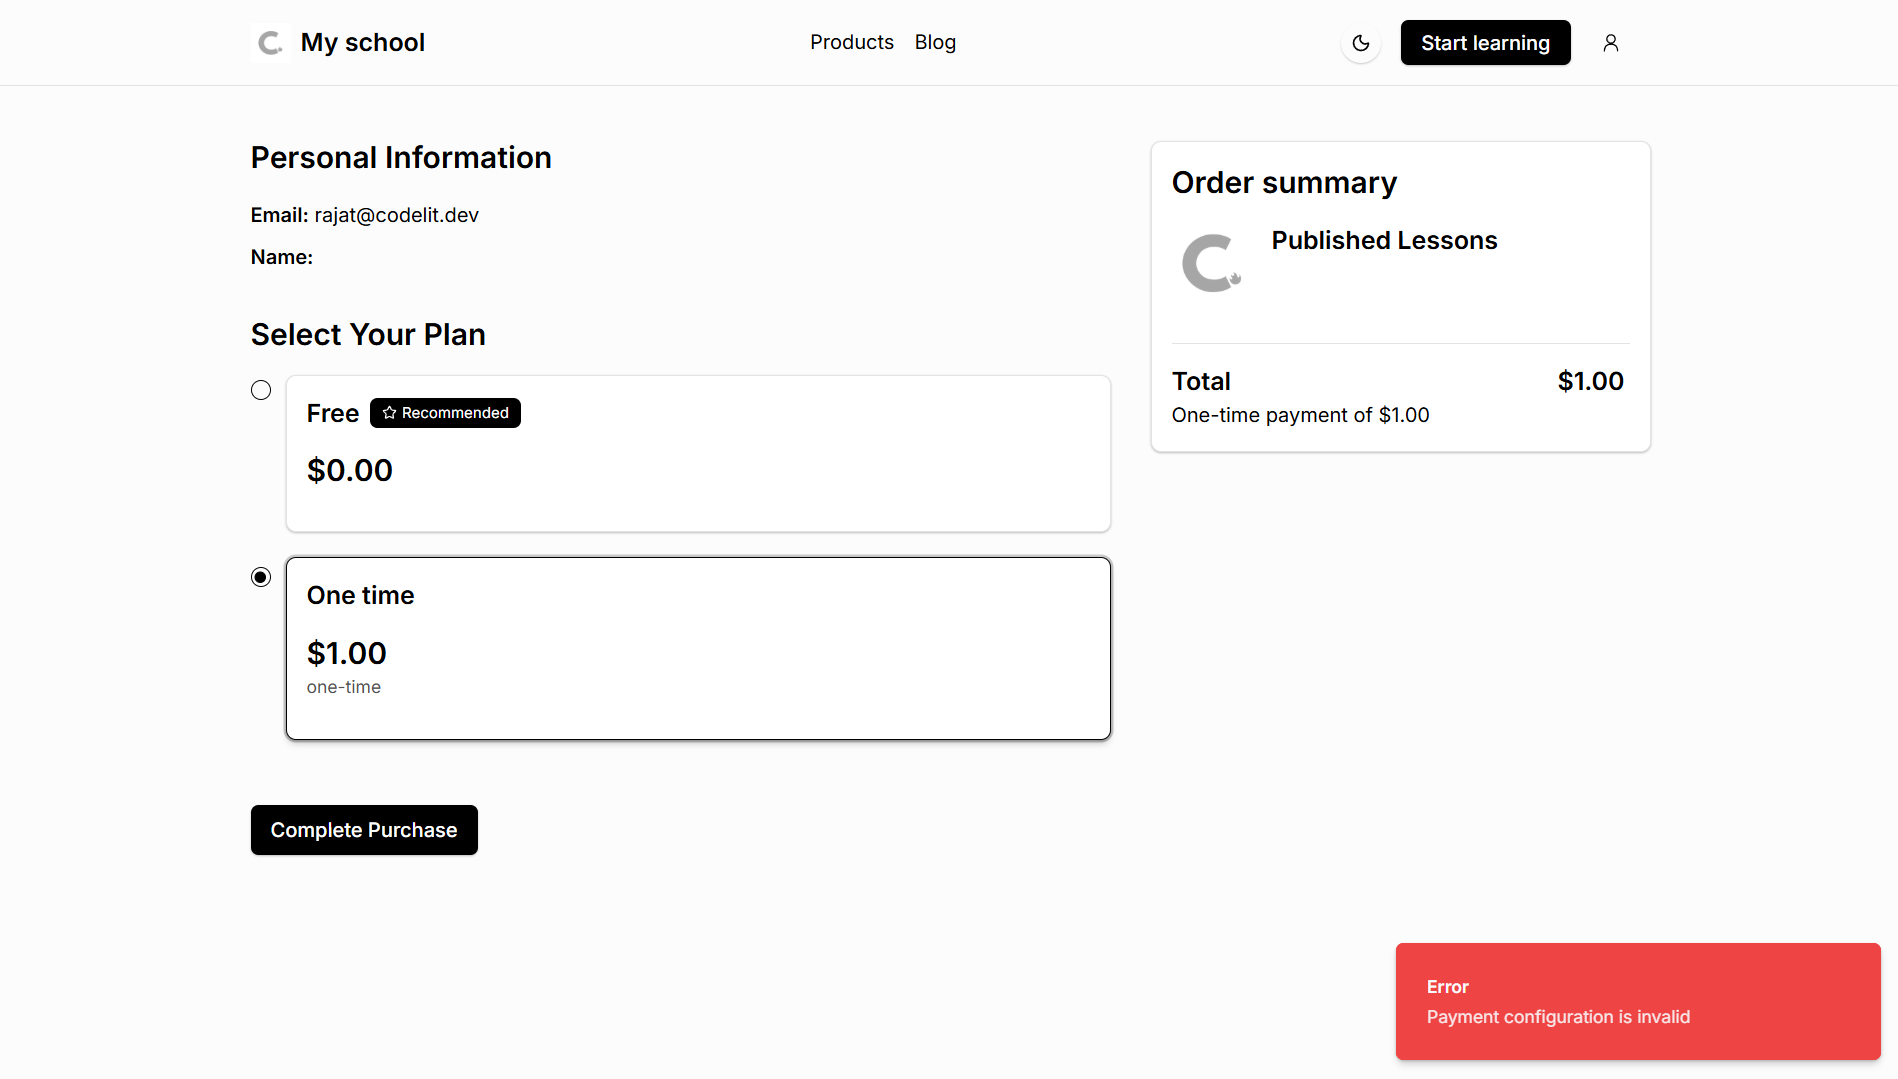
Reset payment method
If you want to stop using the currently selected payment platform, go to Settings > Payment and click the reset icon next to the Payment Method dropdown.
- This sets the payment method to
None. - This does not delete existing gateway credentials (keys/secrets) from your settings.
- You can pick another payment method later and save the settings again.
After reset, all paid plans of all products will fail at checkout with the error
Payment configuration is invalid. Free plans will keep on working..
Looking for developer docs?
We have created detailed documentation to help you understand the payment flow in CourseLit. Check it out here.
Stuck somewhere?
We are always here for you. Come chat with us in our Discord channel or send a tweet at @CourseLit.