Create a school
This concept does not apply if you self-host CourseLit. In the self hosted instance, you get only one school.
Let’s get you a free 14 days subscription on CourseLit.
Steps to create a school
- Go to courselit.app and click on the top right icon.
- Enter your email in the form that appears.
- Click the link you have got in your email to sign into your CourseLit account.
- Click the
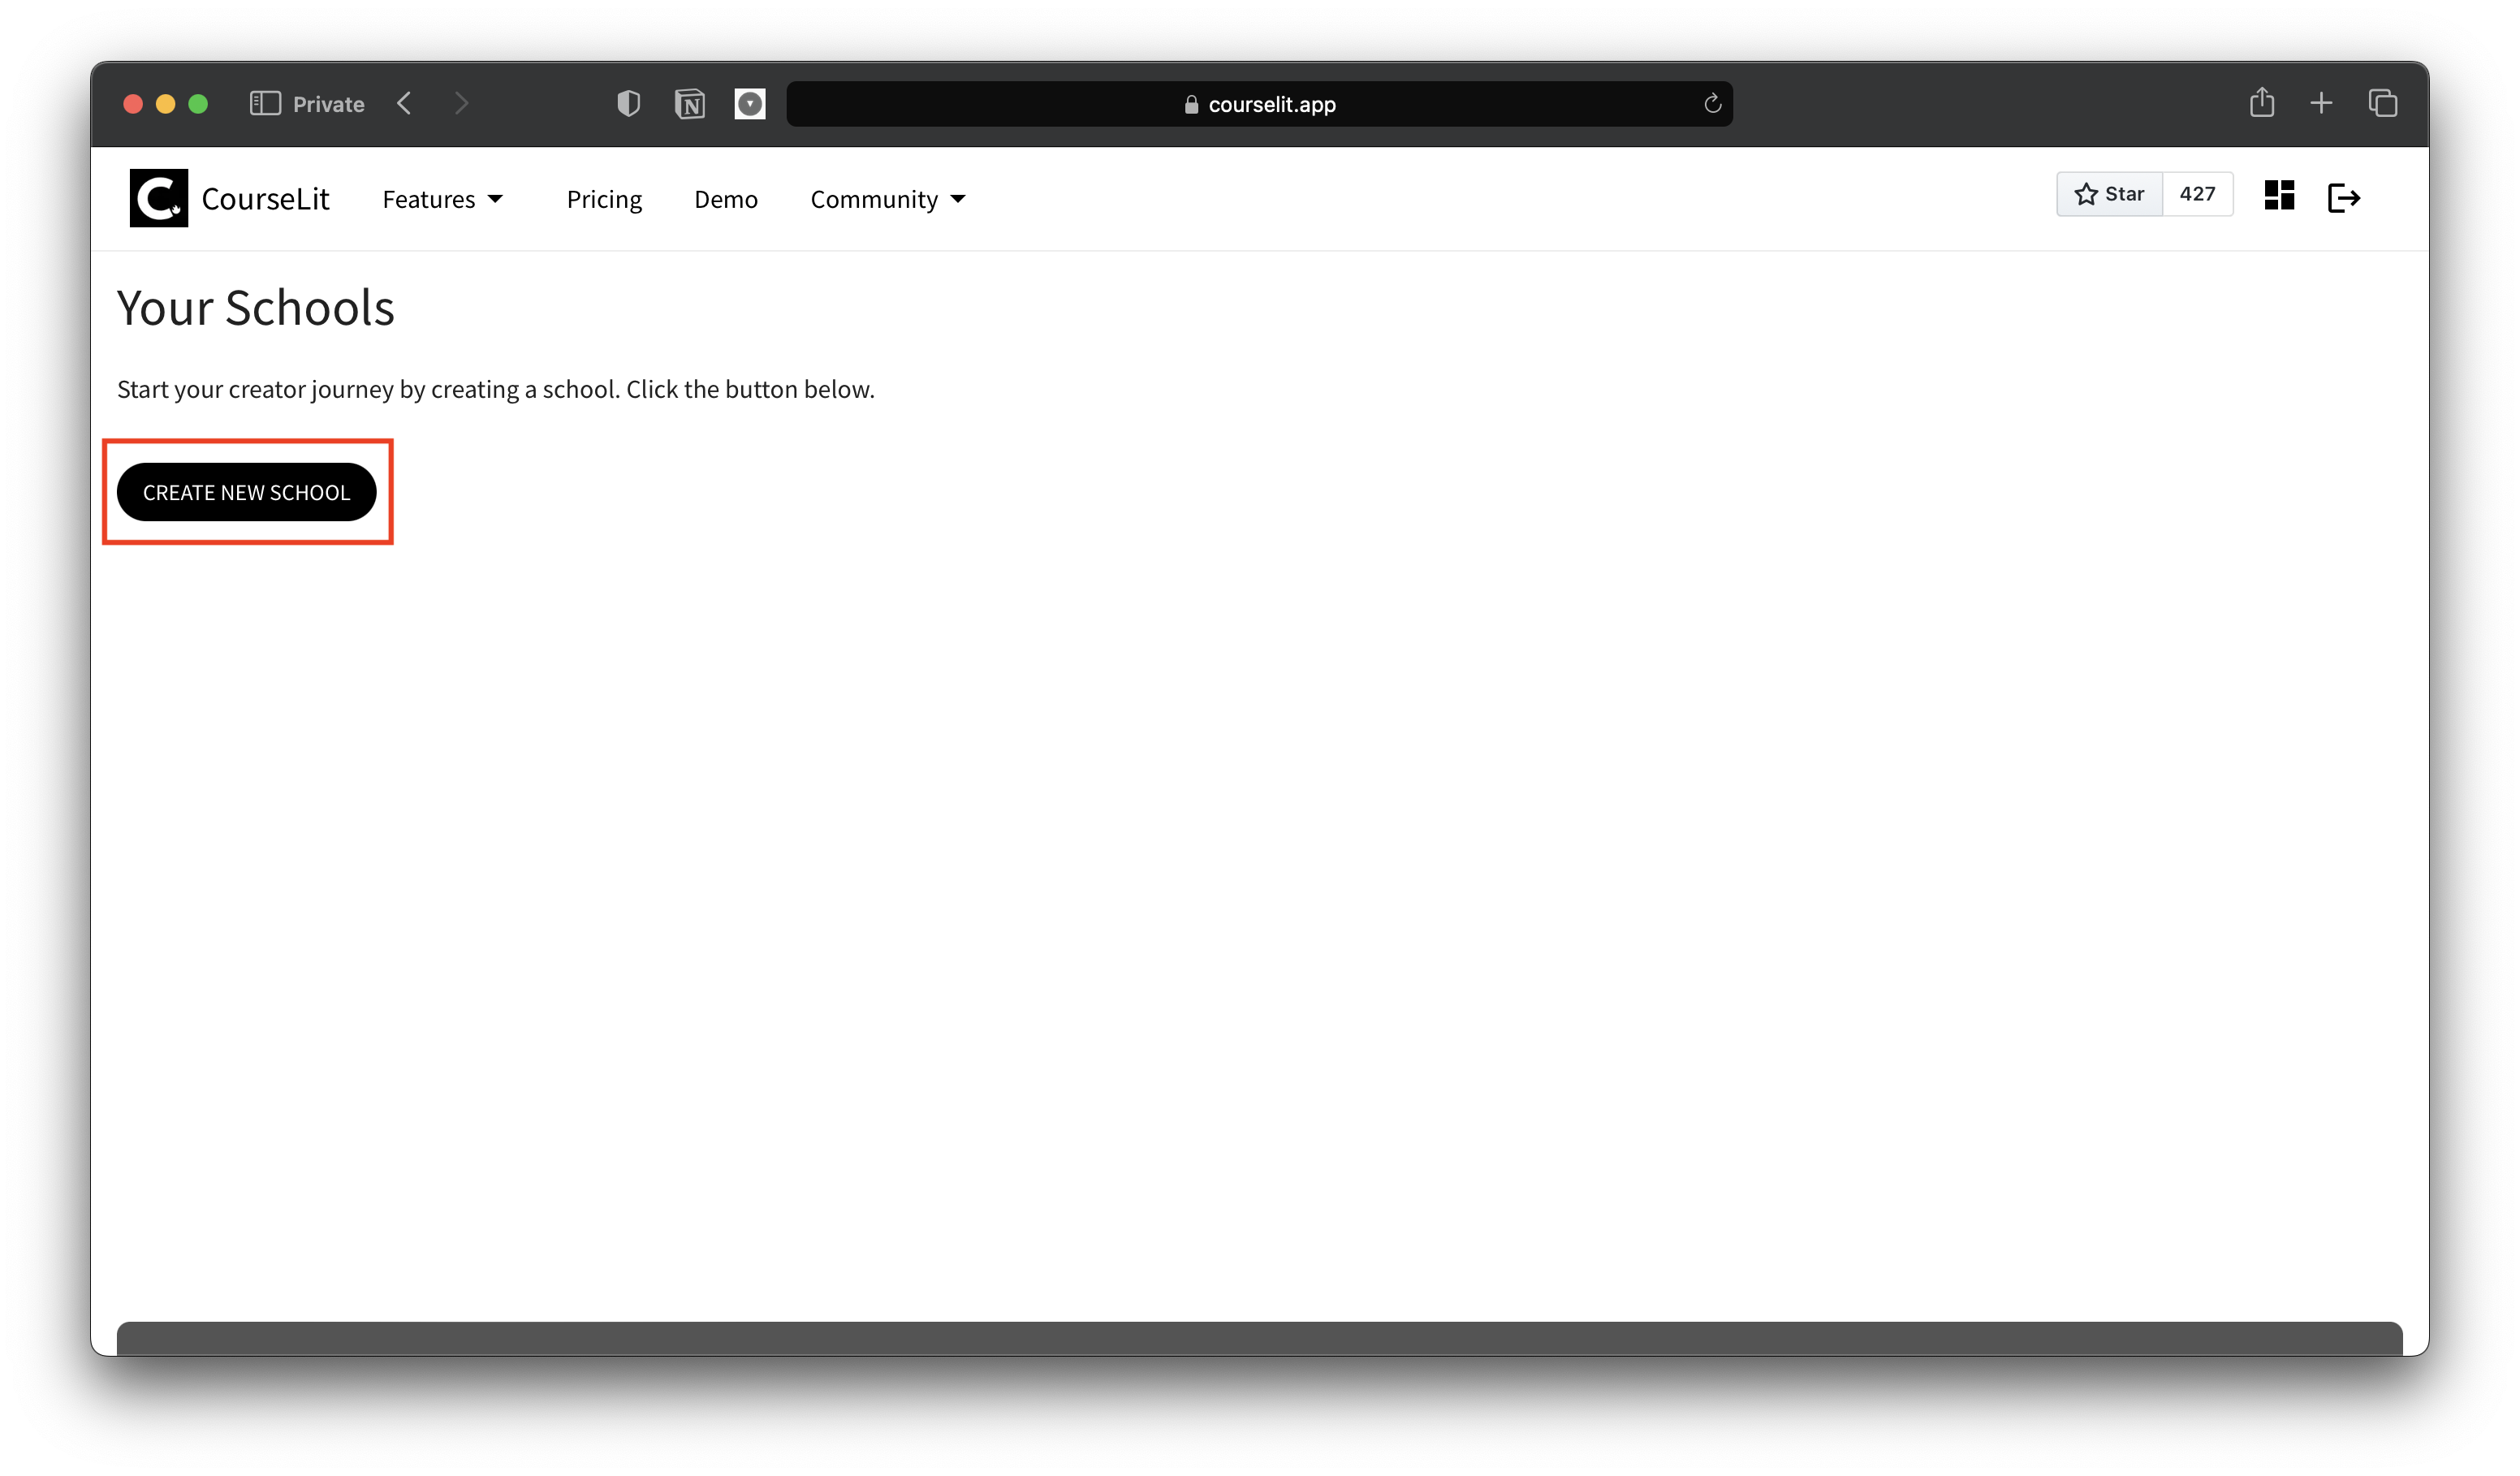
Manage accountbutton on the mail page. You will be taken to the dashboard which will look the following.
- Click on the
Create new schoolbutton (as highlighted above). - Enter your school’s name. Example: If you name your school joe-designs, it will be available as
joe-designs.courselit.app. - (Optional) If you want to host your school on your own domain (in addition to the subdomain on courselit.app as shown above), enter the domain name in the
Custom domaintext box. - Click
Createto create your school. Once your school is created, you will be redirected to the dashboard and your new shiny school will be listed (as shown below).
- Go to your new school by clicking on the
Go to schoollink against your school name.
Sign into your school as admin
We set up an admin user i.e. a user having all the privileges automatically while creating your school. Its email ID is the same as the one your are signed in with in CourseLit.
Your school uses the same mechanics as CourseLit to sign a user in i.e. sending a magic link over email. Click on the top right button on your school’s page to sign in.
Next step
Create your first course under 5 minutes
Stuck somewhere?
We are always here for you. Come chat with us in our Discord channel or send a tweet at @CourseLit.