Broadcast mails
Broadcast emails are typically sent to your entire list or specific segments simultaneously, making them ideal for announcements, promotions, or updates.
The feature is currently in beta, which means you may encounter bugs. Please report them in our Discord group if you run into any.
Before you start: If your school is hosted on courselit.app, you need to get approved for sending marketing emails. Request access here.
Broadcasts Hub
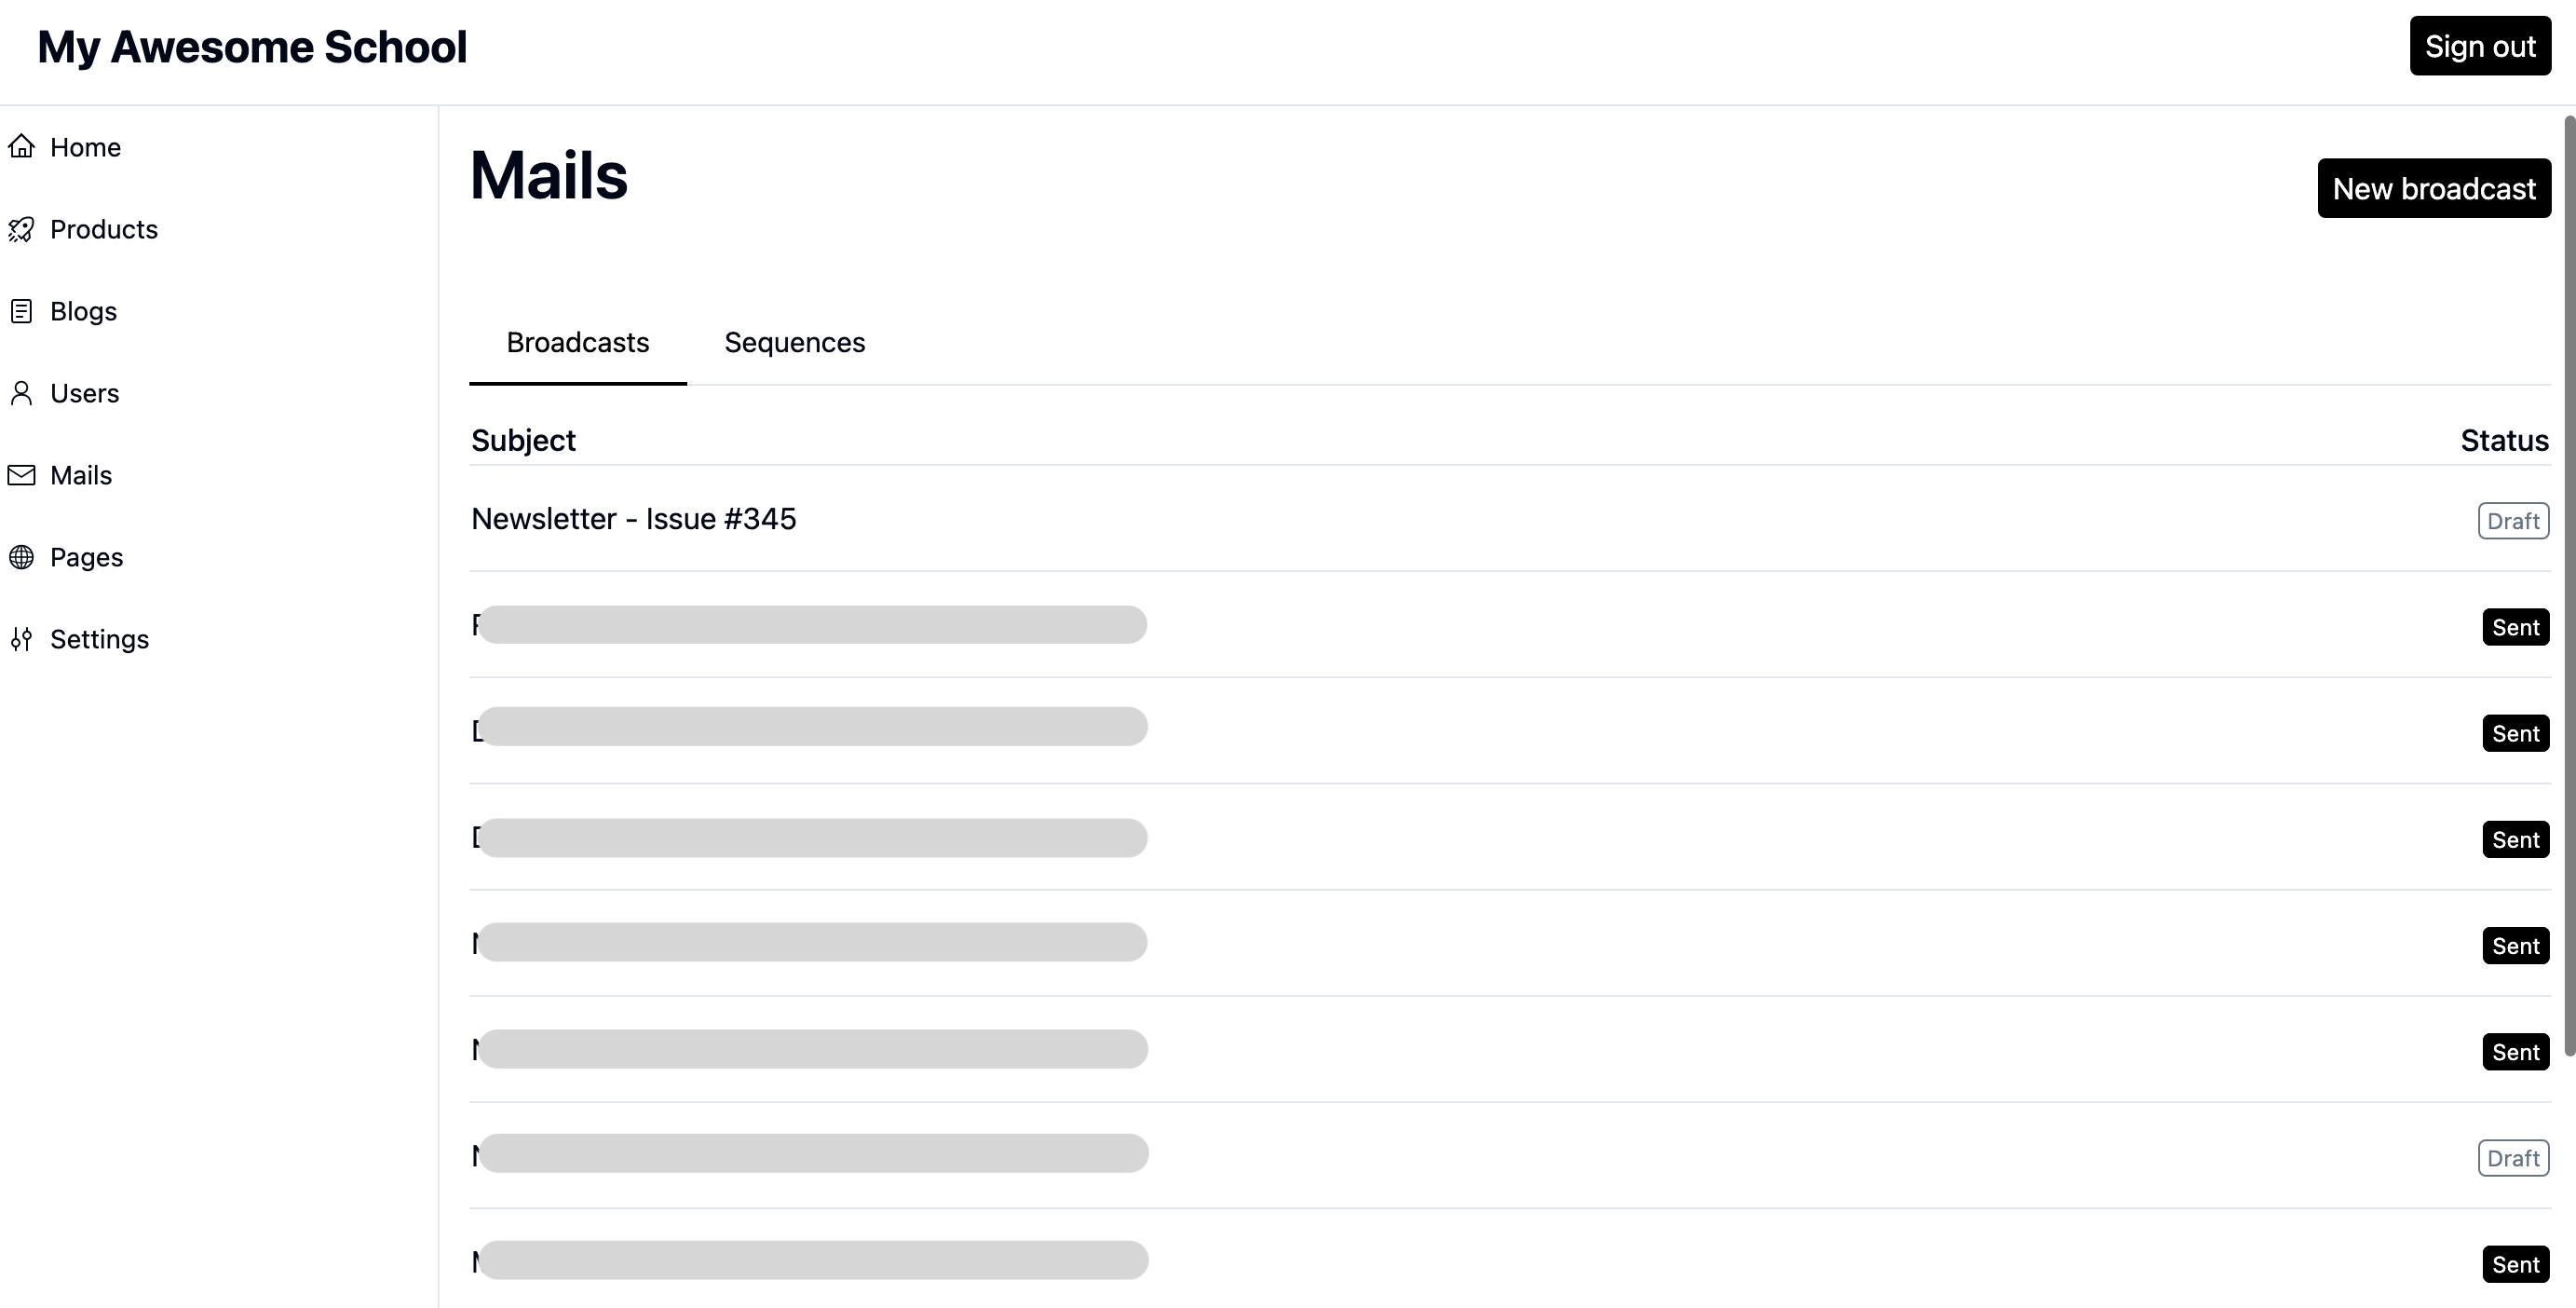
From the Dashboard, go to Mails to land on the Broadcasts hub. Here you will see all the broadcasts you have ever worked on.

Compose Your Email
-
Click on the
New broadcastbutton on the right, in theBroadcastshub. -
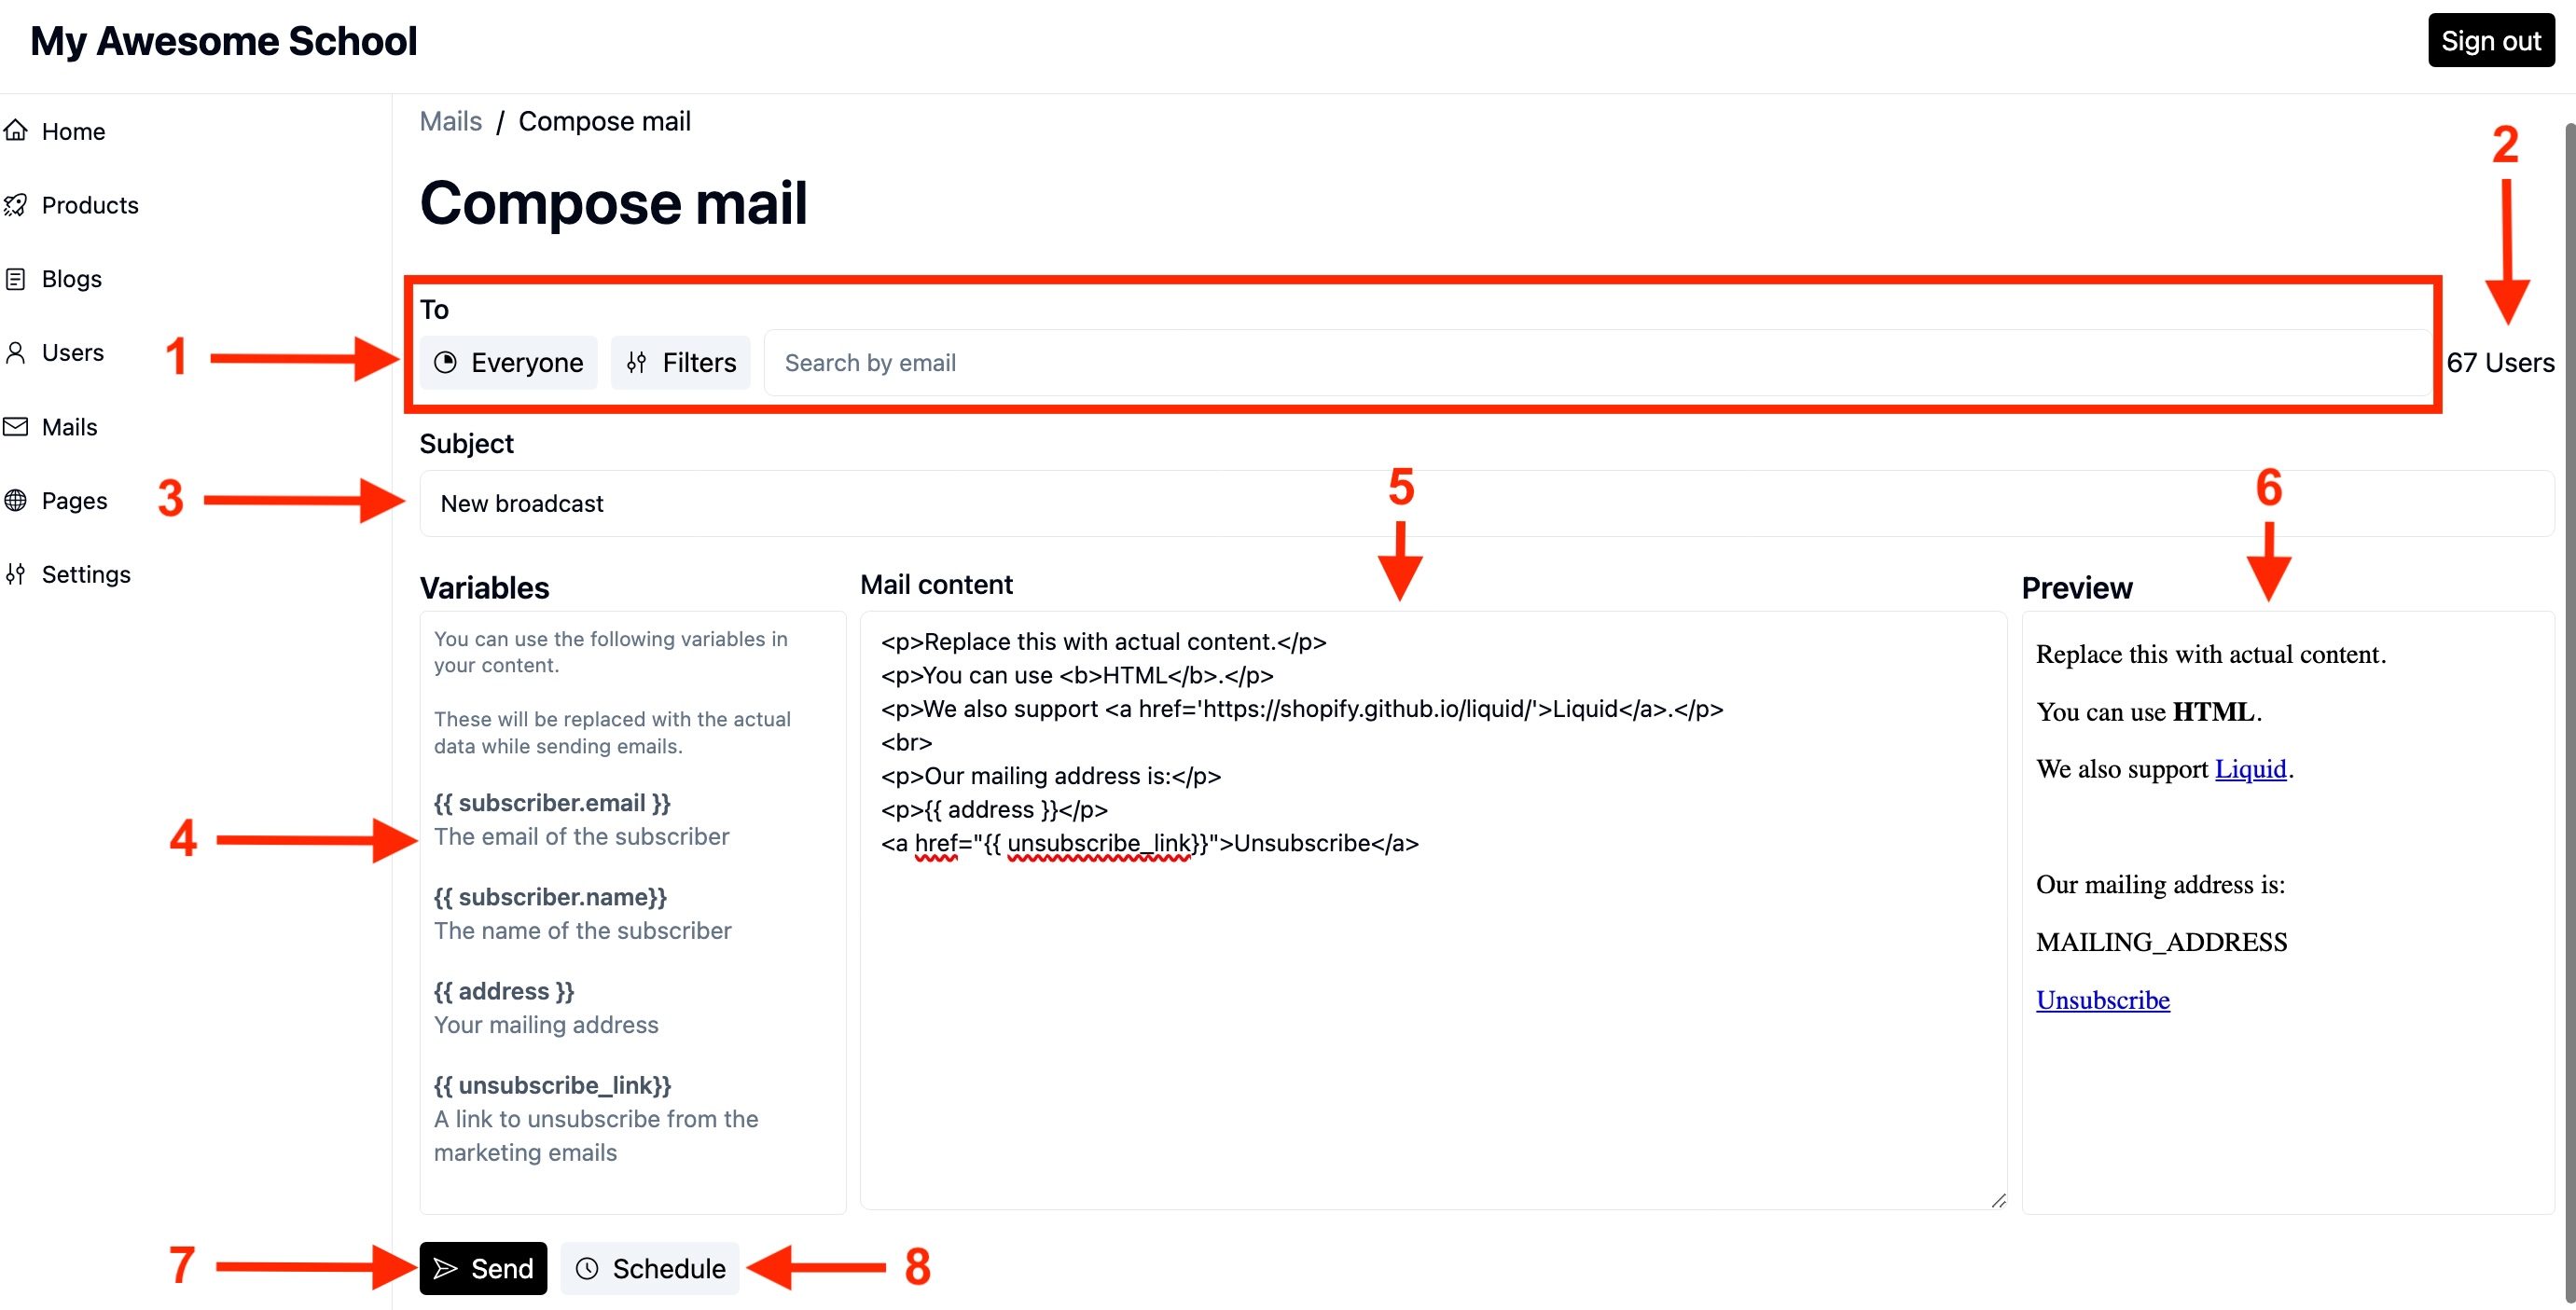
Let’s get acquainted with the interface. In the following image, we have demarcated all the sections. To see the description of a section, notice its number in the screenshot and find its description below.
-
- User Filters: To select the users.
-
- Total Selected Users: The total number of selected users as per the applied filters.
-
- Subject: The email subject goes here.
-
- Variables: Liquid templating variables that are available for you to use in your email body.
-
- Email Compose Window: Email content goes here.
-
- Email Preview: Live email preview.
During the preview, the Liquid variables will be displayed as placeholders. The actual values will be replaced when sending the actual mail.
- Email Preview: Live email preview.
-
- Send Button: Sends the email immediately.
-
- Schedule Button: Lets you schedule an email for later.

-
-
Compose your email.
-
If you are not yet ready to send the email or schedule it, you can simply go back to the Broadcasts hub by clicking on the
Mailsbreadcrumb (located at the top of the page).Your changes are saved in real time, so you won’t lose anything. You can always come back to your draft emails.
Send Immediately
Once your email is ready, you can either send it right away or schedule it for later. Click on the Send button to send the email immediately.
Schedule for Later
Click on the Schedule button to see an additional input box to enter the date and time to send the email, as shown below. The time you select here is based on your own time zone.
In the background, all dates and times are converted into UTC.

Canceling a Scheduled Email
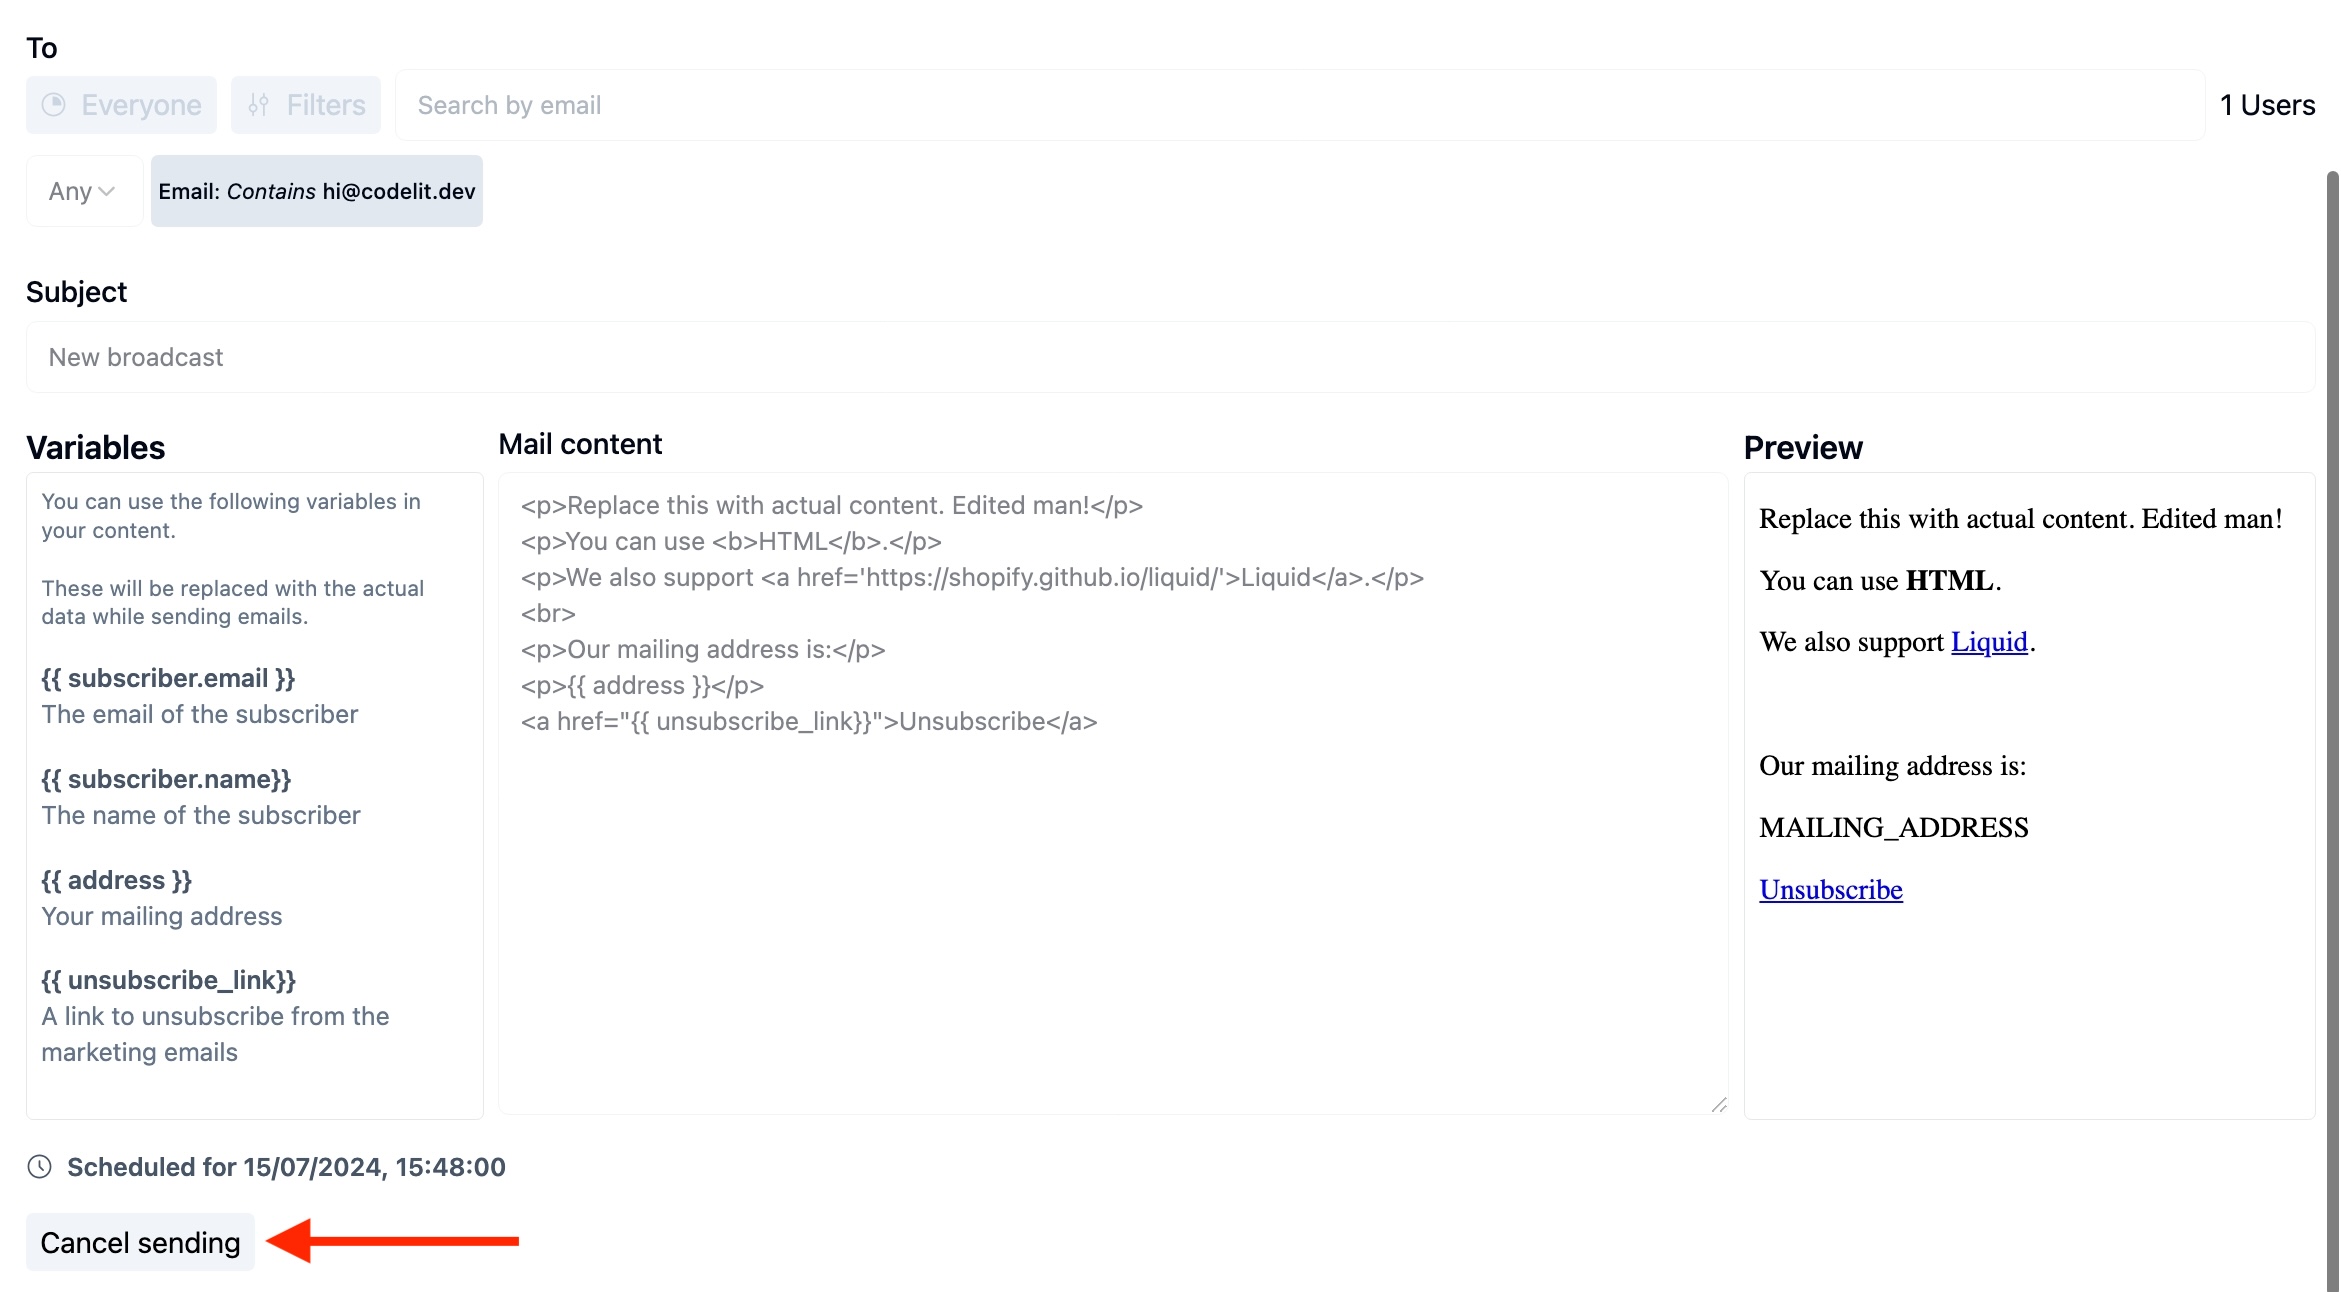
Once an email is scheduled, you will see the time it will be sent at the bottom, as shown below. Simply click on the Cancel sending button to cancel the scheduled send.

Next Step
Let’s see how to send automated email campaigns (aka sequences) when something happens in your school. Click here.
Stuck Somewhere?
We are always here for you. Come chat with us in our Discord channel or send a tweet to @CourseLit.